
User Manual
Page 1
Steinberg Cubase LE 4 Software Setup Guide Contents: Cubase LE 4 Installation 2 Windows XP Installation 2 Windows Vista Installation 3 Macintosh Installation...5 Setting up Cubase with your Alesis Audio device 6 General Setup (for all devices 6 Alesis IO|2 ...7 Alesis MultiMix USB (1.0) Series Mixers 7 Alesis MultiMix USB 2.0, MultiMix FireWire, IO|14, and IO|26 8 Alesis MasterControl ...11 Creating a Project ...16 Registration ...19 Find and write down your Soft...
Steinberg Cubase LE 4 Software Setup Guide Contents: Cubase LE 4 Installation 2 Windows XP Installation 2 Windows Vista Installation 3 Macintosh Installation...5 Setting up Cubase with your Alesis Audio device 6 General Setup (for all devices 6 Alesis IO|2 ...7 Alesis MultiMix USB (1.0) Series Mixers 7 Alesis MultiMix USB 2.0, MultiMix FireWire, IO|14, and IO|26 8 Alesis MasterControl ...11 Creating a Project ...16 Registration ...19 Find and write down your Soft...
User Manual
Page 2
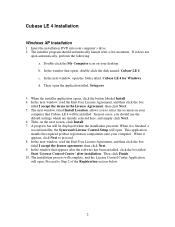
... selected here, and simply click Next. 6. This application installs the required product registration components onto your computer's drive. 2. In the window that appears after the software has been installed, click the box titled Start 'License Control Center' after a few moments. d. Proceed to proceed. 8. Then, open . When it is finished, a second installer...
... selected here, and simply click Next. 6. This application installs the required product registration components onto your computer's drive. 2. In the window that appears after the software has been installed, click the box titled Start 'License Control Center' after a few moments. d. Proceed to proceed. 8. Then, open . When it is finished, a second installer...

User Manual
Page 4
...click Next to select the location on the next screen, click Install. 10. A progress bar will launch. Proceed to Step 2 of this driver software anyway. 13. In the next window, read the End-User License Agreement, click I accept the license agreement, then click Next. 12. The ...installation process will complete, and the License Control Center Application will open . In the window that appears after the software has been installed, click the box titled Start 'License Control Center' after installation. In most cases, you to proceed. 11. The Cubase LE...
...click Next to select the location on the next screen, click Install. 10. A progress bar will launch. Proceed to Step 2 of this driver software anyway. 13. In the next window, read the End-User License Agreement, click I accept the license agreement, then click Next. 12. The ...installation process will complete, and the License Control Center Application will open . In the window that appears after the software has been installed, click the box titled Start 'License Control Center' after installation. In most cases, you to proceed. 11. The Cubase LE...

User Manual
Page 5
... installed Successfully. Click Continue, and then click Install. 8. A progress bar will read the Software License Agreement, and then click Continue, then click Agree. 6. When it . Inside, this password, click the icon in your computer, only one option will then ...
... installed Successfully. Click Continue, and then click Install. 8. A progress bar will read the Software License Agreement, and then click Continue, then click Agree. 6. When it . Inside, this password, click the icon in your computer, only one option will then ...
User Manual
Page 16
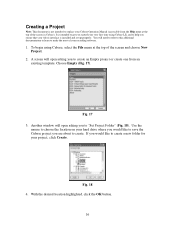
..., select the File menu at the top of the screen in Cubase). Fig. 17 3. Creating a Project Note: This document is not intended to replace your Alesis interface is intended to create. It is installed and set up properly. A screen will open asking you are about to get you ensure that your... screen and choose New Project. 2. Fig. 18 4. You will need to refer to this additional documentation to learn to create a new folder for your recording software. 1. With the desired location highlighted, click the OK button. 16
..., select the File menu at the top of the screen in Cubase). Fig. 17 3. Creating a Project Note: This document is not intended to replace your Alesis interface is intended to create. It is installed and set up properly. A screen will open asking you are about to get you ensure that your... screen and choose New Project. 2. Fig. 18 4. You will need to refer to this additional documentation to learn to create a new folder for your recording software. 1. With the desired location highlighted, click the OK button. 16
User Manual
Page 18
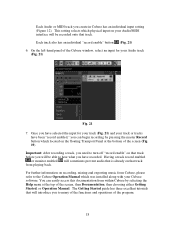
... to the Cubase Operation Manual which physical input on your track or tracks have been "record enabled," you have selected the input for your Cubase software. The Getting Started guide has three excellent tutorials that track before you will be able to hear what you can easily access this documentation from...
... to the Cubase Operation Manual which physical input on your track or tracks have been "record enabled," you have selected the input for your Cubase software. The Getting Started guide has three excellent tutorials that track before you will be able to hear what you can easily access this documentation from...

Quick Start Guide
Page 2
... the switch. Computer Mic Power Monitor Speakers Guitar volume m1 m2 pitch - CONNECTION DIAGRAM BOX CONTENTS y MULTIMIX 8 USB FX y USB cable y Power adapter y Software DVD y Quickstart Guide y Safety Instructions & Warranty Information booklet Notes: y When recording a guitar or bass with native USB support • Mac OS X "Jaguar" version 10.2 or later • 128 MB RAM Recommended Macintosh...
... the switch. Computer Mic Power Monitor Speakers Guitar volume m1 m2 pitch - CONNECTION DIAGRAM BOX CONTENTS y MULTIMIX 8 USB FX y USB cable y Power adapter y Software DVD y Quickstart Guide y Safety Instructions & Warranty Information booklet Notes: y When recording a guitar or bass with native USB support • Mac OS X "Jaguar" version 10.2 or later • 128 MB RAM Recommended Macintosh...

Quick Start Guide
Page 3
... connected and before you want to your computer. 2. Use the included cable to connect the MULTIMIX 8 USB FX to use the included software, insert the CD into a power outlet. 2. Click the Playback tab and select USB Audio Codec* as your software latency 44100 Hz (CD Quality) as the default format. 7. Click the Audio tab. 4. In the...
... connected and before you want to your computer. 2. Use the included cable to connect the MULTIMIX 8 USB FX to use the included software, insert the CD into a power outlet. 2. Click the Playback tab and select USB Audio Codec* as your software latency 44100 Hz (CD Quality) as the default format. 7. Click the Audio tab. 4. In the...

Quick Start Guide
Page 5
... sent to the AUX SEND output. ROOM 1: Room reverb into a slow flanging modulation creates a spacey effect. Adjusts the mid-range frequencies of the MULTIMIX 8 USB FX's internal effects processor. 30. When recording to your software while recording. 35. Press the MAIN TO MONITOR button to avoid feedback in your computer, make sure the 2 TRKS...
... sent to the AUX SEND output. ROOM 1: Room reverb into a slow flanging modulation creates a spacey effect. Adjusts the mid-range frequencies of the MULTIMIX 8 USB FX's internal effects processor. 30. When recording to your software while recording. 35. Press the MAIN TO MONITOR button to avoid feedback in your computer, make sure the 2 TRKS...
