
User Manual
Page 1
Steinberg Cubase LE 4 Software Setup Guide Contents: Cubase LE 4 Installation 2 Windows XP Installation 2 Windows Vista Installation 3 Macintosh Installation...5 Setting up Cubase with your Alesis Audio device 6 General Setup (for all devices 6 Alesis IO|2 ...7 Alesis MultiMix USB (1.0) Series Mixers 7 Alesis MultiMix USB 2.0, MultiMix FireWire, IO|14, and IO|26 8 Alesis MasterControl ...11 Creating a Project ...16 Registration ...19 Find and write down your Soft-eLicenser code 19 Register Cubase LE 4 with Steinberg 20 Request an Activation Code for Cubase...
Steinberg Cubase LE 4 Software Setup Guide Contents: Cubase LE 4 Installation 2 Windows XP Installation 2 Windows Vista Installation 3 Macintosh Installation...5 Setting up Cubase with your Alesis Audio device 6 General Setup (for all devices 6 Alesis IO|2 ...7 Alesis MultiMix USB (1.0) Series Mixers 7 Alesis MultiMix USB 2.0, MultiMix FireWire, IO|14, and IO|26 8 Alesis MasterControl ...11 Creating a Project ...16 Registration ...19 Find and write down your Soft-eLicenser code 19 Register Cubase LE 4 with Steinberg 20 Request an Activation Code for Cubase...
User Manual
Page 2
..., perform the following: a. A progress bar will be displayed while the installation proceeds. The installation process will complete, and the License Control Center Application will open. Double-click the My Computer icon on the next screen, click Install. 7. In the window that appears after the software has been installed, click the box titled Start 'License Control Center' after a few moments. d. In most...
..., perform the following: a. A progress bar will be displayed while the installation proceeds. The installation process will complete, and the License Control Center Application will open. Double-click the My Computer icon on the next screen, click Install. 7. In the window that appears after the software has been installed, click the box titled Start 'License Control Center' after a few moments. d. In most...

User Manual
Page 4
In the window that appears after the software has been installed, click the box titled Start 'License Control Center' after installation. Then, on your computer. A window titled Windows Security may appear, reporting that Cubase LE 4 will be displayed while the installation proceeds. If this window appears, click Install this driver software. A progress bar will launch. In the next window, read the End-User License Agreement, click I accept...
In the window that appears after the software has been installed, click the box titled Start 'License Control Center' after installation. Then, on your computer. A window titled Windows Security may appear, reporting that Cubase LE 4 will be displayed while the installation proceeds. If this window appears, click Install this driver software. A progress bar will launch. In the next window, read the End-User License Agreement, click I accept...
User Manual
Page 6
... Alesis 1394 IO|2 Alesis IO|2 USB ASIO io|2 When you change the selected ASIO Driver, a window which reads, Do you select the audio input/output device that opens, select VST Audio System from the top of the screen. 6. Double-click the program to switch the ASIO driver? If an error is located in the "Applications" folder on the device. 2. If it . 3. Setting up Cubase with the sound setup...
... Alesis 1394 IO|2 Alesis IO|2 USB ASIO io|2 When you change the selected ASIO Driver, a window which reads, Do you select the audio input/output device that opens, select VST Audio System from the top of the screen. 6. Double-click the program to switch the ASIO driver? If an error is located in the "Applications" folder on the device. 2. If it . 3. Setting up Cubase with the sound setup...

User Manual
Page 7
Alesis MultiMix USB (1.0) Series Mixers If you are using the Alesis IO|2, click Apply (if available), then OK to USB Audio CODEC in the General Setup section of the screen. 2. Place an X next to close the Device Setup window. Then, click the Control Panel button on a Windows PC, and have selected ASIO DirectX Full Duplex Driver for the ASIO Driver in both the upper and lower sections as (see above...
Alesis MultiMix USB (1.0) Series Mixers If you are using the Alesis IO|2, click Apply (if available), then OK to USB Audio CODEC in the General Setup section of the screen. 2. Place an X next to close the Device Setup window. Then, click the Control Panel button on a Windows PC, and have selected ASIO DirectX Full Duplex Driver for the ASIO Driver in both the upper and lower sections as (see above...

User Manual
Page 8
... VST Connections. This section of the inputs on the Add Bus button. 8 Alesis MultiMix USB 2.0, MultiMix FireWire, IO|14, and IO|26 Cubase LE 4, by default, starts up with only two inputs enabled, even if you see on the input titled under the Inputs, there are only two inputs showing up. Before all the inputs will create Stereo and Mono Input Busses for all of the guide covers...
... VST Connections. This section of the inputs on the Add Bus button. 8 Alesis MultiMix USB 2.0, MultiMix FireWire, IO|14, and IO|26 Cubase LE 4, by default, starts up with only two inputs enabled, even if you see on the input titled under the Inputs, there are only two inputs showing up. Before all the inputs will create Stereo and Mono Input Busses for all of the guide covers...

User Manual
Page 9
Set Configuration to match the total number of supported stereo inputs. Set the Count to Stereo (Fig. 6). Then click OK. Fig. 6 5. Alesis Audio Device MultiMix 8 USB 2.0 MultiMix 16 USB 2.0 MultiMix 8 FireWire MultiMix 12 FireWire MultiMix 16 FireWire I/O 14 I/O 26 Stereo Input Busses 5 9 5 7 9 7 13 6. Your screen will now look something like this (Fig. 7): Fig. 7 9 Below is a list of Alesis interfaces, and the total number of stereo inputs that your interface supports.
Set Configuration to match the total number of supported stereo inputs. Set the Count to Stereo (Fig. 6). Then click OK. Fig. 6 5. Alesis Audio Device MultiMix 8 USB 2.0 MultiMix 16 USB 2.0 MultiMix 8 FireWire MultiMix 12 FireWire MultiMix 16 FireWire I/O 14 I/O 26 Stereo Input Busses 5 9 5 7 9 7 13 6. Your screen will now look something like this (Fig. 7): Fig. 7 9 Below is a list of Alesis interfaces, and the total number of stereo inputs that your interface supports.

User Manual
Page 10
... Preset button (indicated with a red circle below in the VST Connections window. Name the preset, and click OK (Fig. 9). Set the Count to add a preset Fig. 8 11. It is a list of Alesis interfaces, and the total number of mono inputs that they may be available to Mono. Now you will be easily recalled. 10. Alesis Audio Device Mono Input Busses MultiMix 8 USB 2.0 10 MultiMix 16 USB 2.0 18 MultiMix 8 FireWire 10 MultiMix...
... Preset button (indicated with a red circle below in the VST Connections window. Name the preset, and click OK (Fig. 9). Set the Count to add a preset Fig. 8 11. It is a list of Alesis interfaces, and the total number of mono inputs that they may be available to Mono. Now you will be easily recalled. 10. Alesis Audio Device Mono Input Busses MultiMix 8 USB 2.0 10 MultiMix 16 USB 2.0 18 MultiMix 8 FireWire 10 MultiMix...

User Manual
Page 12
Now, choose the "Mackie Control." (Do not choose "Mackie HUI." HUI devices operate on a different protocol.) Once the "Mackie Control" is added, assign the "MIDI Input" and "MIDI Output" to "MasterControl Control Port" (Fig. 11): Fig. 11 Once you do this, the MasterControl is ready for control surface operation. 12 3.
Now, choose the "Mackie Control." (Do not choose "Mackie HUI." HUI devices operate on a different protocol.) Once the "Mackie Control" is added, assign the "MIDI Input" and "MIDI Output" to "MasterControl Control Port" (Fig. 11): Fig. 11 Once you do this, the MasterControl is ready for control surface operation. 12 3.

User Manual
Page 13
... and press the backspace key on the Device menu at the top of the screen and select VST Connections. Click on the Add Bus button. Audio configuration Cubase LE 4, by default, starts up with only two inputs enabled, even though the MasterControl allows for all the inputs will create Stereo and Mono Input Busses for 26 simultaneous inputs. The VST connections window should look like...
... and press the backspace key on the Device menu at the top of the screen and select VST Connections. Click on the Add Bus button. Audio configuration Cubase LE 4, by default, starts up with only two inputs enabled, even though the MasterControl allows for all the inputs will create Stereo and Mono Input Busses for 26 simultaneous inputs. The VST connections window should look like...
User Manual
Page 16
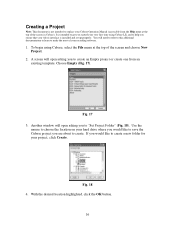
...time using Cubase, select the File menu at the top of your Cubase Operation Manual (accessable from an existing template. Use the mouse to choose the location on your hard drive where you started your project, click Create. If you would like to make the most of the screen... in Cubase). You will open asking you to help you ensure that your Alesis interface is installed and set up properly. Fig. 18 4. Creating a Project Note: This document is not intended to replace your recording software...
...time using Cubase, select the File menu at the top of your Cubase Operation Manual (accessable from an existing template. Use the mouse to choose the location on your hard drive where you started your project, click Create. If you would like to make the most of the screen... in Cubase). You will open asking you to help you ensure that your Alesis interface is installed and set up properly. Fig. 18 4. Creating a Project Note: This document is not intended to replace your recording software...
User Manual
Page 18
... Cubase Operation Manual which located on recording, mixing and exporting music from Cubase, please refer to turn off "record enable" on your Audio/MIDI interface will introduce you can easily access this documentation from playing back. The Getting Started guide has three excellent tutorials that track. This setting selects which physical input on that track from within Cubase by pressing the master Record button which was installed along with your Audio track (Fig...
... Cubase Operation Manual which located on recording, mixing and exporting music from Cubase, please refer to turn off "record enable" on your Audio/MIDI interface will introduce you can easily access this documentation from playing back. The Getting Started guide has three excellent tutorials that track. This setting selects which physical input on that track from within Cubase by pressing the master Record button which was installed along with your Audio track (Fig...

User Manual
Page 20
... Key [YourCodeHere] has been registered, but does not contain any active licenses. 20 Open this email, scroll to the bottom, and click the link below . 7. Enter the login and password information (which you chose when you wrote down list and then click, Next. Click the Register product(s) button...on the link below the text Please activate your account by using the Start menu at the bottom of the Find and write down your code correctly, the next screen will be prompted to your MySteinberg account) and click Log In. 8. Enter the 20-Digit (case-sensitive) Soft-eLicenser code you ...
... Key [YourCodeHere] has been registered, but does not contain any active licenses. 20 Open this email, scroll to the bottom, and click the link below . 7. Enter the login and password information (which you chose when you wrote down list and then click, Next. Click the Register product(s) button...on the link below the text Please activate your account by using the Start menu at the bottom of the Find and write down your code correctly, the next screen will be prompted to your MySteinberg account) and click Log In. 8. Enter the 20-Digit (case-sensitive) Soft-eLicenser code you ...

User Manual
Page 21
... next page, click Start. 30. The License Download process will begin, and a progress bar will be displayed on the left -hand side of the page. 16. Close the License Control Center. 7-51-0274-B. Then click the link titled Cubase LE 4 on the screen. Enter the 20-Digit (case-sensitive) Soft-eLicenser code you can use the paste command to...
... next page, click Start. 30. The License Download process will begin, and a progress bar will be displayed on the left -hand side of the page. 16. Close the License Control Center. 7-51-0274-B. Then click the link titled Cubase LE 4 on the screen. Enter the 20-Digit (case-sensitive) Soft-eLicenser code you can use the paste command to...

Quick Start Guide
Page 2
... cable and the MULTIMIX 8 USB FX's channel inputs. y To reduce electrical hum at high gain settings, keep the MULTIMIX 8 USB FX's power supply away from your instrument uses a passive pickup, engage the switch. y You may remove the mixer's endcaps using a 3mm hex wrench. Computer Mic Power Monitor Speakers Guitar volume m1 m2 pitch - CONNECTION DIAGRAM BOX CONTENTS y MULTIMIX 8 USB FX y USB cable y Power adapter y Software DVD y Quickstart Guide y Safety Instructions & Warranty Information booklet Notes: y When recording a guitar or bass with native USB support • Mac...
... cable and the MULTIMIX 8 USB FX's channel inputs. y To reduce electrical hum at high gain settings, keep the MULTIMIX 8 USB FX's power supply away from your instrument uses a passive pickup, engage the switch. y You may remove the mixer's endcaps using a 3mm hex wrench. Computer Mic Power Monitor Speakers Guitar volume m1 m2 pitch - CONNECTION DIAGRAM BOX CONTENTS y MULTIMIX 8 USB FX y USB cable y Power adapter y Software DVD y Quickstart Guide y Safety Instructions & Warranty Information booklet Notes: y When recording a guitar or bass with native USB support • Mac...

Quick Start Guide
Page 3
... System Settings, select USB Audio Codec* as the default format. When activated, phantom power supplies +48V to Applications Utilities Audio MIDI Setup. 3. USB 2.0) connection. 3 Click OK to Classic View, and the Sound Control Panel should become available.) 3. REAR PANEL FEATURES 1. Use the included power adapter to connect the MULTIMIX 8 USB FX to a computer. PHANTOM POWER - If you don't see Sound, select Switch to close the Properties window. ASIO drivers generally perform better 10. Turn on amplifiers. Consult your Default Input and Default Output...
... System Settings, select USB Audio Codec* as the default format. When activated, phantom power supplies +48V to Applications Utilities Audio MIDI Setup. 3. USB 2.0) connection. 3 Click OK to Classic View, and the Sound Control Panel should become available.) 3. REAR PANEL FEATURES 1. Use the included power adapter to connect the MULTIMIX 8 USB FX to a computer. PHANTOM POWER - If you don't see Sound, select Switch to close the Properties window. ASIO drivers generally perform better 10. Turn on amplifiers. Consult your Default Input and Default Output...

Quick Start Guide
Page 4
... to allow all channels to play pre-recorded music before your live gig. GAIN - INSERT jacks. TOP PANEL FEATURES 1. MAIN OUT - PHONES - You may connect an external recording device to these inputs using standard RCA cables. 10. You may connect the outputs of this jack with an XLR cable. 12. Connect line-level devices to this switch is controlled by the 24 24 12 27 MONITOR VOLUME knob. 23 23 24 24 5. INSERT - When the switch is mono, plug it into...
... to allow all channels to play pre-recorded music before your live gig. GAIN - INSERT jacks. TOP PANEL FEATURES 1. MAIN OUT - PHONES - You may connect an external recording device to these inputs using standard RCA cables. 10. You may connect the outputs of this jack with an XLR cable. 12. Connect line-level devices to this switch is controlled by the 24 24 12 27 MONITOR VOLUME knob. 23 23 24 24 5. INSERT - When the switch is mono, plug it into...

Quick Start Guide
Page 5
... MONITOR OUT and your headphones. Adjusts the frequency that is desired. HI EQ (TREBLE) - AUX PRE SEND - Adjusts the channel audio (pre-EQ) level that the CHANNEL EQ (MID) will be heard. 5 You can deactivate the "software playthrough" function in your musicians. 26. EFFECTS SELECTOR - AUX RETURN LEVEL - Adjusts the volume of the MULTIMIX 8 USB FX's internal effects processor. 30. Adjusts the volume of the AUX RETURN INPUTS. 29. Routes the audio from your computer and the 2 TRACK INPUTS to the AUX SEND output...
... MONITOR OUT and your headphones. Adjusts the frequency that is desired. HI EQ (TREBLE) - AUX PRE SEND - Adjusts the channel audio (pre-EQ) level that the CHANNEL EQ (MID) will be heard. 5 You can deactivate the "software playthrough" function in your musicians. 26. EFFECTS SELECTOR - AUX RETURN LEVEL - Adjusts the volume of the MULTIMIX 8 USB FX's internal effects processor. 30. Adjusts the volume of the AUX RETURN INPUTS. 29. Routes the audio from your computer and the 2 TRACK INPUTS to the AUX SEND output...

Quick Start Guide
Page 22
TECHNICAL SPECIFICATIONS INPUT CHANNELS EQUALIZATION AUX SENDS AUX RETURNS CHANNEL LEVELS MASTER LEVELS 1/4" INPUTS RCA INPUTS 1/4" OUTPUTS RCA OUTPUTS USB AUDIO INTERFACE MIC INPUT Sensitivity Range: -69dBu to -19dBu nominal, +18dBu maximum LINE INPUT Sensitivity Range: -49dBu to -+1dBu nominal, +18dBu maximum MIC INPUT / LINE INPUT Gain Range: -∞ to +20dB HI : 12kHz, ±15dB MID: 120Hz - 4KHz, ±15dB LO: 80Hz, ±15dB AUX SEND Gain Range: -∞ to +10dB AUX RETURN A Gain Range: -∞ to +10dB Effects Level / AUX RETURN B Gain Range: -∞...
TECHNICAL SPECIFICATIONS INPUT CHANNELS EQUALIZATION AUX SENDS AUX RETURNS CHANNEL LEVELS MASTER LEVELS 1/4" INPUTS RCA INPUTS 1/4" OUTPUTS RCA OUTPUTS USB AUDIO INTERFACE MIC INPUT Sensitivity Range: -69dBu to -19dBu nominal, +18dBu maximum LINE INPUT Sensitivity Range: -49dBu to -+1dBu nominal, +18dBu maximum MIC INPUT / LINE INPUT Gain Range: -∞ to +20dB HI : 12kHz, ±15dB MID: 120Hz - 4KHz, ±15dB LO: 80Hz, ±15dB AUX SEND Gain Range: -∞ to +10dB AUX RETURN A Gain Range: -∞ to +10dB Effects Level / AUX RETURN B Gain Range: -∞...
Quick Start Guide
Page 23
... MONITOR AUX SEND PHONES LEVEL PHONES LR MONITOR LEVEL RIGHT LEFT 2-TRK to MONITOR MONITOR OUT 2-TRK to MIX MAIN (L/R) LEVEL L R 2-TRK IN L R USB IN (From Computer) Footswitch ENCODER INTERNAL EFFECTS PROCESSOR (From PicoVerb) RIGHT LEFT MAIN LEFT BUS FX LEVEL MAIN RIGHT BUS L R MAIN OUT BALANCED L R 2-TRK OUT -10dBV L R USB OUT (To Computer) BLOCK DIAGRAM RIGHT LEFT INT EFX AUX CHANNELS 1-2 PHANTOM POWER TRIM HPF 75 Hz INSERT LOW MID HIGH Variable FREQ CHANNELS 3-4 PHANTOM POWER TRIM LOW MID HIGH HPF 75 Hz 1/4" input...
... MONITOR AUX SEND PHONES LEVEL PHONES LR MONITOR LEVEL RIGHT LEFT 2-TRK to MONITOR MONITOR OUT 2-TRK to MIX MAIN (L/R) LEVEL L R 2-TRK IN L R USB IN (From Computer) Footswitch ENCODER INTERNAL EFFECTS PROCESSOR (From PicoVerb) RIGHT LEFT MAIN LEFT BUS FX LEVEL MAIN RIGHT BUS L R MAIN OUT BALANCED L R 2-TRK OUT -10dBV L R USB OUT (To Computer) BLOCK DIAGRAM RIGHT LEFT INT EFX AUX CHANNELS 1-2 PHANTOM POWER TRIM HPF 75 Hz INSERT LOW MID HIGH Variable FREQ CHANNELS 3-4 PHANTOM POWER TRIM LOW MID HIGH HPF 75 Hz 1/4" input...


