Lifecycle Extension Guide
Page 40
Mainboard Removal 1-38 Disassembly Procedures 3. Then remove the support bracket from the guide pin (B) and guide tab (C). Release the support bracket from the top assembly (Figure 1-51). B C Figure 1-51.
Mainboard Removal 1-38 Disassembly Procedures 3. Then remove the support bracket from the guide pin (B) and guide tab (C). Release the support bracket from the top assembly (Figure 1-51). B C Figure 1-51.

Lifecycle Extension Guide
Page 53
NOTE: NOTE: The keyboard is included as part of the top assembly and can no longer be disassembled. Top Assembly Removal 0 Prerequisite: Ensure that the keyboard can not be used, replace the entire top assembly. Figure 1-71. Top Assembly Disassembly Procedures 1-51 In the event that the Left speaker, Rear speaker, Right speaker, Fingerprint, Card reader (Convertible model only), Card reader board, NFC module, and Touchpad have been disassembled prior removing the top assembly.
NOTE: NOTE: The keyboard is included as part of the top assembly and can no longer be disassembled. Top Assembly Removal 0 Prerequisite: Ensure that the keyboard can not be used, replace the entire top assembly. Figure 1-71. Top Assembly Disassembly Procedures 1-51 In the event that the Left speaker, Rear speaker, Right speaker, Fingerprint, Card reader (Convertible model only), Card reader board, NFC module, and Touchpad have been disassembled prior removing the top assembly.
User Manual
Page 3
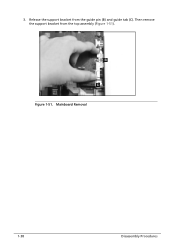
...of your computer 7 Taking care of your AC adapter 8 Cleaning and servicing 8 Guidelines for safe battery usage 8 Internal battery 11 Your Acer notebook tour 12 Screen view 12 Keyboard view 13 Left view 15 USB Type-C information 16 Right view 16 USB 3.2 Gen 1 information 16... network feature 43 Near Field Communication 44 Bluelight Shield 45 Acer ProShield Plus 47 Overview 47 Setting up Acer ProShield Plus 47 File Encryption / Decryption 48 File Shredder 49 Personal Secure Drive 49 Application Guard 51 Browser Guard 52 USB Device Filter 53 Alert 54 Security...
...of your computer 7 Taking care of your AC adapter 8 Cleaning and servicing 8 Guidelines for safe battery usage 8 Internal battery 11 Your Acer notebook tour 12 Screen view 12 Keyboard view 13 Left view 15 USB Type-C information 16 Right view 16 USB 3.2 Gen 1 information 16... network feature 43 Near Field Communication 44 Bluelight Shield 45 Acer ProShield Plus 47 Overview 47 Setting up Acer ProShield Plus 47 File Encryption / Decryption 48 File Shredder 49 Personal Secure Drive 49 Application Guard 51 Browser Guard 52 USB Device Filter 53 Alert 54 Security...

User Manual
Page 51
After setting, it will require Windows Hello authentication to reset the Location and Capacity of the PSD. Note If the Windows Hello authentication fails, the user is locked from the application. Acer ProShield Plus - 51 Use the edit button to access the application. Application Guard Here you can set applications you want to protect.
After setting, it will require Windows Hello authentication to reset the Location and Capacity of the PSD. Note If the Windows Hello authentication fails, the user is locked from the application. Acer ProShield Plus - 51 Use the edit button to access the application. Application Guard Here you can set applications you want to protect.