
User Guide
Page 9
... for rack installation 92 Installing cage nuts 92 Installing the system into the rack 93 To install the system into the rack: 93 Appendix C: SATA RAID configuration utility 97 Hardware Requirements for R310 SATA RAID 99 SATA RAID POST information 99 Server BIOS settings 99 Using the Adaptec...
... for rack installation 92 Installing cage nuts 92 Installing the system into the rack 93 To install the system into the rack: 93 Appendix C: SATA RAID configuration utility 97 Hardware Requirements for R310 SATA RAID 99 SATA RAID POST information 99 Server BIOS settings 99 Using the Adaptec...

User Guide
Page 14
...) • Two LAN port (RJ-45) • One SVGA video port • One serial port Serial ATA ports • Two serial ATA ports • Support RAID 0 or RAID 1 Note: Serial ATA supports drivers for Windows® 2000/Server 2003 only.
...) • Two LAN port (RJ-45) • One SVGA video port • One serial port Serial ATA ports • Two serial ATA ports • Support RAID 0 or RAID 1 Note: Serial ATA supports drivers for Windows® 2000/Server 2003 only.

User Guide
Page 15
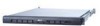
...Altos R310 supports RAID 0 and 1 • Front accessible USB port • Acer EasyBUILDTM for data security and speed - 5 Caring features Part of comprehensive management tools The following features and options are provided. • Cost efficient operation in a value oriented package • Tool-less design • Built-in software Serial ATA RAID... support for efficient system setup and installation • Acer Server Manager (ASM) suite of Acer's mission, as a company that cares about its end users, is no...
...Altos R310 supports RAID 0 and 1 • Front accessible USB port • Acer EasyBUILDTM for data security and speed - 5 Caring features Part of comprehensive management tools The following features and options are provided. • Cost efficient operation in a value oriented package • Tool-less design • Built-in software Serial ATA RAID... support for efficient system setup and installation • Acer Server Manager (ASM) suite of Acer's mission, as a company that cares about its end users, is no...

User Guide
Page 75
65 Parameter PCI Configuration Peripheral Configuration Boot Settings Configuration Event Log Configuration Console Redirection System Health Monitoring ASF Configuration Large Disk Access Mode Parallel ATA Description Open the submenu to configure these settings by pressing 'Enter'. DOS Both Disabled Primary Secondary Enabled Disabled Auto Enabled Disabled Serial ATA Native Mode Operation Serial ATA RAID Option N/A Enter is the only option.
65 Parameter PCI Configuration Peripheral Configuration Boot Settings Configuration Event Log Configuration Console Redirection System Health Monitoring ASF Configuration Large Disk Access Mode Parallel ATA Description Open the submenu to configure these settings by pressing 'Enter'. DOS Both Disabled Primary Secondary Enabled Disabled Auto Enabled Disabled Serial ATA Native Mode Operation Serial ATA RAID Option N/A Enter is the only option.

User Guide
Page 108
This appendix provides instructions for using the SATA RAID configuration utility.
This appendix provides instructions for using the SATA RAID configuration utility.

User Guide
Page 109
...the server boots up, POST information displays connected SATA HDD information, array information, and SATA JBOD information. Follow the steps below to enable SATA RAID. SATA HDD information includes: • attached port ID • HDD model • firmware version • drive capacity • drive status ... Hardware Requirements for more information. A single hard drive is treated as JBOD and is insufficient to create a RAID array. See "Entering BIOS setup" on page 60 for R310 SATA RAID Your system needs to have at least two SATA hard drives installed to create a disk array.
...the server boots up, POST information displays connected SATA HDD information, array information, and SATA JBOD information. Follow the steps below to enable SATA RAID. SATA HDD information includes: • attached port ID • HDD model • firmware version • drive capacity • drive status ... Hardware Requirements for more information. A single hard drive is treated as JBOD and is insufficient to create a RAID array. See "Entering BIOS setup" on page 60 for R310 SATA RAID Your system needs to have at least two SATA hard drives installed to create a disk array.

User Guide
Page 110
100 Appendix C: SATA RAID configuration utility 2 Select the Advanced menu as shown below. 3 Change the "Serial ATA" and "Serial ATA RAID" parameters to ENABLED. 4 Press the F10 key to save the changes and exit the BIOS Setup environment.
100 Appendix C: SATA RAID configuration utility 2 Select the Advanced menu as shown below. 3 Change the "Serial ATA" and "Serial ATA RAID" parameters to ENABLED. 4 Press the F10 key to save the changes and exit the BIOS Setup environment.

User Guide
Page 111
... keys to select from the following screen is accessed during system startup. 101 Using the Adaptec RAID configuration utility This utility is BIOS based and, like BIOS, is displayed. For example, to enter the Adaptec RAID configuration utility. The following options: • anage Arrays • reate Arrays • dd / Delete Hotspare •...
... keys to select from the following screen is accessed during system startup. 101 Using the Adaptec RAID configuration utility This utility is BIOS based and, like BIOS, is displayed. For example, to enter the Adaptec RAID configuration utility. The following options: • anage Arrays • reate Arrays • dd / Delete Hotspare •...

User Guide
Page 112
102 Appendix C: SATA RAID configuration utility Manage Arrays Before using this function, an array(s) must be created. Note: Bootable array(s) denoted by an asterisk (*). Refer to display the array's properties and members. To Delete an Array 1 Select an Array from the Main Menu. 2 Select an array and press to the following section for details. To View Array Properties 1 Select Manage Arrays from the List of Arrays as shown below. 2 Press the key.
102 Appendix C: SATA RAID configuration utility Manage Arrays Before using this function, an array(s) must be created. Note: Bootable array(s) denoted by an asterisk (*). Refer to display the array's properties and members. To Delete an Array 1 Select an Array from the Main Menu. 2 Select an array and press to the following section for details. To View Array Properties 1 Select Manage Arrays from the List of Arrays as shown below. 2 Press the key.

User Guide
Page 113
... is created with Build and Clear and then stopped, the Rebuild function of the utility can be used to verify the array. 1 Select the RAID 1 Array from the List of Arrays. 2 Press + to accept or decline automatic repairs by the utility. 103 To Verify... a RAID 1 If a RAID 1 is created using Quick Init, this utility can be used to resume. 1 Select the RAID 1 Array from the List of Arrays. 2 Press + to begin RAID verification. 3 Press or to begin the rebuid operation. To Rebuild...
... is created with Build and Clear and then stopped, the Rebuild function of the utility can be used to verify the array. 1 Select the RAID 1 Array from the List of Arrays. 2 Press + to accept or decline automatic repairs by the utility. 103 To Verify... a RAID 1 If a RAID 1 is created using Quick Init, this utility can be used to resume. 1 Select the RAID 1 Array from the List of Arrays. 2 Press + to begin RAID verification. 3 Press or to begin the rebuid operation. To Rebuild...

User Guide
Page 114
104 Appendix C: SATA RAID configuration utility Create and Manage RAID 0 Create RAID 0 from new drives 1 Initialize the drives. 2 In the Main Menu, select Create Array, and press . 3 Press the (or, on some keyboards, ) key to add the new drive(s) to the Selected Drives field. 4 Press the key to confirm the selection and continue.
104 Appendix C: SATA RAID configuration utility Create and Manage RAID 0 Create RAID 0 from new drives 1 Initialize the drives. 2 In the Main Menu, select Create Array, and press . 3 Press the (or, on some keyboards, ) key to add the new drive(s) to the Selected Drives field. 4 Press the key to confirm the selection and continue.

User Guide
Page 115
105 5 In the Array Type field, use the arrow keys to select RAID 0(Stripe), and press the key to confirm your selection. 6 Use the key to scroll to the Array Label field and enter text to confirm the array's label. Press to identify the array.
105 5 In the Array Type field, use the arrow keys to select RAID 0(Stripe), and press the key to confirm your selection. 6 Use the key to scroll to the Array Label field and enter text to confirm the array's label. Press to identify the array.

User Guide
Page 116
Press to Stripe Size, by using the key, and select 16 KB, 32 KB, or 64 KB using the arrow keys. 106 Appendix C: SATA RAID configuration utility 7 Scroll to confirm the array stripe size.
Press to Stripe Size, by using the key, and select 16 KB, 32 KB, or 64 KB using the arrow keys. 106 Appendix C: SATA RAID configuration utility 7 Scroll to confirm the array stripe size.

User Guide
Page 117
... to the new drive(s) to the Selected Drives field. 4 Press the key to confirm your selection. 5 In the Array Type field, move the cursor to RAID 0(Stripe) and press the key. 6 Use the key to scroll to the Array Label field and enter text to the Create... RAID via field and select No Init. 107 8 Using the key, scoll to identify the array. Create RAID 0 from source drive 1 Install a new HDD and initalize it. Press to continue. 9 With the key, scroll to...
... to the new drive(s) to the Selected Drives field. 4 Press the key to confirm your selection. 5 In the Array Type field, move the cursor to RAID 0(Stripe) and press the key. 6 Use the key to scroll to the Array Label field and enter text to the Create... RAID via field and select No Init. 107 8 Using the key, scoll to identify the array. Create RAID 0 from source drive 1 Install a new HDD and initalize it. Press to continue. 9 With the key, scroll to...

User Guide
Page 118
... to the new drive(s) to the Selected Drives field. 4 Press the key to confirm your selection. 5 In the Array Type field, move the cursor to RAID 1(Mirror) and press the key. 6 Use the key to scroll to the Array Label field and enter text to Done, and press . Press to confirm... the key, and select 16 KB, 32 KB, or 64 KB using the arrow keys. Press to confirm the array's label. 7 Scroll to the Create RAID via field and select. Do NOT initailize the source drive! 2 From the Main Menu, select Create Array, and press . 3 Press the key to add to...
... to the new drive(s) to the Selected Drives field. 4 Press the key to confirm your selection. 5 In the Array Type field, move the cursor to RAID 1(Mirror) and press the key. 6 Use the key to scroll to the Array Label field and enter text to Done, and press . Press to confirm... the key, and select 16 KB, 32 KB, or 64 KB using the arrow keys. Press to confirm the array's label. 7 Scroll to the Create RAID via field and select. Do NOT initailize the source drive! 2 From the Main Menu, select Create Array, and press . 3 Press the key to add to...

User Guide
Page 119
109 6 Use the key to scroll to the Array Label field and enter text to the Create RAID via field and select. Press to confirm the array's label. 7 Using the key, scoll to identify the array. Press to continue. 8 With the key, scroll to Done, and press . Build.
109 6 Use the key to scroll to the Array Label field and enter text to the Create RAID via field and select. Press to confirm the array's label. 7 Using the key, scoll to identify the array. Press to continue. 8 With the key, scroll to Done, and press . Build.

User Guide
Page 120
110 Appendix C: SATA RAID configuration utility 9 Select the Source Drive, and press followed by . Initialize Drives Prepare hard disk drives for creating arrays. 1 In the Main Menu, select Initialize Drives and press to continue. 2 Use the cursor to select a drive, then press the key to add the new drive(s) to the Selected Drives field. 3 Press and to complete the Initialization.
110 Appendix C: SATA RAID configuration utility 9 Select the Source Drive, and press followed by . Initialize Drives Prepare hard disk drives for creating arrays. 1 In the Main Menu, select Initialize Drives and press to continue. 2 Use the cursor to select a drive, then press the key to add the new drive(s) to the Selected Drives field. 3 Press and to complete the Initialization.

User Guide
Page 124
114 S SATA RAID Adaptec RAID configuration utility 101 BIOS Settings 99 Disk Utilities 111 Hardware Requirements 99 POST information 99 Serial ATA ports 4 Storage 4 system boards mainboard layout 9 system upgrade 39 ESD precautions 40 post-installation instructions 41 preinstallation instructions 41 T turning off the system 21 turning on the system 20 power-on problems 21 U Upgrading the CPU 50 Upgrading the system 39
114 S SATA RAID Adaptec RAID configuration utility 101 BIOS Settings 99 Disk Utilities 111 Hardware Requirements 99 POST information 99 Serial ATA ports 4 Storage 4 system boards mainboard layout 9 system upgrade 39 ESD precautions 40 post-installation instructions 41 preinstallation instructions 41 T turning off the system 21 turning on the system 20 power-on problems 21 U Upgrading the CPU 50 Upgrading the system 39
