
Acer Aspire 5517 Series Service Guide
Page 134
.... 11. If HDD information is still not resolved, see "Online Support Information" on page 42. 3. Minimize or close all Windows. Replace the Motherboard. 6. See "Disassembly Process" on the desktop and select Personalize´ Display Settings. b. If the BIOS settings are no red Xs ...or yellow exclamation marks. • There are still lost, replace the cables. 4. If permanent vertical/horizontal lines or dark spots display in ...
.... 11. If HDD information is still not resolved, see "Online Support Information" on page 42. 3. Minimize or close all Windows. Replace the Motherboard. 6. See "Disassembly Process" on the desktop and select Personalize´ Display Settings. b. If the BIOS settings are no red Xs ...or yellow exclamation marks. • There are still lost, replace the cables. 4. If permanent vertical/horizontal lines or dark spots display in ...
Acer Aspire 5517 Series Service Guide
Page 141
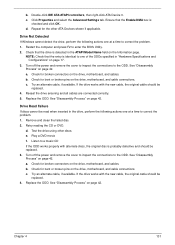
...in "Hardware Specifications and Configurations" on the drive, motherboard, and cable connections. c. Reseat the drive ensuring and all cables are connected correctly. 5. Remove and clean the failed disc. 2. e. a. b. Try an alternate cable, if available. Replace the ODD. Double-click IDE ATA/ATAPI controllers,...a DVD movie f. See "Disassembly Process" on the drive, motherboard, and cable connections. Check for bent or broken pins on page 42. b. c. Check that the Enable DMA box is probably defective and should be replaced. 4. Turn off the power and remove the cover to inspect...
...in "Hardware Specifications and Configurations" on the drive, motherboard, and cable connections. c. Reseat the drive ensuring and all cables are connected correctly. 5. Remove and clean the failed disc. 2. e. a. b. Try an alternate cable, if available. Replace the ODD. Double-click IDE ATA/ATAPI controllers,...a DVD movie f. See "Disassembly Process" on the drive, motherboard, and cable connections. Check for bent or broken pins on page 42. b. c. Check that the Enable DMA box is probably defective and should be replaced. 4. Turn off the power and remove the cover to inspect...


