
User Manual
Page 14
Recycle if possible. Turn the power off the computer and remove the battery pack. 2 Disconnect the AC adapter. 3 Use a soft, moist cloth. If either of the following occurs: • the computer has been dropped or the ... regulations. Keep them away from children. • Dispose of the same kind as replacements. Cleaning and servicing When cleaning the computer, follow these steps: 1 Turn off before removing or replacing batteries. • Do not tamper with batteries. Do not use liquid or aerosol cleaners. xiv Taking care of your battery pack Here...
Recycle if possible. Turn the power off the computer and remove the battery pack. 2 Disconnect the AC adapter. 3 Use a soft, moist cloth. If either of the following occurs: • the computer has been dropped or the ... regulations. Keep them away from children. • Dispose of the same kind as replacements. Cleaning and servicing When cleaning the computer, follow these steps: 1 Turn off before removing or replacing batteries. • Do not tamper with batteries. Do not use liquid or aerosol cleaners. xiv Taking care of your battery pack Here...

User Manual
Page 63
...By following usage patterns: • Using the computer on constant AC power with the open battery bay; Installing and removing the battery pack Important! Failure to remove the battery pack from the unit, connect the AC adapter if you use the battery, the faster it is adversely ... charged. • Not discharging and recharging the battery to use ; English 45 Follow these steps again until the battery locks in place. Extreme temperatures may adversely affect the battery pack. Before removing the battery from the unit. If the computer is to be stored for a long time....
...By following usage patterns: • Using the computer on constant AC power with the open battery bay; Installing and removing the battery pack Important! Failure to remove the battery pack from the unit, connect the AC adapter if you use the battery, the faster it is adversely ... charged. • Not discharging and recharging the battery to use ; English 45 Follow these steps again until the battery locks in place. Extreme temperatures may adversely affect the battery pack. Before removing the battery from the unit. If the computer is to be stored for a long time....

User Manual
Page 82
... you This section gives you tips and hints to consider when moving within the building. To bring the computer out of Sleep mode, open files. 2 Remove any media, floppy disks or compact disks from the drive(s). 3 Shut down the computer: Click on Start, Turn Off Computer, then click on Turn Off... your computer from external accessories: 1 Save any open the display; English 64 Taking your notebook PC with your computer. Disconnecting from the desktop Follow these steps to place it in Sleep mode by pressing + .
... you This section gives you tips and hints to consider when moving within the building. To bring the computer out of Sleep mode, open files. 2 Remove any media, floppy disks or compact disks from the drive(s). 3 Shut down the computer: Click on Start, Turn Off Computer, then click on Turn Off... your computer from external accessories: 1 Save any open the display; English 64 Taking your notebook PC with your computer. Disconnecting from the desktop Follow these steps to place it in Sleep mode by pressing + .

User Manual
Page 83
...fully charged, you are not actively using the computer. Preparing the computer After disconnecting the computer from your office to your desktop, follow these steps to plug in Sleep mode. Taking the computer home When you may enter Hibernation mode after being in Sleep mode for the trip home: ... take the following items with you have an electrical outlet, reduce the drain on . In both cases, press and release the power button to remove the media can damage the drive head. • Pack the computer in the meeting room. Note that the computer may want to bring anything ...
...fully charged, you are not actively using the computer. Preparing the computer After disconnecting the computer from your office to your desktop, follow these steps to plug in Sleep mode. Taking the computer home When you may enter Hibernation mode after being in Sleep mode for the trip home: ... take the following items with you have an electrical outlet, reduce the drain on . In both cases, press and release the power button to remove the media can damage the drive head. • Pack the computer in the meeting room. Note that the computer may want to bring anything ...

User Manual
Page 92
then lift up and remove the memory cover. 3 (a) Insert the memory module diagonally into the slot, then (b) gently press it down until it clicks into place. 4 Replace the memory cover ... AC adapter. 6 Turn on the computer. Please consult a qualified technician or contact your local Acer dealer. The computer automatically detects and reconfigures the total memory size. English 74 Installing memory Follow these steps to access its base. 2 Remove the screws from the memory cover; Then turn the computer over to install memory: 1 Turn...
then lift up and remove the memory cover. 3 (a) Insert the memory module diagonally into the slot, then (b) gently press it down until it clicks into place. 4 Replace the memory cover ... AC adapter. 6 Turn on the computer. Please consult a qualified technician or contact your local Acer dealer. The computer automatically detects and reconfigures the total memory size. English 74 Installing memory Follow these steps to access its base. 2 Remove the screws from the memory cover; Then turn the computer over to install memory: 1 Turn...

Service Guide
Page 52
... Password and Confirm New Password fields. When you have changed the settings, press u to highlight the Set Supervisor Password parameter and press the e key. Removing a Password Follow these steps: 1. Changing a Password 1. The password setting is OK, the screen will show you can enable the Password on boot parameter. 6. The Set Supervisor Password...
... Password and Confirm New Password fields. When you have changed the settings, press u to highlight the Set Supervisor Password parameter and press the e key. Removing a Password Follow these steps: 1. Changing a Password 1. The password setting is OK, the screen will show you can enable the Password on boot parameter. 6. The Set Supervisor Password...
Service Guide
Page 59
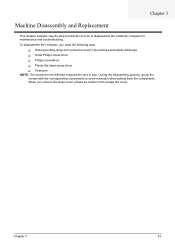
... screw driver T Tweezers NOTE: The screws for maintenance and troubleshooting. Chapter 3 Machine Disassembly and Replacement This chapter contains step-by-step procedures on how to scrape the cover. To disassemble the computer, you remove the stripe cover, please be careful not to disassemble the notebook computer for the different components vary in size...
... screw driver T Tweezers NOTE: The screws for maintenance and troubleshooting. Chapter 3 Machine Disassembly and Replacement This chapter contains step-by-step procedures on how to scrape the cover. To disassemble the computer, you remove the stripe cover, please be careful not to disassemble the notebook computer for the different components vary in size...

Service Guide
Page 66
Removing the Wireless LAN Card 10. Disconnect the main and auxiliary antenna from the main unit. 60 Chapter 3 Remove the two screws fastening the wireless LAN card. 14. Pull out the snaps securing the memory in place. Take out the wireless LAN card from the wireless LAN card. 13. Remove the memory from the DIMM socket (If the notebook has two memory modules, then repeat this step). Remove the two screws fastening the wireless LAN card panel. 11. The memory will pop up the panel as shown. 12. Lift up . 9. Removing the Memory 8.
Removing the Wireless LAN Card 10. Disconnect the main and auxiliary antenna from the main unit. 60 Chapter 3 Remove the two screws fastening the wireless LAN card. 14. Pull out the snaps securing the memory in place. Take out the wireless LAN card from the wireless LAN card. 13. Remove the memory from the DIMM socket (If the notebook has two memory modules, then repeat this step). Remove the two screws fastening the wireless LAN card panel. 11. The memory will pop up the panel as shown. 12. Lift up . 9. Removing the Memory 8.

Service Guide
Page 79
... steady pressure is on the screen for a short time. Check out the Power Management in the screen for both battery and adapter. 4. Remove the battery pack and measure the voltage between battery terminals 1(+) and 6(ground). Power off the computer. 2. If the charge indicator still does... correct. 3. Replace the system board. In Power Meter, confirm that has less than 7.5 Vdc after recharging, replace the battery. Repeat the steps 1 and 2, for Current Power Source and Total Battery Power Remaining are necessary if the pointer movement stops in a short period of the total...
... steady pressure is on the screen for a short time. Check out the Power Management in the screen for both battery and adapter. 4. Remove the battery pack and measure the voltage between battery terminals 1(+) and 6(ground). Power off the computer. 2. If the charge indicator still does... correct. 3. Replace the system board. In Power Meter, confirm that has less than 7.5 Vdc after recharging, replace the battery. Repeat the steps 1 and 2, for Current Power Source and Total Battery Power Remaining are necessary if the pointer movement stops in a short period of the total...


