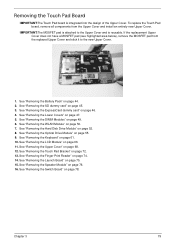
Aspire 4330 / 4370Z / 4370ZG / 4930 User's Guide EN
Page 5
Internal microphone for your hands when you use the computer. 12 Keyboard For entering data into your computer. 13 Speakers Left and right speakers deliver stereo audio output. 14 Power button Turns the computer ... right mouse buttons. 11 Palmrest Comfortable support area for sound recording. 5 English # Icon 1 2 3 4 5 Item Acer Crystal Eye Microphone Display screen Status indicators Empowering key Description Web camera for more details. Lanuch Acer Empowering Technology. 6 Wireless Enables/disables the wireless function. Please refer to show the status of the computer...
Aspire 4330 / 4370Z / 4370ZG / 4930 User's Guide EN
Page 11
...; • • I/O interface • Environment • • ACPI 3.0 48.8 W 4400 mAh 3-pin 65 W AC adapter* 3-pin 90 W AC adapter* Energy Star 4.0 88-/89-/93-key keyboard Touchpad pointing device Empowering Key Easy-launch buttons: WLAN, volume up and down and Bluetooth® ExpressCard™/54 slot 5-in-1 card reader (SD™...
Aspire 4330 / 4730Z / 4730ZG Service Guide
Page 7
...1 Features 1 System Block Diagram 4 Your Acer Notebook tour 5 Front View 5 Closed Front View 6 Left View 7 Right View 8 Rear View 8 Bottom View 9 Indicators 10 Easy-Launch Buttons 10 Touchpad Basics (with fingerprint reader 11 Using the Keyboard 12 Lock Keys and embedded numeric keypad 12 ...Windows Keys 13 Hot Keys 14 Special Key 15 Using the System Utilities 16 Acer GridVista (dual-display compatible 16 Hardware Specifications and Configurations 18 ...
Aspire 4330 / 4730Z / 4730ZG Service Guide
Page 8
... Pad Bracket 117 Replacing the Launch Board 118 Replacing the Switch Board 118 Replacing the Antenna Cables 119 Replacing the Speaker Module 120 Replacing the Keyboard 120 Replacing the Switch Cover 122 Replacing the WLAN Module 122 Replacing the Hard Disk Drive Module 123 Replacing the DIMM Modules 124 Replacing the...
Aspire 4330 / 4730Z / 4730ZG Service Guide
Page 9
Table of Contents No Display Issue 131 Random Loss of BIOS Settings 132 LCD Failure 133 Built-In Keyboard Failure 133 Touchpad Failure 134 Internal Speaker Failure 134 Internal Microphone Failure 136 HDD Not Operating Correctly 137 ODD Failure 138 ... by Crisis Disk 154 FRU (Field Replaceable Unit) List 155 Aspire 4730Z/4730ZG/4330 Exploded Diagrams 156 Main Module 156 LCD Module 157 Aspire 4730Z/4730ZG/4330 FRU List 158 Screw List 165 Model Definition and Configuration 166 Aspire 4730Z/4730ZG/4330 Series 166 Test Compatible Components 177 Microsoft® Windows® ...
Aspire 4330 / 4730Z / 4730ZG Service Guide
Page 12
... Conference, featuring: • Integrated Acer Crystal Eye webcam • Optional Acer Xpress VoIP phone • WLAN: • Acer InviLink™ Nplify™ 802.11b/g/Draft-N* • Acer InviLink™ 802.11b/g* • WPAN: Bluetooth® 2.0+EDR • LAN: Gigabit Ethernet, Wake-on-LAN ... 65 W AC adapter* • 3-pin 90 W AC adapter* • Energy Star 4.0 Special keys and controls • 88-/89-/93-key keyboard • Touchpad pointing device • Empowering Key • Easy-launch buttons: WLAN, volume up and down and Bluetooth® I/O interface • ExpressCard...
Aspire 4330 / 4730Z / 4730ZG Service Guide
Page 16
... (MMC), Memory Stick (MS), Memory Stick PRO (MS PRO), xD-Picture Card (xD). The left and right buttons function like the left and right) Palmrest Keyboard Speakers Power button Description Touch-sensitive pointing device which functions like a computer mouse. Turns the computer on and off. Locks and releases the lid. 6 Chapter...
Aspire 4330 / 4730Z / 4730ZG Service Guide
Page 20
...but can be reset by users. Easy-Launch Buttons Located beside the keyboard are visible even when the computer cover is closed. These buttons are : WLAN, Internet, email, Bluetooth, Arcade and Acer Empowering Technology. To set to -read status indicators: The front ...and Web browser buttons are pre-set the Web browser, mail and programmable buttons, run the Acer Launch Manager. Icon Function Empowering Technology Web browser Description Launch Acer Empowering Technology. (user-programmable) Internet browser (user-Programmable) Mail Email application (user-Programmable) ...
Aspire 4330 / 4730Z / 4730ZG Service Guide
Page 22
... typed are not printed on Type numbers in a normal manner. 12 Chapter 1 Type the letters in a normal manner. Using the Keyboard The keyboard has full-sized keys and an embedded numeric keypad, separate cursor, lock, Windows, function and special keys. Scroll Lock does not work... The keys function as a calculator (complete with some applications. The embedded numeric keypad functions like a desktop numeric keypad. To simplify the keyboard legend, cursor-control key symbols are in numeric mode. Hold while using cursorcontrol keys. Lock key Caps Lock Num Lock + Scroll Lock +...
Aspire 4330 / 4730Z / 4730ZG Service Guide
Page 23
Windows Keys The keyboard has two keys that perform Windows-specific functions. Application This key has the same effect as described. it launches the Start menu. Key Description Windows ...
Aspire 4330 / 4730Z / 4730ZG Service Guide
Page 25
NOTE: Note: Some fonts and software do not support the Euro symbol. Hold and then press the key at the upper-center of the keyboard. Open a text editor or word processor. 2. The US dollar sign 1. Chapter 1 15 The Euro symbol 1. Hold and then press the key at the ...upper-center of your keyboard. NOTE: This function varies by the operating system version. Please refer to www.microsoft.com/ typography/faq/faq12.htm for more information. Open a text editor...
Aspire 4330 / 4730Z / 4730ZG Service Guide
Page 28
... on Cantiga PM40 platform • Intel Cantiga GL40 (667MHz FSB supported)/ Intel Cantiga PM40 (667/800/ 1066MHz FSB supported) • ICH9-M • ENE KB926 for Keyboard Controller, Battery management Unit. • JMICRON JMB385 for Card Reader, 5 in 1 controller. • Integrated VGA solution for CANTIGA GL40/ External VGA card for CANTIGA PM...
Aspire 4330 / 4730Z / 4730ZG Service Guide
Page 35
USB Interface Item Chipset USB Compliancy Level Number of USB port Location Keyboard Item Keyboard controller Total number of keypads Windows logo key Internal & external keyboard work simultaneously ICH9M 2.0 2 Left Side KB926 88/89/93 Yes Yes Battery Item Vendor & model name Battery Type Pack capacity Number of battery cell Package ...
Aspire 4330 / 4730Z / 4730ZG Service Guide
Page 52
... the following stages: • External module disassembly • Main unit disassembly • LCD module disassembly The flowcharts provided in that you must first remove the keyboard, then disassemble the inside assembly frame in the succeeding disassembly sections illustrate the entire disassembly sequence.
Aspire 4330 / 4730Z / 4730ZG Service Guide
Page 53
... Disassembly Process External Modules Disassembly Flowchart The flowchart below gives you a graphic representation on the entire disassembly sequence and instructs you must first remove the keyboard, then disassemble the inside assembly frame in that need to remove the main board, you on the components that order.
Aspire 4330 / 4730Z / 4730ZG Service Guide
Page 68
Main Unit Disassembly Process Main Unit Disassembly Flowchart Remove External Modules before proceeding Remove Switch Cover Remove Keyboard Remove Antenna Remove LCD Module Remove Upper Cover Upper Cover Lower Cover Remove Touchpad Bracket Remove Launch Board Remove Speaker Module Remove Switch Board Remove ...
Aspire 4330 / 4730Z / 4730ZG Service Guide
Page 71
Using a plastic pry, push in the two securing latches and slide the pry under the keyboard. 3. Chapter 3 61 Once both latches are released, lift the keyboard away from the chassis as shown. 4. Turn the keyboard over on page 44. 2. Removing the Keyboard 1. See "Removing the Battery Pack" on the Touch Pad area to expose the FFC cable.
Aspire 4330 / 4730Z / 4730ZG Service Guide
Page 76
See "Removing the Keyboard" on page 63. 6. Remove the two securing screws from the chassis. 66 Chapter 3 See "Removing the Antenna" on page 61. 5. Step LCD Module Size M2.5*8(NL) Quantity 2 Screw Type 7. Disconnect the three LCD interface cables from the bottom of the chassis. See "Removing the Lower Covers" on page 50. 4. See "Removing the WLAN Module" on page 47. 3. See "Removing the Battery Pack" on page 44. 2. Turn the computer over. Removing the LCD Module 1.
Aspire 4330 / 4730Z / 4730ZG Service Guide
Page 78
... page 45. 3. See "Removing the SD dummy card" on page 49. 6. See "Removing the Hard Disk Drive Module" on page 61. 11. See "Removing the Keyboard" on page 52. 8. See "Removing the LCD Module" on page 44. 2. Removing the Upper Cover 1. See "Removing the Battery Pack" on page 66. 12.
Aspire 4330 / 4730Z / 4730ZG Service Guide
Page 89
... from the Upper Cover and install an entirely new Upper Cover. See "Removing the Upper Cover" on page 61. 10. Chapter 3 79 See "Removing the Keyboard" on page 68. 12. To replace the Touch Pad board, remove all components from the replaced Upper Cover and stick it to the Upper Cover...