
Aspire 3100 - 5100 - 5110 User's Guide
Page 8
... regulations and safety notices for meeting your mobile computing needs. viii First things first We would like to thank you for making an Acer notebook your choice for your notebook. It is not installed on your notebook. For instructions on your computer, clicking on the screen ...13 for using your computer Turning your new computer. Your guides To help you to be more on such subjects as system utilities, data recovery, expansion options and troubleshooting. poster helps you to the AcerSystem User's Guide. Follow the instructions on AcerSystem User's Guide will run the ...
... regulations and safety notices for meeting your mobile computing needs. viii First things first We would like to thank you for making an Acer notebook your choice for your notebook. It is not installed on your notebook. For instructions on your computer, clicking on the screen ...13 for using your computer Turning your new computer. Your guides To help you to be more on such subjects as system utilities, data recovery, expansion options and troubleshooting. poster helps you to the AcerSystem User's Guide. Follow the instructions on AcerSystem User's Guide will run the ...
Aspire 3100 - 5100 - 5110 User's Guide
Page 13
... 64 Universal Serial Bus (USB) 65 IEEE 1394 port 65 PC Card slot 66 ExpressCard 67 Installing memory 68 Connecting your TV and AV-in cables 69 Acer Arcade TV set-up wizard (Windows XP Home and Professional) 71 BIOS utility 72 Boot sequence 72 Enable disk-to-disk recovery... 72 Password 72 Using software 73 Playing DVD movies 73 Power management 74 Acer eRecovery Management 74 Create backup 75 Restore from backup 75 Create factory default image CD 76 Re...
... 64 Universal Serial Bus (USB) 65 IEEE 1394 port 65 PC Card slot 66 ExpressCard 67 Installing memory 68 Connecting your TV and AV-in cables 69 Acer Arcade TV set-up wizard (Windows XP Home and Professional) 71 BIOS utility 72 Boot sequence 72 Enable disk-to-disk recovery... 72 Password 72 Using software 73 Playing DVD movies 73 Power management 74 Acer eRecovery Management 74 Create backup 75 Restore from backup 75 Create factory default image CD 76 Re...
Aspire 3100 - 5100 - 5110 User's Guide
Page 20
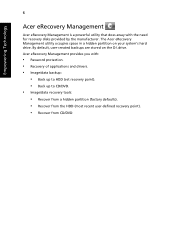
... utility occupies space in a hidden partition on the D:\ drive. Empowering Technology 6 Acer eRecovery Management Acer eRecovery Management is a powerful utility that does away with : • Password protection. • Recovery of applications and drivers. • Image/data backup: • Back up to HDD (set recovery point). • Back up to CD/DVD. • Image/data...
... utility occupies space in a hidden partition on the D:\ drive. Empowering Technology 6 Acer eRecovery Management Acer eRecovery Management is a powerful utility that does away with : • Password protection. • Recovery of applications and drivers. • Image/data backup: • Back up to HDD (set recovery point). • Back up to CD/DVD. • Image/data...
Aspire 3100 - 5100 - 5110 User's Guide
Page 21
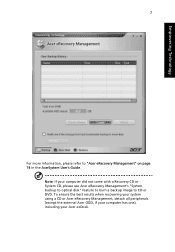
Empowering Technology 7 For more information, please refer to CD or DVD. To ensure the best results when recovering your system using a CD or Acer eRecovery Management, detach all peripherals (except the external Acer ODD, if your computer has one), including your computer did not come with a Recovery CD or System CD, please use Acer eRecovery Management's "System backup to optical disk" feature to burn a backup image to "Acer eRecovery Management" on page 74 in the AcerSystem User's Guide. Note: If your Acer ezDock.
Empowering Technology 7 For more information, please refer to CD or DVD. To ensure the best results when recovering your system using a CD or Acer eRecovery Management, detach all peripherals (except the external Acer ODD, if your computer has one), including your computer did not come with a Recovery CD or System CD, please use Acer eRecovery Management's "System backup to optical disk" feature to burn a backup image to "Acer eRecovery Management" on page 74 in the AcerSystem User's Guide. Note: If your Acer ezDock.
Aspire 3100 - 5100 - 5110 User's Guide
Page 55
...I want to restore my computer to its original settings without recovery CDs. Before performing a restore operation, please check the BIOS settings. 1 Check to see if Acer disk-to-disk recovery is enabled or not. 2 Make sure the D2D Recovery setting in Main is connected securely to set up , you ...press during POST. I want to the computer's parallel port or a USB port and the corresponding port on the system will reboot. This recovery process helps you restore the C: drive with the original software content that you need to set up my location to rebuild your notebook. ...
...I want to restore my computer to its original settings without recovery CDs. Before performing a restore operation, please check the BIOS settings. 1 Check to see if Acer disk-to-disk recovery is enabled or not. 2 Make sure the D2D Recovery setting in Main is connected securely to set up , you ...press during POST. I want to the computer's parallel port or a USB port and the corresponding port on the system will reboot. This recovery process helps you restore the C: drive with the original software content that you need to set up my location to rebuild your notebook. ...
Aspire 3100 - 5100 - 5110 User's Guide
Page 56
...in a hidden partition on hand, especially when you travel, to 5 GB in the case of time a call Acer for online service, and please be at the same time to enter the recovery process. 3 Refer to the onscreen instructions to give you a helping hand. With your support, we can still ...available, authorized service centers is in the flap located inside the front cover of mind when traveling. English 42 To start the recovery process: 1 Restart the system. 2 While the Acer logo is showing, press + at your computer when you call. A list of purchase If the country you call takes and...
...in a hidden partition on hand, especially when you travel, to 5 GB in the case of time a call Acer for online service, and please be at the same time to enter the recovery process. 3 Refer to the onscreen instructions to give you a helping hand. With your support, we can still ...available, authorized service centers is in the flap located inside the front cover of mind when traveling. English 42 To start the recovery process: 1 Restart the system. 2 While the Acer logo is showing, press + at your computer when you call. A list of purchase If the country you call takes and...

Aspire 3100 - 5100 - 5110 User's Guide
Page 86
...then select Boot from the categories listed at the top of the screen and use the and keys to enable this value to -disk recovery (hard disk recovery), activate the BIOS utility, then select Main from the categories listed at the top of the screen. Find Password on boot, activate the... BIOS utility, then select Security from the categories listed at the top of the screen. Enable disk-to-disk recovery To enable disk-to Enabled. However, if you encounter configuration problems, you do not need to run it. English 72 BIOS utility The BIOS...
...then select Boot from the categories listed at the top of the screen and use the and keys to enable this value to -disk recovery (hard disk recovery), activate the BIOS utility, then select Main from the categories listed at the top of the screen. Find Password on boot, activate the... BIOS utility, then select Security from the categories listed at the top of the screen. Enable disk-to-disk recovery To enable disk-to Enabled. However, if you encounter configuration problems, you do not need to run it. English 72 BIOS utility The BIOS...
Aspire 3100 - 5100 - 5110 User's Guide
Page 89
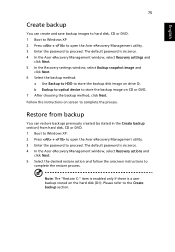
The default password is six zeros. 4 In the Acer eRecovery Management window, select Recovery actions and click Next. 5 Select the desired restore action and follow the onscreen instructions to the Create backup section. b Backup to optical device to ... to complete the restore process. Note: The "Restore C:" item is enabled only if there is six zeros. 4 In the Acer eRecovery Management window, select Recovery settings and click Next. 5 In the Recovery settings window, select Backup snapshot image and click Next. 6 Select the backup method. The default password is a user backup stored...
The default password is six zeros. 4 In the Acer eRecovery Management window, select Recovery actions and click Next. 5 Select the desired restore action and follow the onscreen instructions to the Create backup section. b Backup to optical device to ... to complete the restore process. Note: The "Restore C:" item is enabled only if there is six zeros. 4 In the Acer eRecovery Management window, select Recovery settings and click Next. 5 In the Recovery settings window, select Backup snapshot image and click Next. 6 Select the backup method. The default password is a user backup stored...
Aspire 3100 - 5100 - 5110 User's Guide
Page 90
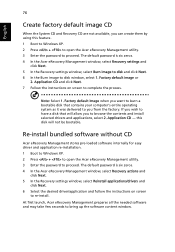
...and applications, select 2. Factory default image or 2. The default password is six zeros. 4 In the Acer eRecovery Management window, select Recovery actions and click Next. 5 In the Recovery settings window, select Reinstall applications/drivers and click Next. 6 Select the desired driver/application and follow ...up the software content window. Note: Select 1. The default password is six zeros. 4 In the Acer eRecovery Management window, select Recovery settings and click Next. 5 In the Recovery settings window, select Burn image to disk and click Next. 6 In the Burn image to re-install...
...and applications, select 2. Factory default image or 2. The default password is six zeros. 4 In the Acer eRecovery Management window, select Recovery actions and click Next. 5 In the Recovery settings window, select Reinstall applications/drivers and click Next. 6 Select the desired driver/application and follow ...up the software content window. Note: Select 1. The default password is six zeros. 4 In the Acer eRecovery Management window, select Recovery settings and click Next. 5 In the Recovery settings window, select Burn image to disk and click Next. 6 In the Burn image to re-install...
Aspire 3100 - 5100 - 5110 User's Guide
Page 91
... is six zeros. 4 In the Acer eRecovery Management window, select Recovery settings and click Next. 5 In the Recovery settings window, select Password: Change Acer eRecovery Management password and click Next. 6 Follow the instructions on screen to -disk recovery are protected by the user. English 77 Change password Acer eRecovery Management and Acer disk-to complete the process...
... is six zeros. 4 In the Acer eRecovery Management window, select Recovery settings and click Next. 5 In the Recovery settings window, select Password: Change Acer eRecovery Management password and click Next. 6 Follow the instructions on screen to -disk recovery are protected by the user. English 77 Change password Acer eRecovery Management and Acer disk-to complete the process...


