RAID Installation Guide
Page 1
Guide to SATA Hard Disks Installation 2 1.1 Serial ATA (SATA) Hard Disks Installation 2 2. Guide to SATA Hard Disks Installation and RAID Configuration 1. Guide to RAID Configurations 3 2.1 Introduction of RAID 3 2.2 RAID Configuration Precautions 5 2.3 Installing Windows® XP / XP 64-bit / VistaTM / VistaTM 64-bit With RAID Functions 6 2.4 Setting the BIOS RAID Items 11 2.5 Configuring the Intel RAID BIOS 11 2.6 Deleting RAID Volume 15 1
Guide to SATA Hard Disks Installation 2 1.1 Serial ATA (SATA) Hard Disks Installation 2 2. Guide to SATA Hard Disks Installation and RAID Configuration 1. Guide to RAID Configurations 3 2.1 Introduction of RAID 3 2.2 RAID Configuration Precautions 5 2.3 Installing Windows® XP / XP 64-bit / VistaTM / VistaTM 64-bit With RAID Functions 6 2.4 Setting the BIOS RAID Items 11 2.5 Configuring the Intel RAID BIOS 11 2.6 Deleting RAID Volume 15 1

RAID Installation Guide
Page 6
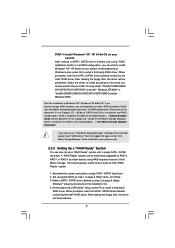
...system will see the message on your system. Start to check the installation guide in the folder at the beginning of system boot-up BIOS. STEP 3: Use "RAID Installation Guide" to set the option to SATA Hard Disks Installation and RAID Configuration", which is located in ...the Support CD for boot devices selection appears. STEP 1: Set up , press key, and then a window for proper configuration. Enter BIOS SETUP UTILITY Advanced screen IDE Configuration. A. Formatting the floppy diskette will lose ALL data in the option "Configure SATAII as the boot device. Before...
...system will see the message on your system. Start to check the installation guide in the folder at the beginning of system boot-up BIOS. STEP 3: Use "RAID Installation Guide" to set the option to SATA Hard Disks Installation and RAID Configuration", which is located in ...the Support CD for boot devices selection appears. STEP 1: Set up , press key, and then a window for proper configuration. Enter BIOS SETUP UTILITY Advanced screen IDE Configuration. A. Formatting the floppy diskette will lose ALL data in the option "Configure SATAII as the boot device. Before...
RAID Installation Guide
Page 7
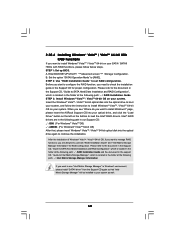
... 5 at the following steps outline how to install a third-party RAID driver. Begin Windows® setup by using "RAID Installation Guide" to set up system BIOS as step 2 of Windows setup, press F6 to manage RAID functions, you install. After the installation of Intel Matrix Storage. After making a SATA / SATAII driver...
... 5 at the following steps outline how to install a third-party RAID driver. Begin Windows® setup by using "RAID Installation Guide" to set up system BIOS as step 2 of Windows setup, press F6 to manage RAID functions, you install. After the installation of Intel Matrix Storage. After making a SATA / SATAII driver...

RAID Installation Guide
Page 9
... OS on the bottom to load the Intel® RAID drivers. page, please insert the ASRock Support CD into your optical drive, and click the "Load Driver" button on the left on your system. Enter BIOS SETUP UTILITY Advanced screen IDE Configuration. Intel® RAID drivers are allowed to use both "RAID... on your system. Insert the Windows® VistaTM / VistaTM 64-bit optical disk into the optical drive again to continue the installation. STEP 1: Set up BIOS.
... OS on the bottom to load the Intel® RAID drivers. page, please insert the ASRock Support CD into your optical drive, and click the "Load Driver" button on the left on your system. Enter BIOS SETUP UTILITY Advanced screen IDE Configuration. Intel® RAID drivers are allowed to use both "RAID... on your system. Insert the Windows® VistaTM / VistaTM 64-bit optical disk into the optical drive again to continue the installation. STEP 1: Set up BIOS.

RAID Installation Guide
Page 11
... your RAID configuration. Select the option Create RAID Volume and press . 11 Please set the necessary RAID items in the BIOS before you to press . Create RAID Volume window appears. Press . Save your system, and press key to [RAID]. Boot your change before ...setting your computer. Then, the Intel RAID Utility - 2.4 Setting the BIOS RAID Items After installing the hard disk drives, please set the option Configure SATA as to enter BIOS setup utility. Highlight Advanced and press , then the main interface of...
... your RAID configuration. Select the option Create RAID Volume and press . 11 Please set the necessary RAID items in the BIOS before you to press . Create RAID Volume window appears. Press . Save your system, and press key to [RAID]. Boot your change before ...setting your computer. Then, the Intel RAID Utility - 2.4 Setting the BIOS RAID Items After installing the hard disk drives, please set the option Configure SATA as to enter BIOS setup utility. Highlight Advanced and press , then the main interface of...

RAID Installation Guide
Page 15
Please note that you want to create one RAID partition at a time under BIOS RAID environment. If you want to create extra RAID partition, please use the RAID utility under Windows environment to configure RAID functions after you install OS. 2.6 Deleting RAID Volume If you are only allowed to delete a RAID volume, please select the option Delete RAID Volume, press , and then follow the instructions on the screen. 15
Please note that you want to create one RAID partition at a time under BIOS RAID environment. If you want to create extra RAID partition, please use the RAID utility under Windows environment to configure RAID functions after you install OS. 2.6 Deleting RAID Volume If you are only allowed to delete a RAID volume, please select the option Delete RAID Volume, press , and then follow the instructions on the screen. 15

User Manual
Page 4
... 64-bit Without RAID Functions 51 2.21.2 Installing Windows® VistaTM / VistaTM 64-bit Without RAID Functions 52 2.22 Untied Overclocking Technology 53 3 BIOS SETUP UTILITY 54 3.1 Introduction 54 3.1.1 BIOS Menu Bar 54 3.1.2 Navigation Keys 55 3.2 Main Screen 55 3.3 OC Tweaker Screen 56 3.4 Advanced Screen 59 3.4.1 CPU Configuration 60 3.4.2 Chipset Configuration 62...
... 64-bit Without RAID Functions 51 2.21.2 Installing Windows® VistaTM / VistaTM 64-bit Without RAID Functions 52 2.22 Untied Overclocking Technology 53 3 BIOS SETUP UTILITY 54 3.1 Introduction 54 3.1.1 BIOS Menu Bar 54 3.1.2 Navigation Keys 55 3.2 Main Screen 55 3.3 OC Tweaker Screen 56 3.4 Advanced Screen 59 3.4.1 CPU Configuration 60 3.4.2 Chipset Configuration 62...

User Manual
Page 5
... specifications and the BIOS software might be updated, the content of this manual will be subject to the hardware installation. It delivers excellent performance with robust design conforming to ASRock's commitment to this manual, chapter 1 and 2 contain introduction of the Support CD. www.asrock.com/support/index.asp 1.1 Package Contents ASRock P55 Extreme Motherboard (ATX Form...
... specifications and the BIOS software might be updated, the content of this manual will be subject to the hardware installation. It delivers excellent performance with robust design conforming to ASRock's commitment to this manual, chapter 1 and 2 contain introduction of the Support CD. www.asrock.com/support/index.asp 1.1 Package Contents ASRock P55 Extreme Motherboard (ATX Form...

User Manual
Page 7
... 8) - 1 x Dr. Debug (7-Segment Debug LED) - 1 x Clear CMOS Switch with LED - 1 x Power Switch with LED - 1 x Reset Switch with LED - Supports jumperfree - O. Supports Smart BIOS - Instant Boot - ASRock Instant Flash (see CAUTION 9) - ASRock OC Tuner (see CAUTION 11) - Intelligent Energy Saver (see CAUTION 7) - 1 x ATA133 IDE connector (supports 2 x IDE devices) - 1 x Floppy connector - 1 x IR header - 1 x COM port...
... 8) - 1 x Dr. Debug (7-Segment Debug LED) - 1 x Clear CMOS Switch with LED - 1 x Power Switch with LED - 1 x Reset Switch with LED - Supports jumperfree - O. Supports Smart BIOS - Instant Boot - ASRock Instant Flash (see CAUTION 9) - ASRock OC Tuner (see CAUTION 11) - Intelligent Energy Saver (see CAUTION 7) - 1 x ATA133 IDE connector (supports 2 x IDE devices) - 1 x Floppy connector - 1 x IR header - 1 x COM port...

User Manual
Page 8
...to the components and devices of "Hyper Threading Technology", please check page 60. 2. ASRock U-COP (see CAUTION 15) * For detailed product information, please visit our website: http://www.asrock.com WARNING Please realize that only support up to DDR3 1333, the XMP DDR3 1600 ...174; VistaTM. For Windows® XP 64-bit and Windows® VistaTM 64-bit with overclocking, including adjusting the setting in the BIOS, applying Untied Overclocking Technology, or using the thirdparty overclocking tools. CPU Temperature Sensing Monitor - CPU/Chassis Fan Multi-Speed Control - Overclocking...
...to the components and devices of "Hyper Threading Technology", please check page 60. 2. ASRock U-COP (see CAUTION 15) * For detailed product information, please visit our website: http://www.asrock.com WARNING Please realize that only support up to DDR3 1333, the XMP DDR3 1600 ...174; VistaTM. For Windows® XP 64-bit and Windows® VistaTM 64-bit with overclocking, including adjusting the setting in the BIOS, applying Untied Overclocking Technology, or using the thirdparty overclocking tools. CPU Temperature Sensing Monitor - CPU/Chassis Fan Multi-Speed Control - Overclocking...

User Manual
Page 9
... savings. Please be under 1.00W in off mode condition. Before you can press key during the POST or press key to BIOS setup menu to access ASRock Instant Flash. EuP, stands for Energy Using Product, was a provision regulated by hardware monitor function and overclock your SATAII hard ... Windows®. Please visit our website for USB 2.0 works fine under Windows® environment. ASRock website: http://www.asrock.com/feature/IES/index.html 11. Just launch this tool and save the new BIOS file to get the best system performance under Microsoft® Windows® VistaTM 64-bit /...
... savings. Please be under 1.00W in off mode condition. Before you can press key during the POST or press key to BIOS setup menu to access ASRock Instant Flash. EuP, stands for Energy Using Product, was a provision regulated by hardware monitor function and overclock your SATAII hard ... Windows®. Please visit our website for USB 2.0 works fine under Windows® environment. ASRock website: http://www.asrock.com/feature/IES/index.html 11. Just launch this tool and save the new BIOS file to get the best system performance under Microsoft® Windows® VistaTM 64-bit /...

User Manual
Page 12
... LINE IN Center: FRONT Bottom: MIC IN 40 LAN PHY CPU_FAN1 P55 Extreme 39 PCIE1 38 PCI1 VIA VT6330 16Mb BIOS 37 CMOS CrossFireX Battery PCIE2 36 1394a Intel Super I/O PCIE3 PCI Express 2.0 P55 IDE1 35 PCI2 SATAII_5_6 SATAII_3_4 SATAII_1_2 34 33 32 AUDIO CODEC CD1 HD_AUDIO1...PS2_USB_PWR1 Jumper 22 Dr. Debug (LED) 2 ATX 12V Power Connector (ATX12V1) 23 USB 2.0 Header (USB8_9, Blue) 3 1156-Pin CPU Socket 24 Intel P55 Chipset 4 Chassis Fan Connector (CHA_FAN3) 25 Front Panel IEEE 1394 Header 5 2 x 240-pin DDR3 DIMM Slots (FRONT_1394, Red) (Dual Channel: DDR3_A2,...
... LINE IN Center: FRONT Bottom: MIC IN 40 LAN PHY CPU_FAN1 P55 Extreme 39 PCIE1 38 PCI1 VIA VT6330 16Mb BIOS 37 CMOS CrossFireX Battery PCIE2 36 1394a Intel Super I/O PCIE3 PCI Express 2.0 P55 IDE1 35 PCI2 SATAII_5_6 SATAII_3_4 SATAII_1_2 34 33 32 AUDIO CODEC CD1 HD_AUDIO1...PS2_USB_PWR1 Jumper 22 Dr. Debug (LED) 2 ATX 12V Power Connector (ATX12V1) 23 USB 2.0 Header (USB8_9, Blue) 3 1156-Pin CPU Socket 24 Intel P55 Chipset 4 Chassis Fan Connector (CHA_FAN3) 25 Front Panel IEEE 1394 Header 5 2 x 240-pin DDR3 DIMM Slots (FRONT_1394, Red) (Dual Channel: DDR3_A2,...

User Manual
Page 30
... cap to clear the data in CMOS. To clear and reset the system parameters to clear the CMOS when you just finish updating the BIOS, you update the BIOS. If no jumper cap is placed on pins, the jumper is placed on pins, the jumper is "Short". The illustration shows a 3-pin jumper...
... cap to clear the data in CMOS. To clear and reset the system parameters to clear the CMOS when you just finish updating the BIOS, you update the BIOS. If no jumper cap is placed on pins, the jumper is placed on pins, the jumper is "Short". The illustration shows a 3-pin jumper...

User Manual
Page 33
B. Enter BIOS Setup Utility. Enter Windows system. Click the icon on the chassis must support HDA to enter Realtek HD Audio Manager. High Definition Audio supports Jack ...
B. Enter BIOS Setup Utility. Enter Windows system. Click the icon on the chassis must support HDA to enter Realtek HD Audio Manager. High Definition Audio supports Jack ...

User Manual
Page 38
... Check if waking up the chipset, memory and other components before memory detection. Disable CACHE before system memory is available. BIOS now executes out of the BIOS: Checkpoint Before D1 D1 D0 D2 D3 D4 D5 D6 D7 D8 D9 DA Description Early chipset initialization is done. Main...module is moved to system memory and control is necessary, control flows to it . Adjust policies and cache first 8MB. If BIOS recovery is given to BIOS POST (ExecutePOSTKernel). 38 NMI is done including RTC and keyboard controller. If memory sizing module not executed, start memory refresh and...
... Check if waking up the chipset, memory and other components before memory detection. Disable CACHE before system memory is available. BIOS now executes out of the BIOS: Checkpoint Before D1 D1 D0 D2 D3 D4 D5 D6 D7 D8 D9 DA Description Early chipset initialization is done. Main...module is moved to system memory and control is necessary, control flows to it . Adjust policies and cache first 8MB. If BIOS recovery is given to BIOS POST (ExecutePOSTKernel). 38 NMI is done including RTC and keyboard controller. If memory sizing module not executed, start memory refresh and...

User Manual
Page 39
... being done on KBC. Early CPU Init Start - Detects the presence of different Input Devices. Traps the INT09h vector, so that may occur during the BIOS pre-boot process. Initialize System Management Interrupt. Activate ADM module. 39 Initialized CMOS as system timer. Initialize status register A. Install the POSTINT1Ch handler. Traps ...is OK and CMOS checksum is bad, update CMOS with power-on POST entry and GPNV area. The following table describes the type of the BIOS: Checkpoint 03 04 05 06 08 C0 C1 C2 C5 C6 C7 0A 0B 0C 0E 13 24 30 2A 2C 2E 31 Description Disable...
... being done on KBC. Early CPU Init Start - Detects the presence of different Input Devices. Traps the INT09h vector, so that may occur during the BIOS pre-boot process. Initialize System Management Interrupt. Activate ADM module. 39 Initialized CMOS as system timer. Initialize status register A. Install the POSTINT1Ch handler. Traps ...is OK and CMOS checksum is bad, update CMOS with power-on POST entry and GPNV area. The following table describes the type of the BIOS: Checkpoint 03 04 05 06 08 C0 C1 C2 C5 C6 C7 0A 0B 0C 0E 13 24 30 2A 2C 2E 31 Description Disable...

User Manual
Page 40
...OEM specific information. 38 Initializes different devices through DIM. 39 Initializes DMAC-1 & DMAC-2. 3A Initialize RTC date/time. 3B Test for different BIOS modules. A1 Clean-up work needed . AA Uninstall POST INT1Ch vector and INT09h vector. Display total memory in the system. 3C Mid ...LOCK status and programs the KBD typematic rate. 75 Initialize Int-13 and prepare for IPL detection. 78 Initializes IPL devices controlled by BIOS and option ROMs. 7A Initializes remaining option ROMs. 7C Generate and write contents of chipset registers. 8D Build ACPI tables (if ACPI...
...OEM specific information. 38 Initializes different devices through DIM. 39 Initializes DMAC-1 & DMAC-2. 3A Initialize RTC date/time. 3B Test for different BIOS modules. A1 Clean-up work needed . AA Uninstall POST INT1Ch vector and INT09h vector. Display total memory in the system. 3C Mid ...LOCK status and programs the KBD typematic rate. 75 Initialize Int-13 and prepare for IPL detection. 78 Initializes IPL devices controlled by BIOS and option ROMs. 7A Initializes remaining option ROMs. 7C Generate and write contents of chipset registers. 8D Build ACPI tables (if ACPI...

User Manual
Page 47
A. Enter BIOS SETUP UTILITY Advanced screen B. Set the option "SATAII Operation Mode" to format and copy files [YN]? STEP 2: Make a SATA / SATAII Driver Diskette. A. WARNING! E. 2.19 Driver ... copy SATA / SATAII drivers into your optical drive to generate Serial ATA driver diskette [YN]?", press . During POST at the beginning of system boot-up BIOS. The system will lose ALL data in it! Therefore, the drivers you install can be auto-detected and listed on your SATA / SATAII HDDs with...
A. Enter BIOS SETUP UTILITY Advanced screen B. Set the option "SATAII Operation Mode" to format and copy files [YN]? STEP 2: Make a SATA / SATAII Driver Diskette. A. WARNING! E. 2.19 Driver ... copy SATA / SATAII drivers into your optical drive to generate Serial ATA driver diskette [YN]?", press . During POST at the beginning of system boot-up BIOS. The system will lose ALL data in it! Therefore, the drivers you install can be auto-detected and listed on your SATA / SATAII HDDs with...

User Manual
Page 48
... 4: Install Windows® XP / XP 64-bit OS on your system as well. 2.20.2 Setting Up a "RAID Ready" System You can also set up system BIOS as step 2 of Windows® XP / Windows® XP-64bit OS, if you want to use both "RAID Installation Guide" and "Intel Matrix Storage Manager...
... 4: Install Windows® XP / XP 64-bit OS on your system as well. 2.20.2 Setting Up a "RAID Ready" System You can also set up system BIOS as step 2 of Windows® XP / Windows® XP-64bit OS, if you want to use both "RAID Installation Guide" and "Intel Matrix Storage Manager...
User Manual
Page 50
...® VistaTM / VistaTM 64-bit optical disk into the optical drive again to set RAID configuration. Enter BIOS SETUP UTILITY Advanced screen Storage Configuration. page, please insert the ASRock Support CD into the optical drive to boot your system, and follow below steps. B. Before you start... Information If you want to use both "RAID Installation Guide" and "Intel Matrix Storage Manager Information" for proper configuration. STEP 1: Set up BIOS. 2.20.4 Installing Windows® VistaTM / VistaTM 64-bit With RAID Functions If you want to install Windows® VistaTM / VistaTM 64...
...® VistaTM / VistaTM 64-bit optical disk into the optical drive again to set RAID configuration. Enter BIOS SETUP UTILITY Advanced screen Storage Configuration. page, please insert the ASRock Support CD into the optical drive to boot your system, and follow below steps. B. Before you start... Information If you want to use both "RAID Installation Guide" and "Intel Matrix Storage Manager Information" for proper configuration. STEP 1: Set up BIOS. 2.20.4 Installing Windows® VistaTM / VistaTM 64-bit With RAID Functions If you want to install Windows® VistaTM / VistaTM 64...


