
User Manual
Page 3
... Plug Feature and Operation Guide ....... 24 2.12 Driver Installation Guide 26 2.13 Installing Windows® 7 / 7 64-bit / VistaTM / VistaTM 64-bit / XP / XP 64-bit Without RAID Functions 26 2.14 Installing Windows® 7 / 7 64-bit / VistaTM / VistaTM 64-bit / XP / XP 64-bit With RAID Functions 26 2.14.1 Installing Windows® XP / XP 64-bit With RAID Functions 26 2.14...
... Plug Feature and Operation Guide ....... 24 2.12 Driver Installation Guide 26 2.13 Installing Windows® 7 / 7 64-bit / VistaTM / VistaTM 64-bit / XP / XP 64-bit Without RAID Functions 26 2.14 Installing Windows® 7 / 7 64-bit / VistaTM / VistaTM 64-bit / XP / XP 64-bit With RAID Functions 26 2.14.1 Installing Windows® XP / XP 64-bit With RAID Functions 26 2.14...
User Manual
Page 7
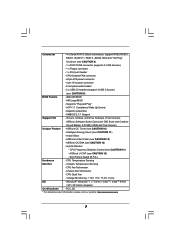
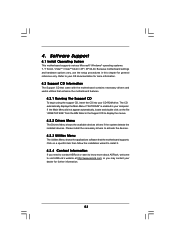
... 7 Supports "Plug and Play" - Hybrid Booster: - Chassis Fan Tachometer - Microsoft® Windows® 7 / 7 64-bit / VistaTM / VistaTM 64-bit / XP / XP 64-bit compliant Certifications - SMBIOS 2.3.1 Support Support CD - Instant Boot - CPU Fan Tachometer - Drivers, Utilities, AntiVirus Software (Trial Version), ASRock Software Suite (CyberLink DVD Suite and Creative Sound Blaster X-Fi MB) (OEM and Trial...
... 7 Supports "Plug and Play" - Hybrid Booster: - Chassis Fan Tachometer - Microsoft® Windows® 7 / 7 64-bit / VistaTM / VistaTM 64-bit / XP / XP 64-bit compliant Certifications - SMBIOS 2.3.1 Support Support CD - Instant Boot - CPU Fan Tachometer - Drivers, Utilities, AntiVirus Software (Trial Version), ASRock Software Suite (CyberLink DVD Suite and Creative Sound Blaster X-Fi MB) (OEM and Trial...
User Manual
Page 16
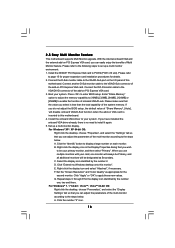
...When you wish to be designated as appropriate for details. 2. Click "Extend my Windows desktop onto this motherboard. Repeat steps C through E for the diaplay icon identified by the number 2. For Windows® XP / XP 64-bit OS: Right click the desktop, choose "Properties", and select the "Settings..." tab so that the value you have installed the onboard VGA driver already, there is less than the total capability of ...
...When you wish to be designated as appropriate for details. 2. Click "Extend my Windows desktop onto this motherboard. Repeat steps C through E for the diaplay icon identified by the number 2. For Windows® XP / XP 64-bit OS: Right click the desktop, choose "Properties", and select the "Settings..." tab so that the value you have installed the onboard VGA driver already, there is less than the total capability of ...
User Manual
Page 26
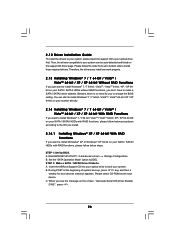
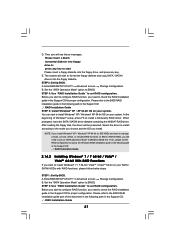
...-bit / VistaTM / VistaTM 64-bit / XP / XP 64-bit on the support CD driver page. B. A. Please follow below steps. B. Therefore, the drivers you install can start to install Windows® 7 / 7 64-bit / VistaTM / VistaTM 64-bit / XP / XP 64bit on the screen, "Generate Serial ATA driver diskette [YN]?", press . 26 Insert the ASRock Support CD into your optical drive...
...-bit / VistaTM / VistaTM 64-bit / XP / XP 64-bit on the support CD driver page. B. A. Please follow below steps. B. Therefore, the drivers you install can start to install Windows® 7 / 7 64-bit / VistaTM / VistaTM 64-bit / XP / XP 64bit on the screen, "Generate Serial ATA driver diskette [YN]?", press . 26 Insert the ASRock Support CD into your optical drive...
User Manual
Page 27
...-bit OS on your system. If you install Windows® XP / Windows® XP 64-bit on IDE HDDs and want to manage (create, convert, delete, or rebuild) RAID functions on SATA / SATAII HDDs, you want to install a third-party RAID driver. STEP 1: Set Up BIOS. NOTE. B. ... When prompted, insert the SATA / SATAII driver diskette containing the NVIDIA® RAID driver. Select the driver to install according to the mode you choose and the OS you will start to configure RAID function, you need to install Windows® XP / Windows® XP 64-bit OS on your system. D....
...-bit OS on your system. If you install Windows® XP / Windows® XP 64-bit on IDE HDDs and want to manage (create, convert, delete, or rebuild) RAID functions on SATA / SATAII HDDs, you want to install a third-party RAID driver. STEP 1: Set Up BIOS. NOTE. B. ... When prompted, insert the SATA / SATAII driver diskette containing the NVIDIA® RAID driver. Select the driver to install according to the mode you choose and the OS you will start to configure RAID function, you need to install Windows® XP / Windows® XP 64-bit OS on your system. D....
User Manual
Page 53
...; Windows® operating systems: 7 / 7 64-bit / VistaTM / VistaTM 64-bit / XP / XP 64-bit. Refer to visit ASRock's website at http://www.asrock.com; The CD automatically displays the Main Menu if "AUTORUN" is enabled in this chapter for general reference only. or you need to contact ASRock or want to display the menus. 4.2.2 Drivers Menu The Drivers...
...; Windows® operating systems: 7 / 7 64-bit / VistaTM / VistaTM 64-bit / XP / XP 64-bit. Refer to visit ASRock's website at http://www.asrock.com; The CD automatically displays the Main Menu if "AUTORUN" is enabled in this chapter for general reference only. or you need to contact ASRock or want to display the menus. 4.2.2 Drivers Menu The Drivers...
Quick Installation Guide
Page 6
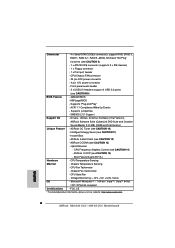
... CAUTION 14) - CPU Frequency Stepless Control (see CAUTION 13) - ASRock U-COP (see CAUTION 11) - Microsoft® Windows® 7 / 7 64-bit / VistaTM / VistaTM 64-bit / XP / XP 64-bit compliant Certifications - FCC, CE * For detailed product information, please visit our website: http://www.asrock.com English 6 ASRock N68-GS3 UCC / N68-S3 UCC Motherboard Chassis Fan Tachometer - AMI Legal BIOS - Intelligent Energy...
... CAUTION 14) - CPU Frequency Stepless Control (see CAUTION 13) - ASRock U-COP (see CAUTION 11) - Microsoft® Windows® 7 / 7 64-bit / VistaTM / VistaTM 64-bit / XP / XP 64-bit compliant Certifications - FCC, CE * For detailed product information, please visit our website: http://www.asrock.com English 6 ASRock N68-GS3 UCC / N68-S3 UCC Motherboard Chassis Fan Tachometer - AMI Legal BIOS - Intelligent Energy...
Quick Installation Guide
Page 13
...Extend my Windows desktop onto this motherboard. 4. Set the "Screen Resolution" and "Color Quality" as Secondary. G. Click the number "2" icon. 13 ASRock N68-GS3 UCC / N68-S3 UCC Motherboard English Connect the D-Sub monitor cable to your primary monitor, and then select "Primary". Install the onboard VGA driver to ...to [16MB], [32MB], [64MB], [128MB] or [256MB] to the steps below . Set up a multi monitor environment: 1. For Windows® XP / XP 64-bit OS: Right click the desktop, choose "Properties", and select the "Settings" tab so that you can adjust the parameters of...
...Extend my Windows desktop onto this motherboard. 4. Set the "Screen Resolution" and "Color Quality" as Secondary. G. Click the number "2" icon. 13 ASRock N68-GS3 UCC / N68-S3 UCC Motherboard English Connect the D-Sub monitor cable to your primary monitor, and then select "Primary". Install the onboard VGA driver to ...to [16MB], [32MB], [64MB], [128MB] or [256MB] to the steps below . Set up a multi monitor environment: 1. For Windows® XP / XP 64-bit OS: Right click the desktop, choose "Properties", and select the "Settings" tab so that you can adjust the parameters of...
Quick Installation Guide
Page 18
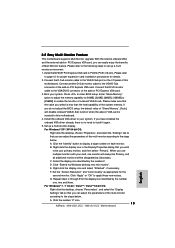
.... Besides, there is untied during overclocking, FSB enjoys better margin due to fixed PCI / PCIE buses. Therefore, the drivers you install can operate under a more stable overclocking environment. Therefore, CPU FSB is no need for detailed procedures: ..\ RAID...ASRock N68-GS3 UCC / N68-S3 UCC Motherboard You can start to install Windows® 7 / 7 64-bit / VistaTM / VistaTM 64-bit / XP / XP 64-bit on your system directly. 2.10 Installing Windows® 7 / 7 64-bit / VistaTM / VistaTM 64-bit / XP / XP 64-bit With RAID Functions If you want to install Windows® 2000 / XP / XP...
.... Besides, there is untied during overclocking, FSB enjoys better margin due to fixed PCI / PCIE buses. Therefore, the drivers you install can operate under a more stable overclocking environment. Therefore, CPU FSB is no need for detailed procedures: ..\ RAID...ASRock N68-GS3 UCC / N68-S3 UCC Motherboard You can start to install Windows® 7 / 7 64-bit / VistaTM / VistaTM 64-bit / XP / XP 64-bit on your system directly. 2.10 Installing Windows® 7 / 7 64-bit / VistaTM / VistaTM 64-bit / XP / XP 64-bit With RAID Functions If you want to install Windows® 2000 / XP / XP...
Quick Installation Guide
Page 19
... supports various Microsoft® Windows® operating systems: 7 / 7 64-bit / VistaTM / VistaTM 64-bit / XP / XP 64-bit. BIOS Information The... Flash Memory on the file "ASSETUP.EXE" from the "BIN" folder in the Support CD to enter BIOS Setup utility; If you start up the computer, please press during the Power-On-Self-Test (POST) to display the menus. 19 ASRock N68-GS3 UCC / N68-S3 UCC... choices. otherwise, POST continues with the motherboard contains necessary drivers and useful utilities that will display the Main Menu automatically ...
... supports various Microsoft® Windows® operating systems: 7 / 7 64-bit / VistaTM / VistaTM 64-bit / XP / XP 64-bit. BIOS Information The... Flash Memory on the file "ASSETUP.EXE" from the "BIN" folder in the Support CD to enter BIOS Setup utility; If you start up the computer, please press during the Power-On-Self-Test (POST) to display the menus. 19 ASRock N68-GS3 UCC / N68-S3 UCC... choices. otherwise, POST continues with the motherboard contains necessary drivers and useful utilities that will display the Main Menu automatically ...
RAID Installation Guide
Page 5
...driver diskette. When you see these messages, Please insert a blank formatted diskette into floppy drive A: press any key. Enter BIOS SETUP UTILITY Advanced screen Storage Configuration. Insert the ASRock Support CD into the floppy drive, and press any key to start to configure RAID function, you need to install Windows® XP / XP... SATA / SATAII HDDs with RAID functions, please follow below procedures according to the OS you install. 1.3.1 Installing Windows® XP / XP 64-bit With RAID Functions If you want to check the RAID installation guide in the Support CD: .. ...
...driver diskette. When you see these messages, Please insert a blank formatted diskette into floppy drive A: press any key. Enter BIOS SETUP UTILITY Advanced screen Storage Configuration. Insert the ASRock Support CD into the floppy drive, and press any key to start to configure RAID function, you need to install Windows® XP / XP... SATA / SATAII HDDs with RAID functions, please follow below procedures according to the OS you install. 1.3.1 Installing Windows® XP / XP 64-bit With RAID Functions If you want to check the RAID installation guide in the Support CD: .. ...
RAID Installation Guide
Page 6
...choose and the OS you install Windows® XP / XP 64-bit on IDE HDDs and want to manage (create, convert, delete, or rebuild) RAID functions on your system. After reading the floppy disk, the driver will be presented. Select the driver to install according to install ...a third-party RAID driver. When prompted, insert the SATA / SATAII driver diskette containing the NVIDIA® RAID driver. You can start to install Windows® XP / XP 64-bit OS on your system....
...choose and the OS you install Windows® XP / XP 64-bit on IDE HDDs and want to manage (create, convert, delete, or rebuild) RAID functions on your system. After reading the floppy disk, the driver will be presented. Select the driver to install according to install ...a third-party RAID driver. When prompted, insert the SATA / SATAII driver diskette containing the NVIDIA® RAID driver. You can start to install Windows® XP / XP 64-bit OS on your system....
RAID Installation Guide
Page 11
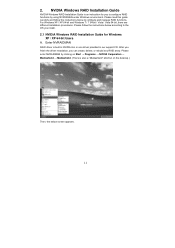
Please follow the instructions below to the OS you install. 2.1 NVIDIA Windows RAID Installation Guide for you can create, delete, or rebuild any RAID array. Enter NVRAIDMAN RAID driver is an instruction for Windows XP / XP 64-bit Users A. 2. For Windows XP / XP 64-bit and Windows 7 / 7 64-bit / Vista / Vista 64-bit, there are different installation procedures. Please enter...
Please follow the instructions below to the OS you install. 2.1 NVIDIA Windows RAID Installation Guide for you can create, delete, or rebuild any RAID array. Enter NVRAIDMAN RAID driver is an instruction for Windows XP / XP 64-bit Users A. 2. For Windows XP / XP 64-bit and Windows 7 / 7 64-bit / Vista / Vista 64-bit, there are different installation procedures. Please enter...


