User Manual
Page 4
3 UEFI SETUP UTILITY 28 3.1 Introduction 28 3.1.1 UEFI Menu Bar 28 3.1.2 Navigation Keys 29 3.2 Main Screen 29 3.3 OC Tweaker Screen 30 3.4 Advanced Screen 32 3.4.1 CPU Configuration 33 3.4.2 North Bridge Configuration 34 3.4.3 South Bridge Configuration 35 3.4.4 Storage Con&#...
3 UEFI SETUP UTILITY 28 3.1 Introduction 28 3.1.1 UEFI Menu Bar 28 3.1.2 Navigation Keys 29 3.2 Main Screen 29 3.3 OC Tweaker Screen 30 3.4 Advanced Screen 32 3.4.1 CPU Configuration 33 3.4.2 North Bridge Configuration 34 3.4.3 South Bridge Configuration 35 3.4.4 Storage Con&#...
User Manual
Page 28
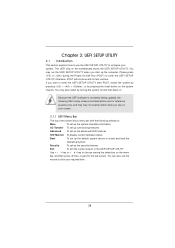
... see on the system chassis. Because the UEFI software is constantly being updated, the following selections: Main To set up the system time/date information OC Tweaker To set up overclocking features Advanced To set up the advanced UEFI features H/W Monitor To display current hardware status Boot To set up the...
... see on the system chassis. Because the UEFI software is constantly being updated, the following selections: Main To set up the system time/date information OC Tweaker To set up overclocking features Advanced To set up the advanced UEFI features H/W Monitor To display current hardware status Boot To set up the...

User Manual
Page 30
... is [Auto]. The default is [Auto]. The default is selected, the motherboard will detect the memory module(s) inserted and assigns appropriate frequency automatically. 3.3 OC Tweaker Screen In the OC Tweaker screen, you can set up overclocking features. Bank Interleaving Interleaving allows memory accesses to change CAS# Latency (tCL) Auto/Manual setting. RAS...
... is [Auto]. The default is [Auto]. The default is selected, the motherboard will detect the memory module(s) inserted and assigns appropriate frequency automatically. 3.3 OC Tweaker Screen In the OC Tweaker screen, you can set up overclocking features. Bank Interleaving Interleaving allows memory accesses to change CAS# Latency (tCL) Auto/Manual setting. RAS...