User Manual
Page 3
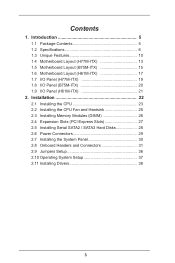
... 30 2.8 Onboard Headers and Connectors 31 2.9 Jumpers Setup 36 2.10 Operating System Setup 37 2.11 Installing Drivers 38 3 Introduction 5 1.1 Package Contents 5 1.2 Specifications 6 1.3 Unique Features 10 1.4 Motherboard Layout (H77M-ITX 13 1.5 Motherboard Layout (B75M-ITX 15 1.6 Motherboard Layout (H61M-ITX 17 1.7 I/O Panel (H77M-ITX 19 1.8 I/O Panel (B75M-ITX 20 1.9 I/O Panel (H61M...
... 30 2.8 Onboard Headers and Connectors 31 2.9 Jumpers Setup 36 2.10 Operating System Setup 37 2.11 Installing Drivers 38 3 Introduction 5 1.1 Package Contents 5 1.2 Specifications 6 1.3 Unique Features 10 1.4 Motherboard Layout (H77M-ITX 13 1.5 Motherboard Layout (B75M-ITX 15 1.6 Motherboard Layout (H61M-ITX 17 1.7 I/O Panel (H77M-ITX 19 1.8 I/O Panel (B75M-ITX 20 1.9 I/O Panel (H61M...

User Manual
Page 5
.... You may find the latest VGA cards and CPU support list on ASRock's website. Chapter 2 provides step by step installation instructions. www.asrock.com/support/index.asp 1.1 Package Contents ASRock H77TM-ITX / B75TM-ITX / H61TM-ITX Motherboard (Thin Mini-ITX Form Factor: 6.7-in x 6.7-in, 17.0 cm x 17.0 cm) ASRock H77TM-ITX / B75TM-ITX / H61TM-ITX Quick Installation Guide ASRock H77TM-ITX / B75TM-ITX / H61TM-ITX Support CD 1 x I/O Panel Shield 5 1.
.... You may find the latest VGA cards and CPU support list on ASRock's website. Chapter 2 provides step by step installation instructions. www.asrock.com/support/index.asp 1.1 Package Contents ASRock H77TM-ITX / B75TM-ITX / H61TM-ITX Motherboard (Thin Mini-ITX Form Factor: 6.7-in x 6.7-in, 17.0 cm x 17.0 cm) ASRock H77TM-ITX / B75TM-ITX / H61TM-ITX Quick Installation Guide ASRock H77TM-ITX / B75TM-ITX / H61TM-ITX Support CD 1 x I/O Panel Shield 5 1.
User Manual
Page 22
... order to avoid damage from static electricity to the motherboard's components, NEVER place your chassis to you install the motherboard, study the configuration of the following precautions before installing or removing the motherboard. Whenever you handle the components. 3. When placing ...Pre-installation Precautions Take note of your motherboard directly on a grounded anti-static pad or in the bag that the motherboard fits into it. Make sure to motherboard components. 2. Chapter 2: Installation This is a Thin Mini-ITX form factor motherboard. Hold components by the edges and...
... order to avoid damage from static electricity to the motherboard's components, NEVER place your chassis to you install the motherboard, study the configuration of the following precautions before installing or removing the motherboard. Whenever you handle the components. 3. When placing ...Pre-installation Precautions Take note of your motherboard directly on a grounded anti-static pad or in the bag that the motherboard fits into it. Make sure to motherboard components. 2. Chapter 2: Installation This is a Thin Mini-ITX form factor motherboard. Hold components by the edges and...

