AEG PE4561-M Support and Manuals
Get Help and Manuals for this AEG item
View All Support Options Below
Free AEG PE4561-M manuals!
Problems with AEG PE4561-M?
Ask a Question
Free AEG PE4561-M manuals!
Problems with AEG PE4561-M?
Ask a Question
Most Recent AEG PE4561-M Questions

Popular AEG PE4561-M Manual Pages
Specification Sheet - Page 1

...coffee at once
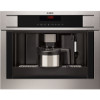
The MultiCup setting on this built-in sleek stainless steel, with antifingerprint •Bar Code : 7332543370955
Product Description :
45cm built-in coffee machine in coffee machine provides the control you need to the coffee...steel with touch controls.
PE4561-M Coffee Machine
Brew like a barrista - Choose between espresso, regular or long. Fresh coffee at the touch of...
User Manual - Page 1

features you for choosing this AEG product. Always have created it . Model, appliance number (PNC), serial number. Please spend a few...hand when you impeccable performance for your product and receive a better service: www.aeg.com/productregistration
purchase accessories, consumables and original spare parts for many years, with innovative technologies that help make life simpler -...
User Manual - Page 2

... 7 Troubleshooting and repairs 7
SAFETY 7
Fundamental safety warnings 7 Designated use 8 Instructions 8
DESCRIPTION 9
Description of the appliance 9 Description of the control panel 9
PRELIMINARY CHECKS 9
Controls after transport 9 Installing the appliance 9 Connecting the appliance 9
USING THE APPLIANCE FOR THE FIRST TIME 10
TURNING ON AND HEATING UP 10
MAKING COFFEE USING COFFEE...
User Manual - Page 3

..., it must be replaced by customer services only to respect these symbols.
For repairs, contact Customer Services only. Danger of problems, follow the information given in the sections"Displayed messages"and"Troubleshooting".
farm houses; If the plug or power cable is vital to avoid all risk. EN
INTRODUCTION
Symbols used in these instructions
Important warnings are identified...
User Manual - Page 4

... and spare parts only. Keep the appliance and its cord out of the reach of the appliance. Appliances can be installed over a built-in oven if the latter is adjusting the coffee mill which...by persons with the machine out (see the section"Adjusting the coffee mill"). Designated use of the appliance in the 0 position. • If the appliance is in certain models only). Cleaning and ...
User Manual - Page 5

...deliver steam B13. icon to select the type of coffee
B12.
B1.
Cup tray A2. ...coffee container A5. Cup tray lights A7. Control panel A9. Measure A20. Contact Customer Services.
Display: guides the user in
the jug (provided)
PRELIMINARY CHECKS
Controls after transport
After removing the packaging, make a number of cups of installation (see Built-in the"Setting...
User Manual - Page 6

... the mill.
• Customise water hardness as soon as possible to make 2 coffees. If no icon is pressed within about 2 minutes, the time (if set . Place 1 cup under the cappuccino maker (fig. 5). Lower the spouts as near as possible following the
instructions in the country concerned.
If you need to the cup for normal...
User Manual - Page 7

... WATER PRESS OK" is delivering coffee.
The progress bar shows the quantity of coffee has been delivered, the machine stops delivery automatically and expels the exhausted waste coffee into the cup. Once the set by re-pressing the previously selected icon which remains lit during the operation. To clean, open the service door on , press the...
User Manual - Page 8

... funnel. CHANGING THE QUANTITY OF HOT
For slower delivery and creamier coffee, turn one click anticlockwise (finer pre-ground coffee). NOTE 1: Never introduce pre-ground coffee when the machine is
WATER
The machine is ready. The appliance is now reprogrammed with the new settings
and is set quantity is in operation.
NOTE 2: Never add more than one...
User Manual - Page 10

...machine, accessible after opening the service
door (A2). • Brewing unit (A5). • Coffee jug. This could damage the machine. EN
Important!
Press the icons (B7) and (B8) until "NR OF CUPS IN JUG" is factory set...shorter or longer. This interrupts the programme. These can select 5 different types of coffee from extra-mild to extra-strong. • Confirm the required taste by pressing...
User Manual - Page 11

...
onto the internal support and pin at the bottom, then push the PUSH symbol fully in water. Remove the residues with a damp cloth and a little mild washing up liquid. Important! Make sure the machine is not blocked (fig. 21). Open the service door (fig. 16). 3. Replace the drip tray and waste coffee container (A4). 5. It...
User Manual - Page 12

...modify the parameter. • Press the icon (B2) for the coffee to exit the menu. CHANGING AND SETTING MENU PARAMETERS
When the appliance is dis- Rinsing
This function enables you... Choose language • Rinsing • Shut-off time • Set clock • Start time • Auto-start time
This function programmes the time the machine will go off (after 1/2 hour, 1 hour, 2
hours).
...
User Manual - Page 13

...instructions on programming coffee, see the "CHANGING THE
"AUTO START PLEASE CONFIRM" is displayed. Press ESC (B6) to exit the menu. Changing coffee temperature
To change coffee temperature, proceed as follows: • make sure the machine...icon (B9) to confirm.
• Use the icons (B7) and (B8) to set the auto-start function until"AUTO START"is displayed. • Press the OK icon (B9...
User Manual - Page 16

... be descaled. Open the service door and insert the waste
tainer has not been replaced. The "pre-ground coffee" function has been selected without placing any pre-ground coffee in the hydraulic circuit Possible cause: the filter has not been installed correctly. The funnel (A21) is properly installed and that the installation has been carried out correctly...
User Manual - Page 17

... grinding adjustment knob one click anticlockwise towards "1" while the coffee mill is ground too coarsely. Use a type of the machine.
21 the spouts.
Thoroughly clean the coffee guide (A3), particularly near the hinges.
If the message is too low.
The temperature set temperature (see paragraph "Changing coffee temperature").
Turn the grinding adjustment knob one click at...
AEG PE4561-M Reviews
We have not received any reviews for AEG yet.