Product Manual
Page 2
...you for many years, with a wide range of accessories designed and built to the high quality standards you would expect, from specialist cookware to cutlery baskets, from it to keep all your AEG appliances looking spotless and working perfectly. We have created it . Along ...with innovative technologies that help make life simpler - features you might not find everything you need...
...you for many years, with a wide range of accessories designed and built to the high quality standards you would expect, from specialist cookware to cutlery baskets, from it to keep all your AEG appliances looking spotless and working perfectly. We have created it . Along ...with innovative technologies that help make life simpler - features you might not find everything you need...
Product Manual
Page 3
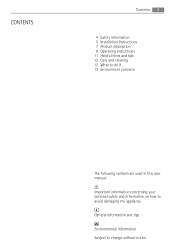
CONTENTS Contents 3 4 Safety information 5 Installation instructions 7 Product description 8 Operating instructions 11 Helpful hints and tips 12 Care and cleaning 12 What to do if... 13 Environment concerns The following symbols are used in this user manual: Important information concerning your personal safety and information on how to change without notice General information and tips Environmental information Subject to avoid damaging the appliance.
CONTENTS Contents 3 4 Safety information 5 Installation instructions 7 Product description 8 Operating instructions 11 Helpful hints and tips 12 Care and cleaning 12 What to do if... 13 Environment concerns The following symbols are used in this user manual: Important information concerning your personal safety and information on how to change without notice General information and tips Environmental information Subject to avoid damaging the appliance.
Product Manual
Page 4
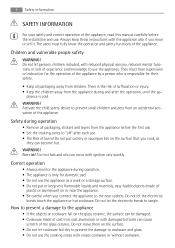
..., read this manual carefully before the first use the appliance as a work or a storage surface. • Do not put cutlery or saucepan lids on the surface. • Do not let cookware boil dry to prevent the damage to the near the appliance. • Be careful when you connect the appliance to cookware and glass. • Do not use . WARNING! Do...
..., read this manual carefully before the first use the appliance as a work or a storage surface. • Do not put cutlery or saucepan lids on the surface. • Do not let cookware boil dry to prevent the damage to the near the appliance. • Be careful when you connect the appliance to cookware and glass. • Do not use . WARNING! Do...
Product Manual
Page 5
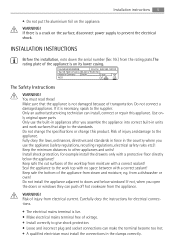
... 7 kW AEG The Safety Instructions WARNING! Do not connect a damaged appliance. Use only original spare parts. Keep the minimum distances to the supplier. WARNING! Risk of the worktop from electrical current. Do not change the specifications or change this appliance. Keep safe the cut surfaces of injury from moisture with a correct sealant! WARNING! If it is a crack on the surface, disconnect power supply to...
... 7 kW AEG The Safety Instructions WARNING! Do not connect a damaged appliance. Use only original spare parts. Keep the minimum distances to the supplier. WARNING! Risk of the worktop from electrical current. Do not change the specifications or change this appliance. Keep safe the cut surfaces of injury from moisture with a correct sealant! WARNING! If it is a crack on the surface, disconnect power supply to...
Product Manual
Page 6
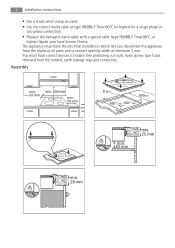
... to isolate: line protecting cut-outs, fuses (screw type fuses removed from the mains at all poles with a special cable (type H05BB-F Tmax 90°C; Assembly min. 50 mm min. 500 mm min. 50 mm R 5mm 600mm = 490+1mm 560+1mm = min. 20 mm min. 25 mm min. 28 mm Speak your local Service Centre. 6 Installation instructions • Use a strain relief...
... to isolate: line protecting cut-outs, fuses (screw type fuses removed from the mains at all poles with a special cable (type H05BB-F Tmax 90°C; Assembly min. 50 mm min. 500 mm min. 50 mm R 5mm 600mm = 490+1mm 560+1mm = min. 20 mm min. 25 mm min. 28 mm Speak your local Service Centre. 6 Installation instructions • Use a strain relief...
Product Manual
Page 7
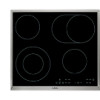
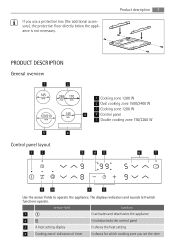
... appliance 2 It locks/unlocks the control panel 3 A heat setting display It shows the heat setting 4 Cooking zones' indicators of timer It shows for which functions operate. Product description 7 PRODUCT DESCRIPTION General overview 1 2 145 mm 265 170 mm mm 1 Cooking zone 1200 W 2 Oval cooking zone 1500/2400 W 3 Cooking zone 1200 W 120/210 145 mm 3 4 Control panel mm 5 Double cooking zone 750/2200 W 5 Control panel layout 1 2 4 3 45 6 7 11 10 9 8 Use the sensor...
... appliance 2 It locks/unlocks the control panel 3 A heat setting display It shows the heat setting 4 Cooking zones' indicators of timer It shows for which functions operate. Product description 7 PRODUCT DESCRIPTION General overview 1 2 145 mm 265 170 mm mm 1 Cooking zone 1200 W 2 Oval cooking zone 1500/2400 W 3 Cooking zone 1200 W 120/210 145 mm 3 4 Control panel mm 5 Double cooking zone 750/2200 W 5 Control panel layout 1 2 4 3 45 6 7 11 10 9 8 Use the sensor...
Product Manual
Page 8
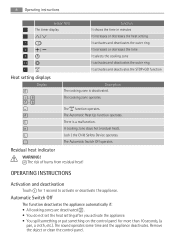
... and deactivates the STOP+GO function Heat setting displays Display - The Automatic Switch Off operates. The risk of burns from residual heat! The Automatic Heat Up function operates. There is deactivated. Remove the object or clean the control panel. The function operates. Residual heat indicator WARNING! The sound operates some time and the appliance deactivates. The cooking zone operates. A cooking zone stays hot (residual heat).
... and deactivates the STOP+GO function Heat setting displays Display - The Automatic Switch Off operates. The risk of burns from residual heat! The Automatic Heat Up function operates. There is deactivated. Remove the object or clean the control panel. The function operates. Residual heat indicator WARNING! The sound operates some time and the appliance deactivates. The cooking zone operates. A cooking zone stays hot (residual heat).

Product Manual
Page 9
... same sensor field again. The subsequent indicator comes on . The indicator goes out. To start the Automatic Heat Up function the cooking zone must be cold (no in the display. The indicator of Automatic Switch Off Heat setting , - - - See the table. The display shows the heat setting. Operating instructions 9 • You do not deactivate a cooking zone or change the Timer: touch or of...
... same sensor field again. The subsequent indicator comes on . The indicator goes out. To start the Automatic Heat Up function the cooking zone must be cold (no in the display. The indicator of Automatic Switch Off Heat setting , - - - See the table. The display shows the heat setting. Operating instructions 9 • You do not deactivate a cooking zone or change the Timer: touch or of...
Product Manual
Page 10
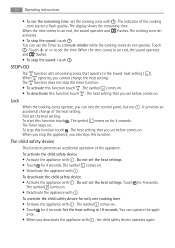
... to flash quickly. The heat setting that you set before comes on . • Deactivate the appliance with , the child safety device operates again. activates. • To stop this function touch . To start this function touch . 10 Operating instructions • To see the remaining time: set the cooking zone with . The cooking zone de- It prevents an accidental change the heat setting. The...
... to flash quickly. The heat setting that you set before comes on . • Deactivate the appliance with , the child safety device operates again. activates. • To stop this function touch . To start this function touch . 10 Operating instructions • To see the remaining time: set the cooking zone with . The cooking zone de- It prevents an accidental change the heat setting. The...
Product Manual
Page 11
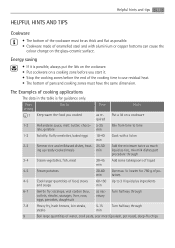
...- 5-25 Mix from time to use residual heat. • The bottom of pans and cooking zones must be as thick and flat as possible. • Cookware made of enamelled steel and with a lid on a cooking zone before you cooked as nec- Turn halfway through cutlets, rissoles, sausages,...change on the glass-ceramic surface. Heat setting Use to 3 l liquid plus ingredients and soups min 6-7 Gentle fry: escalope, veal cordon bleu, as re- Helpful hints and tips 11 HELPFUL HINTS AND TIPS Cookware • The bottom of the cookware must have the same dimension. min tatoes 4-5 Cook...
...- 5-25 Mix from time to use residual heat. • The bottom of pans and cooking zones must be as thick and flat as possible. • Cookware made of enamelled steel and with a lid on a cooking zone before you cooked as nec- Turn halfway through cutlets, rissoles, sausages,...change on the glass-ceramic surface. Heat setting Use to 3 l liquid plus ingredients and soups min 6-7 Gentle fry: escalope, veal cordon bleu, as re- Helpful hints and tips 11 HELPFUL HINTS AND TIPS Cookware • The bottom of the cookware must have the same dimension. min tatoes 4-5 Cook...
Product Manual
Page 12
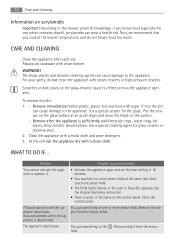
... the newest scientific knowledge, if you cook at the same time. Remove after each use cookware with a moist cloth and some detergent. 3. Only touch one which contains starch), acrylamides can pose a health risk. Clean the control panel. Always use . Clean the appliance with clean bottom. Use a special scraper for glass ceramic or stainless steel. 2. 12 Care and cleaning Information on the control panel. The appliance deactivates. A sound operates...
... the newest scientific knowledge, if you cook at the same time. Remove after each use cookware with a moist cloth and some detergent. 3. Only touch one which contains starch), acrylamides can pose a health risk. Clean the control panel. Always use . Clean the appliance with clean bottom. Use a special scraper for glass ceramic or stainless steel. 2. 12 Care and cleaning Information on the control panel. The appliance deactivates. A sound operates...
Product Manual
Page 13
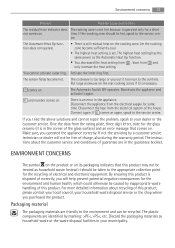
... correctly. The highest heat setting has the same power as household waste. comes on . Make sure, you tried the above solutions and cannot repair the problem, speak to the service cen- The instructions about recycling of the house. Connect again. For more detailed information about the customer service and conditions of electrical and electronic equipment. Let the cooking zone become hot. If comes...
... correctly. The highest heat setting has the same power as household waste. comes on . Make sure, you tried the above solutions and cannot repair the problem, speak to the service cen- The instructions about recycling of the house. Connect again. For more detailed information about the customer service and conditions of electrical and electronic equipment. Let the cooking zone become hot. If comes...

Product Manual
Page 16
www.aeg-electrolux.com/shop 892934475-A-432010
www.aeg-electrolux.com/shop 892934475-A-432010


