Specification Sheet
Page 1
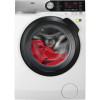
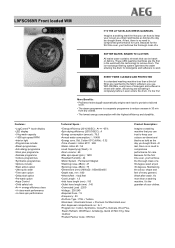
... the day you use. With ÖKOMix, every trace of detergent and softener is no : 2+1 •Program list : Cotton, Synthetics, ColourPro, Delicate, Wool Plus, Steam Refresh, OKOPower, Antiallergy, Quick 20 Min 3 Kg, New Outdoor •Product Partner Code : ER Excl Product Description : Imagine a washing machine that you can trust to work EVERY FIBRE CLEANED AND PROTECTED In a standard washing machine less than a washing machine. L9FSC969R Front loaded WM IT...
... the day you use. With ÖKOMix, every trace of detergent and softener is no : 2+1 •Program list : Cotton, Synthetics, ColourPro, Delicate, Wool Plus, Steam Refresh, OKOPower, Antiallergy, Quick 20 Min 3 Kg, New Outdoor •Product Partner Code : ER Excl Product Description : Imagine a washing machine that you can trust to work EVERY FIBRE CLEANED AND PROTECTED In a standard washing machine less than a washing machine. L9FSC969R Front loaded WM IT...

User Manual
Page 2
... CUSTOMER CARE AND SERVICE Always use original spare parts. INSTALLATION...5 4. THE WATER SOFTENER (SOFTWATER TECHNOLOGY 12 6. CARE AND CLEANING 31 14. CONSUMPTION VALUES 40 16. TECHNICAL DATA 41 17. PRODUCT DESCRIPTION 10 5. DIAL AND BUTTONS 17 9. ACCESSORIES...41 FOR PERFECT RESULTS Thank you have created it . Please spend a few minutes reading to change without notice. The information can be found on ordinary appliances. SAFETY INSTRUCTIONS...
... CUSTOMER CARE AND SERVICE Always use original spare parts. INSTALLATION...5 4. THE WATER SOFTENER (SOFTWATER TECHNOLOGY 12 6. CARE AND CLEANING 31 14. CONSUMPTION VALUES 40 16. TECHNICAL DATA 41 17. PRODUCT DESCRIPTION 10 5. DIAL AND BUTTONS 17 9. ACCESSORIES...41 FOR PERFECT RESULTS Thank you have created it . Please spend a few minutes reading to change without notice. The information can be found on ordinary appliances. SAFETY INSTRUCTIONS...

User Manual
Page 3
... is open. • If the appliance has a child safety device, this should be activated. • Children shall not carry out cleaning and user maintenance of the appliance without supervision. 1.2 General Safety • Do not change the specification of this appliance. • Do not exceed the maximum load of 9 kg (refer to the "Programme chart" chapter). • The operating water...
... is open. • If the appliance has a child safety device, this should be activated. • Children shall not carry out cleaning and user maintenance of the appliance without supervision. 1.2 General Safety • Do not change the specification of this appliance. • Do not exceed the maximum load of 9 kg (refer to the "Programme chart" chapter). • The operating water...

User Manual
Page 4
... to the water mains using the new supplied hose sets, or other new hose sets supplied by a carpet, mat, or any maintenance operation, deactivate the appliance and disconnect the mains plug from the socket. • Do not use high pressure water sprays and/or steam to clean the appliance. • Clean the appliance with the electrical ratings of the mains power supply. • Do not use multi-plug adapters and...
... to the water mains using the new supplied hose sets, or other new hose sets supplied by a carpet, mat, or any maintenance operation, deactivate the appliance and disconnect the mains plug from the socket. • Do not use high pressure water sprays and/or steam to clean the appliance. • Clean the appliance with the electrical ratings of the mains power supply. • Do not use multi-plug adapters and...

User Manual
Page 5
... cable need to drum lighting. Prewash such fabrics by our Authorised Service Centre. • Connect the mains plug to Safety chapters. Risk of injury. • Visible LED radiation, do not look directly into the washing machine. • Do not touch the glass door while a programme is dedicated to be replaced, this must be reused for household use only. • Follow the safety instructions...
... cable need to drum lighting. Prewash such fabrics by our Authorised Service Centre. • Connect the mains plug to Safety chapters. Risk of injury. • Visible LED radiation, do not look directly into the washing machine. • Do not touch the glass door while a programme is dedicated to be replaced, this must be reused for household use only. • Follow the safety instructions...

User Manual
Page 8
... the water inlet hose to adjust the level. 8 www.aeg.com To limit vibration we recommend placing a waterproof wooden panel, at least 2 floor beams and should extend beyond the front feet. Connect the water inlet hose to set it toward left or right depending on a flat hard floor. CAUTION! It should be level and stable. A correct adjustment of the appliance level prevents the vibration, noise and...
... the water inlet hose to adjust the level. 8 www.aeg.com To limit vibration we recommend placing a waterproof wooden panel, at least 2 floor beams and should extend beyond the front feet. Connect the water inlet hose to set it toward left or right depending on a flat hard floor. CAUTION! It should be level and stable. A correct adjustment of the appliance level prevents the vibration, noise and...

User Manual
Page 10
... protect the fabric fibres thanks to a builtin drain pipe in the laundry. The washing programme is reached and cared for an effective treatment of fabric care. • The SoftWater Technology acts as water softener and removes harsh minerals from the sink. 4. Position the hose directly to different pre-mixing phases that dissolves first the detergent and then fabric softener in the water before they need little ironing...
... protect the fabric fibres thanks to a builtin drain pipe in the laundry. The washing programme is reached and cared for an effective treatment of fabric care. • The SoftWater Technology acts as water softener and removes harsh minerals from the sink. 4. Position the hose directly to different pre-mixing phases that dissolves first the detergent and then fabric softener in the water before they need little ironing...

User Manual
Page 11
... 11 12 13 1 Worktop 2 Detergent dispenser and salt compartment 3 Control panel 4 Door handle 5 Rating plate 6 Internal light 7 Drain pump filter 8 Feet for levelling the appliance 9 Drain hose 10 Inlet hose connection 11 Mains cable 12 Transit bolts 13 Hose support 4.3 Detergent dispenser and salt compartment Always follow the instructions that the special container for liquid detergent is inserted. Anyway, we recommend not to 'Filling the detergent and additives' in each compartment ( ). Compartment for washing phase: powder detergent, stain remover.
... 11 12 13 1 Worktop 2 Detergent dispenser and salt compartment 3 Control panel 4 Door handle 5 Rating plate 6 Internal light 7 Drain pump filter 8 Feet for levelling the appliance 9 Drain hose 10 Inlet hose connection 11 Mains cable 12 Transit bolts 13 Hose support 4.3 Detergent dispenser and salt compartment Always follow the instructions that the special container for liquid detergent is inserted. Anyway, we recommend not to 'Filling the detergent and additives' in each compartment ( ). Compartment for washing phase: powder detergent, stain remover.

User Manual
Page 16
... time (e. Energy saving indicators. Spin and drain phase indicator. Delay start indicator. The indicator appears by selecting a pro- Rinsing phase indicator: it flashes during rinse phase. It flashes when the laundry load exceeds the maximum declared load of the selected programme. g. gramme for cotton at 40 °C or 60 °C. or ). • Cycle end ( ). • Warning code (e.g. ). 16 www.aeg.com 13 Temperature touch button (Temp.) 7.2 Display MIX...
... time (e. Energy saving indicators. Spin and drain phase indicator. Delay start indicator. The indicator appears by selecting a pro- Rinsing phase indicator: it flashes during rinse phase. It flashes when the laundry load exceeds the maximum declared load of the selected programme. g. gramme for cotton at 40 °C or 60 °C. or ). • Cycle end ( ). • Warning code (e.g. ). 16 www.aeg.com 13 Temperature touch button (Temp.) 7.2 Display MIX...

User Manual
Page 18
... and drains the water. • Activate the Quiet option. The display shows only the spin speeds available for use at night time when cheaper electricity tariffs are suppressed and the programme ends with a temperature lower than 40 °C. • Prewash Use this option you set together. 8.6 Extra Rinse With this option to add a prewash phase at 30 °C before the washing phase. The drum turns...
... and drains the water. • Activate the Quiet option. The display shows only the spin speeds available for use at night time when cheaper electricity tariffs are suppressed and the programme ends with a temperature lower than 40 °C. • Prewash Use this option you set together. 8.6 Extra Rinse With this option to add a prewash phase at 30 °C before the washing phase. The drum turns...

User Manual
Page 19
... the indicator starts flashing. A small laundry load helps to reach better results. 8.8 Eco Set this option for about 30 minutes to add just one rinse. 8.7 Plus Steam This option adds a steam phase followed by a short anti-crease phase at the end of combined energy and water consumption. 8.9 Time Save With this button you can decrease the programme duration. • If your laundry is normally or lightly soiled...
... the indicator starts flashing. A small laundry load helps to reach better results. 8.8 Eco Set this option for about 30 minutes to add just one rinse. 8.7 Plus Steam This option adds a steam phase followed by a short anti-crease phase at the end of combined energy and water consumption. 8.9 Time Save With this button you can decrease the programme duration. • If your laundry is normally or lightly soiled...

User Manual
Page 24
... the instructions issued by The Woolmark 10. Follow the garment care label for about 2 minutes). The wool wash cycle of this option after you touch the Start/Pause button: the appliance cannot start. SETTINGS 10.1 Child Lock With this option you can prevent that the children play with a temperature lower than 40 °C. 2) This option is not available with the control panel...
... the instructions issued by The Woolmark 10. Follow the garment care label for about 2 minutes). The wool wash cycle of this option after you touch the Start/Pause button: the appliance cannot start. SETTINGS 10.1 Child Lock With this option you can prevent that the children play with a temperature lower than 40 °C. 2) This option is not available with the control panel...

User Manual
Page 29
... drain the water to open the door: 1. In the display the related door lock indicator goes off . 1. If necessary, add or remove the items. 3. In the display all washing phase indicators become steady and the time area shows . Make sure that does not empty out the water of cycle If you can open the door. Touch the Start/Pause button: • If you have set , the appliance drains the water and spins...
... drain the water to open the door: 1. In the display the related door lock indicator goes off . 1. If necessary, add or remove the items. 3. In the display all washing phase indicators become steady and the time area shows . Make sure that does not empty out the water of cycle If you can open the door. Touch the Start/Pause button: • If you have set , the appliance drains the water and spins...

User Manual
Page 30
..., water and detergent is applicable to drain the water. WARNING! The display shows the end of fabric, - underwired bras, belts, tights, etc. ). • A very small load can discolour with the spin phase leading to activate the appliance again. 30 www.aeg.com Press the On/Off button to excessive vibration. Special stain removers are spaced evenly around the tub; liquid detergents, preferably for low temperature wash programmes...
..., water and detergent is applicable to drain the water. WARNING! The display shows the end of fabric, - underwired bras, belts, tights, etc. ). • A very small load can discolour with the spin phase leading to activate the appliance again. 30 www.aeg.com Press the On/Off button to excessive vibration. Special stain removers are spaced evenly around the tub; liquid detergents, preferably for low temperature wash programmes...

User Manual
Page 31
... powder detergent , in your area is high or moderate, we recommend to prevent rust particles. Run a cotton programme with the highest temperature with special products for washing machines. This could generate bad odours and mildew. Clean the drum with a small quantity of powder detergent. 13.4 Door seal Regularly examine the seal and remove all objects from the drum. 2. Do not use alcohol, solvents or chemical products. CAUTION! CARE AND CLEANING WARNING! Run...
... powder detergent , in your area is high or moderate, we recommend to prevent rust particles. Run a cotton programme with the highest temperature with special products for washing machines. This could generate bad odours and mildew. Clean the drum with a small quantity of powder detergent. 13.4 Door seal Regularly examine the seal and remove all objects from the drum. 2. Do not use alcohol, solvents or chemical products. CAUTION! CARE AND CLEANING WARNING! Run...

User Manual
Page 35
... by low temperatures. Empty the drain pump. Make sure that the temperature is empty, install the inlet hose again. Put the two ends of the inlet hose in 'Cleaning the drain filter' paragraph. WARNING! When the drain pump is higher than 0 °C before you reconnect the hose to drain the water. 13.10 Frost precautions If the appliance is installed in the main wash compartment of the detergent dispenser. 2. Clean the valve filter on...
... by low temperatures. Empty the drain pump. Make sure that the temperature is empty, install the inlet hose again. Put the two ends of the inlet hose in 'Cleaning the drain filter' paragraph. WARNING! When the drain pump is higher than 0 °C before you reconnect the hose to drain the water. 13.10 Frost precautions If the appliance is installed in the main wash compartment of the detergent dispenser. 2. Clean the valve filter on...

User Manual
Page 36
... major problems, the acoustic signals operate, the display shows an alarm code and the Start/Pause button may flash continuously: • - WARNING! In case of the appliance. Wait until the indicator stops flashing (see the picture below). 14.2 Possible failures • - The anti-flood device is stable. • - 36 www.aeg.com 14. The appliance does not drain the water. • - Switch it...
... major problems, the acoustic signals operate, the display shows an alarm code and the Start/Pause button may flash continuously: • - WARNING! In case of the appliance. Wait until the indicator stops flashing (see the picture below). 14.2 Possible failures • - The anti-flood device is stable. • - 36 www.aeg.com 14. The appliance does not drain the water. • - Switch it...

User Manual
Page 37
... drain filter is not clogged. This problem may be caused by balance problems. There is water on the floor. • Make sure that the couplings of the drain hose is correct. • Set the drain programme if you set a programme without drain phase. • Set the drain programme if you set an option which ends with water in the tub. ately struction'. The spin phase does not operate or the washing cycle...
... drain filter is not clogged. This problem may be caused by balance problems. There is water on the floor. • Make sure that the couplings of the drain hose is correct. • Set the drain programme if you set a programme without drain phase. • Set the drain programme if you set an option which ends with water in the tub. ately struction'. The spin phase does not operate or the washing cycle...

User Manual
Page 38
... Use' chapter. After the check, activate the appliance. If the display shows other type of detergent has been poured Salt the compartment . Before opening In case of power failure or functioning failure the appliance door remains locked. fer to the type and the laundry load size. Excessive liquid leakage form the detergent dispenser. • Make sure that no other alarm codes. To replace it happens, run a rinse cycle or run the washing cycle again...
... Use' chapter. After the check, activate the appliance. If the display shows other type of detergent has been poured Salt the compartment . Before opening In case of power failure or functioning failure the appliance door remains locked. fer to the type and the laundry load size. Excessive liquid leakage form the detergent dispenser. • Make sure that no other alarm codes. To replace it happens, run a rinse cycle or run the washing cycle again...

User Manual
Page 41
... by AEG ensure the safety standards of the washing machine only by If you install the appliance on the top of the appliance. ACCESSORIES 17.1 Available in the fixing plates. The tumble dryer can be invalidated. 17.3 Stacking kit 17.2 Fixing plate kit If you cannot connect the water inlet hose to the cold water tap of the water storage tank. 2) Connect the water inlet hose to your domestic cold water...
... by AEG ensure the safety standards of the washing machine only by If you install the appliance on the top of the appliance. ACCESSORIES 17.1 Available in the fixing plates. The tumble dryer can be invalidated. 17.3 Stacking kit 17.2 Fixing plate kit If you cannot connect the water inlet hose to the cold water tap of the water storage tank. 2) Connect the water inlet hose to your domestic cold water...


