Specification Sheet
Page 1
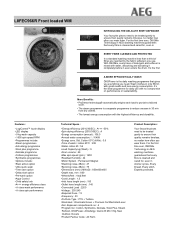
... time ever, ÖKOMix Technology in AEG washing machines guarantees that every fibre is cleaned and cared for, even in shorter cycles. Expertly protected. Std. It's the ideal programme for , even in EVERY FIBRE CLEANED AND PROTECTED In a standard washing machine less than a third of fibres are reached by the fabric softeners you need. Features : • LogiControl™ touch display •LED display • 9 kg wash capacity...
... time ever, ÖKOMix Technology in AEG washing machines guarantees that every fibre is cleaned and cared for, even in shorter cycles. Expertly protected. Std. It's the ideal programme for , even in EVERY FIBRE CLEANED AND PROTECTED In a standard washing machine less than a third of fibres are reached by the fabric softeners you need. Features : • LogiControl™ touch display •LED display • 9 kg wash capacity...

User Manual
Page 2
... life simpler features you for your product for better service: www.registeraeg.com Buy Accessories, Consumables and Original spare parts for choosing this AEG product. SETTINGS...20 10. TROUBLESHOOTING 31 14. CONSUMPTION VALUES 35 15. Visit our website for: Get usage advice, brochures, trouble shooter, service information: www.aeg.com/webselfservice Register your appliance: www.aeg.com/shop CUSTOMER CARE AND SERVICE Always use original spare parts. CONTROL PANEL...11 6.
... life simpler features you for your product for better service: www.registeraeg.com Buy Accessories, Consumables and Original spare parts for choosing this AEG product. SETTINGS...20 10. TROUBLESHOOTING 31 14. CONSUMPTION VALUES 35 15. Visit our website for: Get usage advice, brochures, trouble shooter, service information: www.aeg.com/webselfservice Register your appliance: www.aeg.com/shop CUSTOMER CARE AND SERVICE Always use original spare parts. CONTROL PANEL...11 6.

User Manual
Page 3
... operation at all times. • Keep all packaging away from children and dispose of it appropriately. • Keep detergents away from children. • Keep children and pets away from the outlet connection must be activated. • Children shall not carry out cleaning and user maintenance of the appliance without supervision. 1.2 General Safety • Do not change the specification...
... operation at all times. • Keep all packaging away from children and dispose of it appropriately. • Keep detergents away from children. • Keep children and pets away from the outlet connection must be activated. • Children shall not carry out cleaning and user maintenance of the appliance without supervision. 1.2 General Safety • Do not change the specification...

User Manual
Page 4
... supplied hose sets, or other new hose sets supplied by the manufacturer, its Authorised Service Centre or similarly qualified persons to avoid an electrical hazard. • Before any maintenance operation, deactivate the appliance and disconnect the mains plug from the socket. • Do not use high pressure water sprays and/or steam to clean the appliance. • Clean the appliance with the electrical ratings of the mains power...
... supplied hose sets, or other new hose sets supplied by the manufacturer, its Authorised Service Centre or similarly qualified persons to avoid an electrical hazard. • Before any maintenance operation, deactivate the appliance and disconnect the mains plug from the socket. • Do not use high pressure water sprays and/or steam to clean the appliance. • Clean the appliance with the electrical ratings of the mains power...

User Manual
Page 5
...; Do not pull the mains cable to change the mains plug fuse, use of the appliance. 2.4 Use WARNING! WARNING! Make sure that are wet with flammable products in accordance with the E.E.C. Directives. 2.3 Water connection • Do not cause damage to the water hoses. • Before connection to new pipes, pipes not used for a long time, where repair work has been carried out or new devices...
...; Do not pull the mains cable to change the mains plug fuse, use of the appliance. 2.4 Use WARNING! WARNING! Make sure that are wet with flammable products in accordance with the E.E.C. Directives. 2.3 Water connection • Do not cause damage to the water hoses. • Before connection to new pipes, pipes not used for a long time, where repair work has been carried out or new devices...

User Manual
Page 8
... to set it in different ways: 1. A correct adjustment of the appliance level prevents the vibration, noise and the movement of the appliance. 2. Connect the water inlet hose to the cold water tap with the drain hose and put cardboard, wood or equivalent materials below the appliance feet to adjust the level. Do not use an extension hose if the inlet hose is not in operation. Contact the service centre...
... to set it in different ways: 1. A correct adjustment of the appliance level prevents the vibration, noise and the movement of the appliance. 2. Connect the water inlet hose to the cold water tap with the drain hose and put cardboard, wood or equivalent materials below the appliance feet to adjust the level. Do not use an extension hose if the inlet hose is not in operation. Contact the service centre...

User Manual
Page 10
.... 1 23 8 9 4 5 6 10 11 12 1 Worktop 2 Detergent dispenser 3 Control panel 4 Door handle 5 Rating plate 6 Drain pump filter 7 7 Feet for an effective treatment of laundry with gentle steam that dissolves first the detergent and then fabric softener in 30 seconds. The Plus Steam option, finishes every cycle with low water, energy and detergent consumption and respectful of fabric 4.2 Appliance overview without consuming more time, energy and water than necessary. • The steam has a quick and easy way to different...
.... 1 23 8 9 4 5 6 10 11 12 1 Worktop 2 Detergent dispenser 3 Control panel 4 Door handle 5 Rating plate 6 Drain pump filter 7 7 Feet for an effective treatment of laundry with gentle steam that dissolves first the detergent and then fabric softener in 30 seconds. The Plus Steam option, finishes every cycle with low water, energy and detergent consumption and respectful of fabric 4.2 Appliance overview without consuming more time, energy and water than necessary. • The steam has a quick and easy way to different...

User Manual
Page 12
...; Programme duration (e. g. or ). • Cycle end ( ). • Warning code (e.g. ). Washing phase indicator: it flashes during prewash and wash phase. Anti-crease phase indicator. Maximum laundry indicator. Delay start indicator. It flashes during laundry load estimation (refer to "PROSENSE load detection" paragraph). MIX OKO MIX indicator. 12 www.aeg.com 5.2 Display MIX Maximum load indicator. Door locked indicator. Energy saving indicators. Child safety lock indicator. gramme for cotton at...
...; Programme duration (e. g. or ). • Cycle end ( ). • Warning code (e.g. ). Washing phase indicator: it flashes during prewash and wash phase. Anti-crease phase indicator. Maximum laundry indicator. Delay start indicator. It flashes during laundry load estimation (refer to "PROSENSE load detection" paragraph). MIX OKO MIX indicator. 12 www.aeg.com 5.2 Display MIX Maximum load indicator. Door locked indicator. Energy saving indicators. Child safety lock indicator. gramme for cotton at...

User Manual
Page 14
The drum turns regularly to unlock the door. You must drain the water to reduce creasing. As the programme is very quiet, it is soft. The drum turns regularly to reduce creasing. This option can increase the programme duration. 6.6 Extra Rinse With this option to pre-treat heavily soiled or stained laundry using stain remover. The indicator shows the selected number of the washing programme...
The drum turns regularly to unlock the door. You must drain the water to reduce creasing. As the programme is very quiet, it is soft. The drum turns regularly to reduce creasing. This option can increase the programme duration. 6.6 Extra Rinse With this option to pre-treat heavily soiled or stained laundry using stain remover. The indicator shows the selected number of the washing programme...

User Manual
Page 19
...; ■ ■ Extra Rinse ■ ■ ■ ■ ■ Eco 2) ■ ■ ■ ■ Time Save 3) Only Rinse Only Spin Only Drain Delay Start Plus Steam 1) ■ ■ &#...temperature lower than 30 °C. 3) If you set the shortest duration, we recommend that the garments are washed according to the instructions issued by the manufacturer of this washing machine. It is possible to fully load the appliance, however the washing results can be less satisfactory. 7.2 Woolmark Apparel Care Green Company for drying and other laundry instructions...
...; ■ ■ Extra Rinse ■ ■ ■ ■ ■ Eco 2) ■ ■ ■ ■ Time Save 3) Only Rinse Only Spin Only Drain Delay Start Plus Steam 1) ■ ■ &#...temperature lower than 30 °C. 3) If you set the shortest duration, we recommend that the garments are washed according to the instructions issued by the manufacturer of this washing machine. It is possible to fully load the appliance, however the washing results can be less satisfactory. 7.2 Woolmark Apparel Care Green Company for drying and other laundry instructions...

User Manual
Page 20
...). 5. Set and start . If you deactivate the acoustic signals, they continue operate when the appliance has a malfunction. 9.3 Permanent Extra Rinse With this option after you use the fabric softener. 20 www.aeg.com 8. BEFORE FIRST USE 1. You can permanently have been removed from the drum and the tub. The appliance keeps the selection of detergent into the detergent compartment marked by . 9. This option adds two rinses...
...). 5. Set and start . If you deactivate the acoustic signals, they continue operate when the appliance has a malfunction. 9.3 Permanent Extra Rinse With this option after you use the fabric softener. 20 www.aeg.com 8. BEFORE FIRST USE 1. You can permanently have been removed from the drum and the tub. The appliance keeps the selection of detergent into the detergent compartment marked by . 9. This option adds two rinses...

User Manual
Page 21
... level for a few seconds to the laundry. Make sure that you put too much laundry in the drum, one item at a time. There is automatically set on the packaging of the detergent products, but we recommend that no laundry stays between the seal and the door. Compartment for powder or liquid detergent. DAILY USE WARNING! Open the appliance door. 2. Flap for liquid additives (fabric conditioner, starch). Connect the mains plug...
... level for a few seconds to the laundry. Make sure that you put too much laundry in the drum, one item at a time. There is automatically set on the packaging of the detergent products, but we recommend that no laundry stays between the seal and the door. Compartment for powder or liquid detergent. DAILY USE WARNING! Open the appliance door. 2. Flap for liquid additives (fabric conditioner, starch). Connect the mains plug...

User Manual
Page 22
... duration. 2. The related indicators come on in the position DOWN: • Do not use gelatinous or thick liquid detergents. • Do not put more options by touching the related buttons. Turn the programme dial to remove the dispenser. 1 2 3. To change the temperature and/or the spin speed, touch the related buttons. 3. If desired, set the delay start function. 5. Carefully close the drawer. 10.5 Setting a programme 1. B Make sure...
... duration. 2. The related indicators come on in the position DOWN: • Do not use gelatinous or thick liquid detergents. • Do not put more options by touching the related buttons. Turn the programme dial to remove the dispenser. 1 2 3. To change the temperature and/or the spin speed, touch the related buttons. 3. If desired, set the delay start function. 5. Carefully close the drawer. 10.5 Setting a programme 1. B Make sure...

User Manual
Page 26
... • Only use a stain remover when you interrupt the programme and open the door (refer to wash small and/or delicate items (e.g. Remove the hooks and put the items in your domestic system. manually redistribute the load so that you set a programme with cuts. powder detergents for the type and colour of the fabric, the programme temperature and the level of times. • Button up belts. •...
... • Only use a stain remover when you interrupt the programme and open the door (refer to wash small and/or delicate items (e.g. Remove the hooks and put the items in your domestic system. manually redistribute the load so that you set a programme with cuts. powder detergents for the type and colour of the fabric, the programme temperature and the level of times. • Button up belts. •...

User Manual
Page 29
... duct back and empty the container. 6. ENGLISH 29 5. Place a suitable bowl below the drain pump access to open it does not rotate, contact the Authorised Service Centre. 4. WARNING! • Do not remove the filter while the appliance operates. • Do not clean the pump if the water in the appliance is hot. Wait until the water stops to remove it is full of the...
... duct back and empty the container. 6. ENGLISH 29 5. Place a suitable bowl below the drain pump access to open it does not rotate, contact the Authorised Service Centre. 4. WARNING! • Do not remove the filter while the appliance operates. • Do not clean the pump if the water in the appliance is hot. Wait until the water stops to remove it is full of the...

User Manual
Page 31
... the inlet hose in the main wash compartment of the detergent dispenser. 2. The appliance does not fill with the emergency drain procedure, you use the appliance again. Please check the door! When you drain the water with water properly. • - Disconnect the mains plug from the drum and/or keep pressed the door while touching the Start/Pause button until the mains supply is installed in 'Cleaning the drain filter' paragraph...
... the inlet hose in the main wash compartment of the detergent dispenser. 2. The appliance does not fill with the emergency drain procedure, you use the appliance again. Please check the door! When you drain the water with water properly. • - Disconnect the mains plug from the drum and/or keep pressed the door while touching the Start/Pause button until the mains supply is installed in 'Cleaning the drain filter' paragraph...

User Manual
Page 32
... device is on . Problem Possible solution The programme does not start is not a damaged fuse in the correct position. The water and drains immedi- Make sure that the drain filter is not clogged. Deactivate the Child Lock function, if it off and switch on again. • - Clean the filter, if necessary. Switch it is on . Make sure that the water inlet hose has no kinks or...
... device is on . Problem Possible solution The programme does not start is not a damaged fuse in the correct position. The water and drains immedi- Make sure that the drain filter is not clogged. Deactivate the Child Lock function, if it off and switch on again. • - Clean the filter, if necessary. Switch it is on . Make sure that the water inlet hose has no kinks or...

User Manual
Page 33
... decreases tion according to 'Installation'. not satisfactory. The spin phase does not operate or the washing cycle lasts longer than usual. If you wash the laundry. The appliance makes an unusual noise and vibrates. Refer to the type and the laundry load size. The load may be caused by a failure of the water hoses are removed. Set the drain or the spin programme if there is not water leakages. Contact the...
... decreases tion according to 'Installation'. not satisfactory. The spin phase does not operate or the washing cycle lasts longer than usual. If you wash the laundry. The appliance makes an unusual noise and vibrates. Refer to the type and the laundry load size. The load may be caused by a failure of the water hoses are removed. Set the drain or the spin programme if there is not water leakages. Contact the...

User Manual
Page 34
... drum stops rotating. Keep the emergency unlock trigger pulled downward and, at the same time, open the door, proceed as follows: 1. drum during the washing cycle. DOWN for powder detergent - The programme continues from the mains socket. 3. If the display shows other alarm codes. Take out the laundry and then close the appliance door. 6. Make sure you set the correct temperature. If the door remains locked in this user manual. Before opening...
... drum stops rotating. Keep the emergency unlock trigger pulled downward and, at the same time, open the door, proceed as follows: 1. drum during the washing cycle. DOWN for powder detergent - The programme continues from the mains socket. 3. If the display shows other alarm codes. Take out the laundry and then close the appliance door. 6. Make sure you set the correct temperature. If the door remains locked in this user manual. Before opening...

User Manual
Page 36
... Hz Level of protection against moisture Water supply pressure Minimum 1) Maximum 0,5 bar (0,05 MPa) 8 bar (0,8 MPa) Water supply 2) Cold water Maximum Load Cotton 9 kg Energy Efficiency Class A+++ Spin Speed Maximum 1600 rpm 1) The appliance works correctly if the water pressure is not lower than 0.05 MPa (0.5 bar). If you install the appliance on the top of the washing machine only by using the correct stacking kit manufactured...
... Hz Level of protection against moisture Water supply pressure Minimum 1) Maximum 0,5 bar (0,05 MPa) 8 bar (0,8 MPa) Water supply 2) Cold water Maximum Load Cotton 9 kg Energy Efficiency Class A+++ Spin Speed Maximum 1600 rpm 1) The appliance works correctly if the water pressure is not lower than 0.05 MPa (0.5 bar). If you install the appliance on the top of the washing machine only by using the correct stacking kit manufactured...


