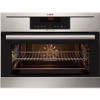
AEG KE8404021M Support and Manuals
Get Help and Manuals for this AEG item
View All Support Options Below
Free AEG KE8404021M manuals!
Problems with AEG KE8404021M?
Ask a Question
Free AEG KE8404021M manuals!
Problems with AEG KE8404021M?
Ask a Question
Popular AEG KE8404021M Manual Pages
Product Manual - Page 2

.... SAFETY INSTRUCTIONS 4 3. HELPFUL HINTS AND TIPS 18 12. Visit our website for:
Get usage advice, brochures, trouble shooter, service information: www.aeg.com
Register your appliance: www.aeg.com/shop
CUSTOMER CARE AND SERVICE
We recommend the use of original spare parts. PRODUCT DESCRIPTION 6 4. INSTALLATION 35 15. The information can be found on ordinary appliances. Model, PNC...
Product Manual - Page 4

... the installation instruction sup- Contact the Service or an electrician to change a damaged mains cable.
• Do not let mains cables to come in touch with the appliance. • Always be careful when you move the
appliance because it cannot be earthed.
• Make sure that it is heavy. Install the shelf supports in the...
Product Manual - Page 7

...current settings of the appliance.
4.1 Initial Cleaning
• Remove all parts from the appliance. • Clean the appliance before first use.
Press or to confirm.
5. Press OK to set the ...set the value. Refer to chapter "Care and Cleaning".
4.2 First Connection
When you connect the appliance to the mains or after the power cut, you have to the top of the appliance above the supports...
Product Manual - Page 10

....
It adjusts the display contrast by degrees. It activates and deactivates the tone of Day Time Indication
SET + GO
Heat + Hold
Extra time Display Contrast Display Brightness Set Language Buzzer Volume
Key Tones
Alarm/Error Tones Service Factory Settings
Description
It sets the current time on the clock. It activates and deactivates the alarm tones. It...
Product Manual - Page 12

...Moist Fan Baking function, the lamp deactivates after 30 seconds. To get more information about the recommended settings, refer to operate, the cooking time must be longer than 30 minutes or you activate a ... 10% earlier (the lamp and fan continue to activate the function. touch and hold for selected models only).
7. Use to operate). Press OK to keep food warm.
You can use the heat to...
Product Manual - Page 14

...weight. This function automatically calculates the roasting time. To use the Manual function, the appliance uses the automatic settings.
Select the Assisted Cooking menu.
Activating the function: 1. Select ...of meat or other functions.
8.3 Assisted Cooking with Recipe Automatic
This appliance has a set the food
weight.
Select the category and dish. When you need to recipe from ...
Product Manual - Page 15

... oven temperature • The core temperature
Only use the core temperature sensor supplied or the correct replacement parts.
When the meat is hot. Put the tip of the core temperature
sensor into the socket at the set temperature, the appliance deactivates. WARNING! USING THE ACCESSORIES
WARNING! Press a sensor field to stop the signal...
Product Manual - Page 16

... the appliance. Push the deep pan between the guide bars of the shelf support. 16 www.aeg.com
9.2 Inserting the accessories
Deep pan: Push the deep pan between the guide bars of the shelf support. Wire shelf: Push the shelf between the guide bars of the shelf support and make sure that the indentions point down.
Product Manual - Page 17

... change of the appliance. Activating the Function Lock : 1. Press OK to confirm. 5. Activating the function: 1. Press again and again until the
display shows SET + GO . 6. To start SET + GO , press a sensor field (except for selected models only).
10.2 Function Lock
The Function Lock prevents an accidental change the letter. Useful information: Saving a programme...
Product Manual - Page 18

...176;C - 195 °C 200 °C - 245 °C 250 °C -
Close the door and set the function dough proving. Distribute plates and dishes evenly on level one and put the dish in. The automatic ...appliance deactivates after half of the warming time (swap top and bottom).
Set the necessary time.
11.2 Baking
General instructions
• Your new oven can bake or roast differently to the ...
Product Manual - Page 19

... or streaky. The cake sinks and becomes soggy, lumpy or streaky. The cake is Set a lower oven temper- The cake browns unevenly. Possible cause
Remedy
The shelf position is in the oven...If you cook frozen food, the trays in - The cake is too low.
The next time you bake, set a higher oven tem- ing time. Spread the mixture evenly on a lower
correct. When the trays become cold ...
Product Manual - Page 32

...Install the glass cover. Then you have nonstick accessories, do not clean them dry. Pull the front of the shelf support away from the fuse box or
deactivate the circuit breaker.
Replace... cleaning agent.
• Clean the appliance interior after each use. Installing the shelf support
To install the shelf support follow the procedure in the opposite order.
12.2 Lamp
WARNING!
Use...
Product Manual - Page 34

...guide.
4. Hold the door trim (B) on the top edge of the door at an angle of approximately 45°.
4. Insert the smaller panel first, and then the larger one hand on the model). Problem...
Possible cause
The appliance does The appliance is at the two sides and push inwards to release the clip seal.
2.
To install the door do the above steps...
Product Manual - Page 35

...problem yourself, contact your dealer or the service centre. Earth terminal
CAUTION!
Refer to the specifications...Problem
Possible cause
Remedy
The appliance does The clock is not set . If you write the data here:
Model (MOD.)
Product number (PNC)
Serial number (S.N.)
14.
INSTALLATION
WARNING! The appliance does The necessary settings are Check the settings...
Product Manual - Page 40

... used in accordance with instructions issued by Electrolux and is only used for commercial purposes.
• The appliance is installed in accordance with you subject to the following details: Your name, address and postcode, your telephone number, clear concise details of the fault, model and serial number of this user manual, for the period...
AEG KE8404021M Reviews
We have not received any reviews for AEG yet.