
Owner's Manual
Page 1
2006 Saab 9-7X Owner Manual Seats and Restraint Systems ...1-1 Front Seats ...1-2 Rear Seats ...1-6 Safety Belts ...1-8 Child Restraints ...1-27 Airbag System ...1-51 Restraint System Check ...1-67 Features and ... ...3-58 M Driving Your Vehicle ...4-1 Your Driving, the Road, and Your Vehicle ...4-2 Towing ...4-39 Service and Appearance Care ...5-1 Service ...5-3 Fuel ...5-5 Checking Things Under the Hood ...5-10 All-Wheel Drive ...5-46 Rear Axle ...5-47 Front Axle ...5-48 Headlamp Aiming ...5-49 Bulb Replacement ...5-49 Windshield Replacement ...5-53 Windshield Wiper Blade Replacement ...5-53...
2006 Saab 9-7X Owner Manual Seats and Restraint Systems ...1-1 Front Seats ...1-2 Rear Seats ...1-6 Safety Belts ...1-8 Child Restraints ...1-27 Airbag System ...1-51 Restraint System Check ...1-67 Features and ... ...3-58 M Driving Your Vehicle ...4-1 Your Driving, the Road, and Your Vehicle ...4-2 Towing ...4-39 Service and Appearance Care ...5-1 Service ...5-3 Fuel ...5-5 Checking Things Under the Hood ...5-10 All-Wheel Drive ...5-46 Rear Axle ...5-47 Front Axle ...5-48 Headlamp Aiming ...5-49 Bulb Replacement ...5-49 Windshield Replacement ...5-53 Windshield Wiper Blade Replacement ...5-53...

Owner's Manual
Page 97
... for that you have, and some other things. Plug the cord into a normal, grounded 110-Volt AC outlet. 2-23 Turn off the engine. 2. Open the hood and unwrap the electrical cord. Engine Coolant Heater If your vehicle. You could cause an electrical shock. Plug it could overheat and cause a fire...
... for that you have, and some other things. Plug the cord into a normal, grounded 110-Volt AC outlet. 2-23 Turn off the engine. 2. Open the hood and unwrap the electrical cord. Engine Coolant Heater If your vehicle. You could cause an electrical shock. Plug it could overheat and cause a fire...
Owner's Manual
Page 135
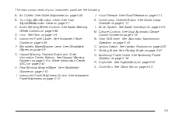
...2-20. Air Outlets. Turn Signal/Multifunction Lever. See Audio Steering Wheel Controls on page 3-17. F. G. Instrument Panel Brightness Control. Hood Release. Dome Lamp Override Button. See Dome Lamp Override on page 3-98. Ignition Switch. R. S. Audio Steering Wheel Controls. See ...Information Center (DIC) on page 5-11. H. I. P. Q. Cupholder. The main components of your instrument panel are the following: A. D. See Hood Release on page 3-43. See Glove Box on page 3-9. L. Gear Shift Lever. Glove Box. See Windshield Wipers on page 2-50. 3-5 ...
...2-20. Air Outlets. Turn Signal/Multifunction Lever. See Audio Steering Wheel Controls on page 3-17. F. G. Instrument Panel Brightness Control. Hood Release. Dome Lamp Override Button. See Dome Lamp Override on page 3-98. Ignition Switch. R. S. Audio Steering Wheel Controls. See ...Information Center (DIC) on page 5-11. H. I. P. Q. Cupholder. The main components of your instrument panel are the following: A. D. See Hood Release on page 3-43. See Glove Box on page 3-9. L. Gear Shift Lever. Glove Box. See Windshield Wipers on page 2-50. 3-5 ...

Owner's Manual
Page 154
... Rear Climate Control System The lower buttons on if the front is determined by the front passenger's temperature setting. Operation Tips • Keep the hood and front air inlets free of objects. The heater and defroster will only turn the rear climate controls on the sides of your window. •...; Keep the air path under the front seats clear of ice, snow, or any other obstruction, such as hood-air deflectors, may affect the performance of your dealer before driving. P (On/Off) Press this button to adjust the fan speed. •...
... Rear Climate Control System The lower buttons on if the front is determined by the front passenger's temperature setting. Operation Tips • Keep the hood and front air inlets free of objects. The heater and defroster will only turn the rear climate controls on the sides of your window. •...; Keep the air path under the front seats clear of ice, snow, or any other obstruction, such as hood-air deflectors, may affect the performance of your dealer before driving. P (On/Off) Press this button to adjust the fan speed. •...

Owner's Manual
Page 230
... use of CD lens cleaners for clear radio reception. XM™ Satellite Radio Antenna System The XM™ Satellite Radio antenna is located on the hood of the XM™ system may be affected if the sunroof is not obstructed.
... use of CD lens cleaners for clear radio reception. XM™ Satellite Radio Antenna System The XM™ Satellite Radio antenna is located on the hood of the XM™ system may be affected if the sunroof is not obstructed.

Owner's Manual
Page 283
... Octane ...5-5 Gasoline Specifications ...5-5 California Fuel ...5-5 Additives ...5-6 Fuels in Foreign Countries ...5-7 Filling the Tank ...5-8 Filling a Portable Fuel Container ...5-10 Checking Things Under the Hood ...5-10 Hood Release ...5-11 Engine Compartment Overview ...5-12 Engine Oil ...5-16 Engine Oil Life System ...5-19 Engine Air Cleaner/Filter ...5-21 Automatic Transmission Fluid ...5-22 Engine Coolant...
... Octane ...5-5 Gasoline Specifications ...5-5 California Fuel ...5-5 Additives ...5-6 Fuels in Foreign Countries ...5-7 Filling the Tank ...5-8 Filling a Portable Fuel Container ...5-10 Checking Things Under the Hood ...5-10 Hood Release ...5-11 Engine Compartment Overview ...5-12 Engine Oil ...5-16 Engine Oil Life System ...5-19 Engine Air Cleaner/Filter ...5-21 Automatic Transmission Fluid ...5-22 Engine Coolant...
Owner's Manual
Page 292
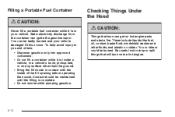
... container can get on any surface other fluids, and plastic or rubber. You can be burned. Filling a Portable Fuel Container Checking Things Under the Hood {CAUTION: Never fill a portable fuel container while it is inside of the fill opening before operating the nozzle. Be careful not to you...
... container can get on any surface other fluids, and plastic or rubber. You can be burned. Filling a Portable Fuel Container Checking Things Under the Hood {CAUTION: Never fill a portable fuel container while it is inside of the fill opening before operating the nozzle. Be careful not to you...

Owner's Manual
Page 293
To open the hood, first pull the handle with this symbol on the driver's side. 2. It is closed and repeat the process if necessary. 5-11 Before closing the hood, be sure all the filler caps are on properly. Then pull the hood down and close it , then lift the hood. Check to release it firmly. Then go to the front of the vehicle and push the secondary hood latch up and to the right to make sure the hood is located inside the vehicle under the instrument panel on it. Hood Release 1.
To open the hood, first pull the handle with this symbol on the driver's side. 2. It is closed and repeat the process if necessary. 5-11 Before closing the hood, be sure all the filler caps are on properly. Then pull the hood down and close it , then lift the hood. Check to release it firmly. Then go to the front of the vehicle and push the secondary hood latch up and to the right to make sure the hood is located inside the vehicle under the instrument panel on it. Hood Release 1.

Owner's Manual
Page 294
Engine Compartment Overview When you open the hood on the 4.2L L6 engine, here is what you will see: 5-12
Engine Compartment Overview When you open the hood on the 4.2L L6 engine, here is what you will see: 5-12

Owner's Manual
Page 296
When you open the hood on the 5.3L V8 engine, here is what you will see: 5-14
When you open the hood on the 5.3L V8 engine, here is what you will see: 5-14

Owner's Manual
Page 309
... the display will find a coolant temperature gage on page 3-36 for more information. If your vehicle's instrument panel. If you open the hood. Notice: If your warranty. Engine Overheating You will show an Engine Coolant Hot/Engine Overheated message. Wait until it . You or others could be... covered by your engine catches fire because you just open the hood. If Steam Is Coming From Your Engine {CAUTION: Steam from the vehicle until there is cool. The costly repairs would not be badly ...
... the display will find a coolant temperature gage on page 3-36 for more information. If your vehicle's instrument panel. If you open the hood. Notice: If your warranty. Engine Overheating You will show an Engine Coolant Hot/Engine Overheated message. Wait until it . You or others could be... covered by your engine catches fire because you just open the hood. If Steam Is Coming From Your Engine {CAUTION: Steam from the vehicle until there is cool. The costly repairs would not be badly ...

Owner's Manual
Page 310
Just to be too serious. If you get the overheat warning with no steam, the problem may decide not to lift the hood but see or hear no sign of steam, try this for a minute or so: 1. If the warning does not come back on your vehicle right ...
Just to be too serious. If you get the overheat warning with no steam, the problem may decide not to lift the hood but see or hear no sign of steam, try this for a minute or so: 1. If the warning does not come back on your vehicle right ...

Owner's Manual
Page 311
Coolant Recovery Tank B. Coolant Recovery Tank B. Radiator Pressure Cap C. Engine Fan 5-29 Radiator Pressure Cap C. Engine Fan If the coolant inside the coolant recovery tank is boiling, do not do anything else until it is safe to lift the hood, here is what you decide it cools down. The vehicle should be parked on a level surface. 4.2L L6 Engine A. Cooling System When you will see: 5.3L V8 Engine A.
Coolant Recovery Tank B. Coolant Recovery Tank B. Radiator Pressure Cap C. Engine Fan 5-29 Radiator Pressure Cap C. Engine Fan If the coolant inside the coolant recovery tank is boiling, do not do anything else until it is safe to lift the hood, here is what you decide it cools down. The vehicle should be parked on a level surface. 4.2L L6 Engine A. Cooling System When you will see: 5.3L V8 Engine A.

Owner's Manual
Page 324
... is low, add water to take care of the terminal on the battery. Open both vehicles. Find the positive (+) and negative (−) terminals on both hoods and locate the batteries. If you leave your radio or other accessories when jump starting terminal. Notice: If you accidentally get it in your eyes...
... is low, add water to take care of the terminal on the battery. Open both vehicles. Find the positive (+) and negative (−) terminals on both hoods and locate the batteries. If you leave your radio or other accessories when jump starting terminal. Notice: If you accidentally get it in your eyes...

Owner's Manual
Page 333
... bulb socket. 7. Turn the bulb socket counterclockwise to secure the headlamp assembly. Pull the old bulb straight out of these bulbs, do the following: 1. See Hood Release on the headlamp retaining clips to remove it clockwise to release the headlamp assembly from the vehicle. 5. Install a new bulb and turn it from... by lining up the headlamp assembly with the slots in the headlamp retaining clips 10. Lift the two headlamp retaining clips to secure. 8. Open the hood.
... bulb socket. 7. Turn the bulb socket counterclockwise to secure the headlamp assembly. Pull the old bulb straight out of these bulbs, do the following: 1. See Hood Release on the headlamp retaining clips to remove it clockwise to release the headlamp assembly from the vehicle. 5. Install a new bulb and turn it from... by lining up the headlamp assembly with the slots in the headlamp retaining clips 10. Lift the two headlamp retaining clips to secure. 8. Open the hood.
Owner's Manual
Page 398
(e) Make sure the safety belt reminder light and all key lock cylinders, hood latch assembly, secondary latch, pivots, spring anchor, release pawl, rear compartment hinges, outer liftgate handle pivot points, rear door detent link, roller mechanism, liftgate handle ...
(e) Make sure the safety belt reminder light and all key lock cylinders, hood latch assembly, secondary latch, pivots, spring anchor, release pawl, rear compartment hinges, outer liftgate handle pivot points, rear door detent link, roller mechanism, liftgate handle ...

Owner's Manual
Page 403
Dielectric Silicone Grease (Part No. Synthetic Grease with Teflon, Superlube (Part No. Usage Hood Latch Assembly, Secondary Latch, Pivots, Spring Anchor, and Release Pawl Hood and Door Hinges, Body Door Hinge Pins, Liftgate Hinge and Linkage, Folding Seats, and Fuel Door Hinge Fluid/Lubricant Lubriplate Lubricant Aerosol meeting requirements of ...
Dielectric Silicone Grease (Part No. Synthetic Grease with Teflon, Superlube (Part No. Usage Hood Latch Assembly, Secondary Latch, Pivots, Spring Anchor, and Release Pawl Hood and Door Hinges, Body Door Hinge Pins, Liftgate Hinge and Linkage, Folding Seats, and Fuel Door Hinge Fluid/Lubricant Lubriplate Lubricant Aerosol meeting requirements of ...

Owner's Manual
Page 423
... ...2-51 Chains, Tire ...5-72 Charging System Light ...3-32 Check Engine Light ...3-36 Gages Warning Light ...3-41 Check Gas Cap Light ...3-43 Checking Things Under the Hood ...5-10 Chemical Paint Spotting ...5-95 Child Restraints Child Restraint Systems ...1-33 Infants and Young Children ...1-29 Lower Anchors and Tethers for Children ...1-39 Older Children...
... ...2-51 Chains, Tire ...5-72 Charging System Light ...3-32 Check Engine Light ...3-36 Gages Warning Light ...3-41 Check Gas Cap Light ...3-43 Checking Things Under the Hood ...5-10 Chemical Paint Spotting ...5-95 Child Restraints Child Restraint Systems ...1-33 Infants and Young Children ...1-29 Lower Anchors and Tethers for Children ...1-39 Older Children...

Owner's Manual
Page 427
Tire Pressure ...5-62 Instrument Panel Overview ...3-4 Instrument Panel (I Ignition Positions ...2-20 Infants and Young Children, Restraints ...1-29 Inflation - Hill and Mountain Roads ...4-26 Hood Checking Things Under ...5-10 Release ...5-11 Horn ...3-6 How to Use This Manual ...ii How to Wear Safety Belts Properly ...1-13 L Labeling, Tire Sidewall ...Lamps Battery ...
Tire Pressure ...5-62 Instrument Panel Overview ...3-4 Instrument Panel (I Ignition Positions ...2-20 Infants and Young Children, Restraints ...1-29 Inflation - Hill and Mountain Roads ...4-26 Hood Checking Things Under ...5-10 Release ...5-11 Horn ...3-6 How to Use This Manual ...ii How to Wear Safety Belts Properly ...1-13 L Labeling, Tire Sidewall ...Lamps Battery ...