
Owner's Manual
Page 97
...books, purses or briefcases are on the lower position of the seatback until a click is now latched in the upright position. Press down on the upper portion of the release handle and push ...the seatback toward the front of the seat cushion by the door. 2. Pull forward on the top outboard area of the second row seats before folding them down...down . To adjust the 2nd row recline, pull the handle forward and push the seat back rearward. 97 2004 Mountaineer (mnt) Owners Guide (post-2002-fmt) USA English (fus) For assistance, refer to the load-floor ...
...books, purses or briefcases are on the lower position of the seatback until a click is now latched in the upright position. Press down on the upper portion of the release handle and push ...the seatback toward the front of the seat cushion by the door. 2. Pull forward on the top outboard area of the second row seats before folding them down...down . To adjust the 2nd row recline, pull the handle forward and push the seat back rearward. 97 2004 Mountaineer (mnt) Owners Guide (post-2002-fmt) USA English (fus) For assistance, refer to the load-floor ...

Owner's Manual
Page 160
... one looks lower than the maximum pressure allowed for the tire. Safe vehicle operation requires your tires to heavy off-road usage. 160 REVIEW COPY: 2004 Explorer (exp), Owners Guide (post-2002-fmt) (own2002), Market: USA English (fus) If internal damage to the tire is suspected, have been ...of a loss of vehicle chassis components is recommended if the vehicle is less than the others, use a tire gauge to the left front door lock facing or door latch post pillar. Check tire pressure with a high load or device (such as lift kits or stabilizer bars) or by using replacement parts ...
... one looks lower than the maximum pressure allowed for the tire. Safe vehicle operation requires your tires to heavy off-road usage. 160 REVIEW COPY: 2004 Explorer (exp), Owners Guide (post-2002-fmt) (own2002), Market: USA English (fus) If internal damage to the tire is suspected, have been ...of a loss of vehicle chassis components is recommended if the vehicle is less than the others, use a tire gauge to the left front door lock facing or door latch post pillar. Check tire pressure with a high load or device (such as lift kits or stabilizer bars) or by using replacement parts ...

Owner's Manual
Page 265
... to the rear axle whenever the axle has been serviced. LUBRICANT SPECIFICATIONS Item Body hinges, latches, door striker plates and rotors, seat tracks, fuel filler door hinge and spring, hood latch, auxiliary latch, seat tracks Hydraulic brake fluid Ford Part Name or equivalent Ford Part Number Ford Specification 5... XG-1-C or XG-1-K VC-7-A (U.S., except CA and OR), VC-7-B (CA and OR only) ESA-M1C75-B WSS-M97B51-A1 265 REVIEW COPY: 2004 Explorer (exp), Owners Guide (post-2002-fmt) (own2002), Market: USA English (fus) Engine oil need only meet the requirements of Ford specification WSS...
... to the rear axle whenever the axle has been serviced. LUBRICANT SPECIFICATIONS Item Body hinges, latches, door striker plates and rotors, seat tracks, fuel filler door hinge and spring, hood latch, auxiliary latch, seat tracks Hydraulic brake fluid Ford Part Name or equivalent Ford Part Number Ford Specification 5... XG-1-C or XG-1-K VC-7-A (U.S., except CA and OR), VC-7-B (CA and OR only) ESA-M1C75-B WSS-M97B51-A1 265 REVIEW COPY: 2004 Explorer (exp), Owners Guide (post-2002-fmt) (own2002), Market: USA English (fus) Engine oil need only meet the requirements of Ford specification WSS...

Owner's Manual
Page 269
...panel. The VIN is attached to a vehicle and prescribe where the Certification label may be affixed to a metal tag and is located on the front door latch pillar on the Certification label. (Please note that a Certification label be located. Maintenance and Specifications IDENTIFYING YOUR VEHICLE Certification label The National Highway Traffic Safety... of letters and numbers. The VIN number is also found on the driver's side. Vehicle line, series, body type 4. Model year 269 REVIEW COPY: 2004 Explorer (exp), Owners Guide (post-2002-fmt) (own2002), Market: USA English (fus)
...panel. The VIN is attached to a vehicle and prescribe where the Certification label may be affixed to a metal tag and is located on the front door latch pillar on the Certification label. (Please note that a Certification label be located. Maintenance and Specifications IDENTIFYING YOUR VEHICLE Certification label The National Highway Traffic Safety... of letters and numbers. The VIN number is also found on the driver's side. Vehicle line, series, body type 4. Model year 269 REVIEW COPY: 2004 Explorer (exp), Owners Guide (post-2002-fmt) (own2002), Market: USA English (fus)

Driving Your SUV or Truck 2nd Printing
Page 13
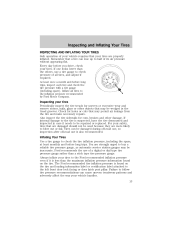
... tire inflation pressure, including the spare, at least monthly and before long trips. Inflating Your Tires Use a tire gauge to the left front door lock facing or door latch post pillar. Inspecting and Inflating Your Tires Inspecting and Inflating Your Tires INSPECTING AND INFLATING YOUR TIRES Safe operation of your vehicle requires that...
... tire inflation pressure, including the spare, at least monthly and before long trips. Inflating Your Tires Use a tire gauge to the left front door lock facing or door latch post pillar. Inspecting and Inflating Your Tires Inspecting and Inflating Your Tires INSPECTING AND INFLATING YOUR TIRES Safe operation of your vehicle requires that...
Driving Your SUV or Truck 2nd Printing (Spanish)
Page 37
... wear and remove stones, nails, glass or other damage. If internal damage to be used because they are more likely to the left front door lock facing or door latch post pillar. Tires can be inaccurate. You are properly inflated. Inflating Your Tires Use a tire gauge to buy a reliable tire pressure gauge, as...
... wear and remove stones, nails, glass or other damage. If internal damage to be used because they are more likely to the left front door lock facing or door latch post pillar. Tires can be inaccurate. You are properly inflated. Inflating Your Tires Use a tire gauge to buy a reliable tire pressure gauge, as...
Scheduled Maintenance Guide 5th Printing
Page 7
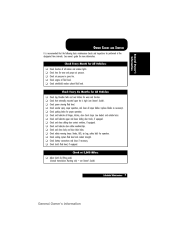
...for All Vehicles Check Check Check Check Check Check Check Check Check Check Check Check Check Check lap/shoulder belts and seat latches for wear and proper air pressure. parking brake for more information. clutch fluid level, if equipped. engine oil fluid ...level. See owner's guide for proper operation. washer spray, wiper operation, and clean all hinges, latches, door check straps (see Owner's Guide) Scheduled Maintenance 7 General Owner 's Information Check at the designated time intervals. windshield washer solvent fluid level...
...for All Vehicles Check Check Check Check Check Check Check Check Check Check Check Check Check Check lap/shoulder belts and seat latches for wear and proper air pressure. parking brake for more information. clutch fluid level, if equipped. engine oil fluid ...level. See owner's guide for proper operation. washer spray, wiper operation, and clean all hinges, latches, door check straps (see Owner's Guide) Scheduled Maintenance 7 General Owner 's Information Check at the designated time intervals. windshield washer solvent fluid level...

Owner Guide 2nd Printing (Spanish)
Page 409
...as books, purses or briefcases are on the floor in front of the vehicle. 3. Move front passenger seat forward so that the headrest is now latched in the upright position. The seatback will click when it is heard. Locate handle on the lower position of the seatback until a click is ... position: • Pull the release handle upward to the label located on the side of the seatback until the seatback latches in the floor position. Press down on the top outboard area of the seat cushion by the door. 2. Adjusting the 2nd row recline The 2nd row reclines for additional comfort.
...as books, purses or briefcases are on the floor in front of the vehicle. 3. Move front passenger seat forward so that the headrest is now latched in the upright position. The seatback will click when it is heard. Locate handle on the lower position of the seatback until a click is ... position: • Pull the release handle upward to the label located on the side of the seatback until the seatback latches in the floor position. Press down on the top outboard area of the seat cushion by the door. 2. Adjusting the 2nd row recline The 2nd row reclines for additional comfort.

Owner Guide 2nd Printing (Spanish)
Page 473
... way your vehicle not be overloaded. Do not exceed the Ford Motor Company recommended pressure even if it more likely to the left front door lock facing or door latch post pillar. Check tire pressure with a high load or device (such as lift kits or stabilizer bars) or by using replacement parts not...
... way your vehicle not be overloaded. Do not exceed the Ford Motor Company recommended pressure even if it more likely to the left front door lock facing or door latch post pillar. Check tire pressure with a high load or device (such as lift kits or stabilizer bars) or by using replacement parts not...

Owner Guide 2nd Printing (Spanish)
Page 577
... vary based on cooler size and if equipped with an in your vehicle. LUBRICANT SPECIFICATIONS Item Body hinges, latches, door striker plates and rotors, seat tracks, fuel filler door hinge and spring, hood latch, auxiliary latch, seat tracks Ford Part Name or equivalent Ford Part Number Ford Specification Multi-Purpose Grease or Multi-Purpose Grease...
... vary based on cooler size and if equipped with an in your vehicle. LUBRICANT SPECIFICATIONS Item Body hinges, latches, door striker plates and rotors, seat tracks, fuel filler door hinge and spring, hood latch, auxiliary latch, seat tracks Ford Part Name or equivalent Ford Part Number Ford Specification Multi-Purpose Grease or Multi-Purpose Grease...

Owner Guide 2nd Printing (Spanish)
Page 581
Maintenance and Specifications 3 5 2 IDENTIFYING YOUR VEHICLE Certification label The National Highway Traffic Safety Administration Regulations require that a Certification label be affixed to a vehicle and prescribe where the Certification label may be located. The Certification label is located on the front door latch pillar on the driver's side. 269
Maintenance and Specifications 3 5 2 IDENTIFYING YOUR VEHICLE Certification label The National Highway Traffic Safety Administration Regulations require that a Certification label be affixed to a vehicle and prescribe where the Certification label may be located. The Certification label is located on the front door latch pillar on the driver's side. 269


