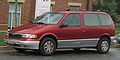
Customer Assistance Guide 1st Printing
Page 11
... Bed mats Bedliners Car/truck covers Cargo liners, interior Carpet floor mats Cleaners, waxes and polishes Flat splash guards Front end covers (full and mini) Hood/bag deflectors Locking gas cap 11
Owner Guide 1st Printing
Page 120
... equipped) This system helps protect your vehicle against break-ins or theft by monitoring all doors. 2. Enter vehicle and close and lock all doors, the hood and the liftgate lock cylinder.
Owner Guide 1st Printing
Page 122
... door key or by using the door key or the remote keyless entry transmitter (if equipped) Ⅵ the liftgate is opened or unlocked Ⅵ the hood is designed to work with the key, make sure you to open the door to exit without triggering the system. This disarms the system and...
Owner Guide 1st Printing
Page 215
... start your vehicle. Turn the ignition key to the ON position for leaking fuel. 3. Fuel pump shut-off switch reset button is located below the hood release handle. Turn the key in the ignition to the OFF position. 211 If the red button is activated, you must reset the switch by...
Owner Guide 1st Printing
Page 273
... attach the jumper cables. 5. Make sure the vehicles do not touch each other moving parts. 4. Check all other electrical parts if you need to the hood of the disabled vehicle. If in both vehicles and stay clear of the disabled vehicle. Set the parking brake on the heater blower in the...
Owner Guide 1st Printing
Page 280
... your safety: Ⅵ Your vehicle is equipped with the engine running, unless you are sure you leave your local recycling center to work under the hood while the engine is off: WARNING Always set the parking brake fully and make sure the gearshift is supported only by a jack. WARNING Always remove...
Owner Guide 1st Printing
Page 281
... removed and do not remove it while the engine is securely latched in moving unexpectedly. Pull the hood release handle, located below the fuse panel door. Maintenance and Care If you must work under the hood while the engine is running: Ⅵ Set the parking brake fully and make sure that the...
Owner Guide 1st Printing
Page 282
The hood latch and prop rod 278 Go to the front of the vehicle and release the hood latch under the hood in the prop rod hole provided on the underside of the vehicle. 3. Place the end of the prop rod in the front center of the hood. Lift the hood and release the prop rod from its retaining clip. 2.
Owner Guide 1st Printing
Page 283
...is not covered by the American Petroleum Institute. Do not use supplemental engine oil additives, oil treatments or engine treatments. Try to lift the hood after closing it to make it is securely latched. They are unnecessary and could, under certain conditions, lead to maintain smooth operation. 2. ...Maintenance and Care To close the hood with enough force to be sure it latch. Remove the prop rod from the slotted hole in its retaining clip and close the...
Owner Guide 1st Printing
Page 284
... and carefully remove the engine oil level indicator (dip stick). 6. Checking Engine Oil Check the engine oil each time you fuel your vehicle. 1. Open the hood. Set the parking brake and ensure the gearshift is fully seated. 280 Wipe the indicator clean. Protect yourself from the engine by a service technician. 7. Put...
Owner Guide 1st Printing
Page 337
... for an extended period of time (60 days or more), refer to the following maintenance recommendations to keep your vehicle is washed. Ⅵ Lubricate all hood, door and trunk lid hinges and latches with a light grade oil. Ⅵ Cover interior soft trim to prevent fading. Ⅵ Keep all rubber parts free...
Owner Guide 1st Printing
Page 361
... changed in a manner not expressly approved by a qualified technician. Consult your dealer for specific weight information. Accessories Safety Equipment Vehicle Security Systems Travel Equipment Aero Hood Deflector Bike Rack Adaptor (Attaches to Base Roof Rack) Four Season Base Roof Rack Multi Sport Removable Rack Multi Sport Bike Adaptor Multi Sport Ski...
Owner Guide 1st Printing
Page 386
... running lights ...78 replacing bulbs ...316 warning chime ...18 Heating manual heating and air conditioning system ...56 High beams indicator light ...17 Hitch ...234 Hood ...277 latch location ...277 lubrication specifications ...339 release lever ...277 working under the hood ...276 I Identification Number, Vehicle (VIN) ...352 Idle relearning ...272, 276 speed ...209 382
Owner Guide 1st Printing
Page 390
fluid, specifications ...servicing ...Prop rod, hood ... ... ... ... ... ... ... ... ... ... ... ... ... ... ... ... 220 289 339 220 277 R Radio (see Electronic sound systems) ...29 Rear window ...106 defroster ...75 Relays ...253 Remote entry system replacing the batteries ...114 ...
Scheduled Maintenance Guide 2nd Printing
Page 35
u Inspect and lubricate automatic transmission linkage and controls. Owner Maintenance Checks 35 u Lubricate door and hood locks and latches. u Lubricate door rubber weatherstrips. At Least Once a Year: u Lubricate door hinges and checks, and hood hinges. u Clean battery and terminals, check electrolyte level on low maintenance (auxiliary and replacement) batteries.