

Owners Manual
Page 6
...reliability, safety and performance. For those who plan to do their Kawasaki Motorcycle, a Service Manual is not to ride a motorcycle safely. Keep this Owner's Manual carefully before riding so that you can refer to attain awareness of your motorcycle, give it the proper care and maintenance described in this vehicle... times so that you need information. To ensure a long, trouble-free life for your motorcycle's controls, its purpose is available for purchase from any authorized Kawasaki motorcycle dealer. This manual offers many safe riding tips, but its features,...
...reliability, safety and performance. For those who plan to do their Kawasaki Motorcycle, a Service Manual is not to ride a motorcycle safely. Keep this Owner's Manual carefully before riding so that you can refer to attain awareness of your motorcycle, give it the proper care and maintenance described in this vehicle... times so that you need information. To ensure a long, trouble-free life for your motorcycle's controls, its purpose is available for purchase from any authorized Kawasaki motorcycle dealer. This manual offers many safe riding tips, but its features,...
Owners Manual
Page 8
... ...GENERAL INFORMATION ...Meter Instruments ...Speedometer: ...Digital Meter: ...Indicator Lights: ...Warning Lights:...Keys ...Ignition Switch ...Steering Lock ...Right Handlebar Switches...Engine Stop Switch: ...Starter Button: ...Left Handlebar Switches ...Dimmer Switch: ...Turn Signal Switch:...Horn Button: ...8 11 12 15 18 18 19 19 23 23 25 27 29 30 30 30 31 31 31 31 Brake Lever Adjusters...Fuel Tank Cap ...Fuel Tank ...Stand...Side Covers...Tool Kit Compartment...Seat...Windshield...Special Warning on the Use of Saddlebags...Saddlebags ...Electric Accessory Connectors ...BREAK-IN...
... ...GENERAL INFORMATION ...Meter Instruments ...Speedometer: ...Digital Meter: ...Indicator Lights: ...Warning Lights:...Keys ...Ignition Switch ...Steering Lock ...Right Handlebar Switches...Engine Stop Switch: ...Starter Button: ...Left Handlebar Switches ...Dimmer Switch: ...Turn Signal Switch:...Horn Button: ...8 11 12 15 18 18 19 19 23 23 25 27 29 30 30 30 31 31 31 31 Brake Lever Adjusters...Fuel Tank Cap ...Fuel Tank ...Stand...Side Covers...Tool Kit Compartment...Seat...Windshield...Special Warning on the Use of Saddlebags...Saddlebags ...Electric Accessory Connectors ...BREAK-IN...

Owners Manual
Page 9
... Maintenance Chart...Engine Oil ...Cooling System ...Radiator and Cooling Fan - ...Radiator Hoses -...Coolant - ...Drive Belt...Spark Plugs...Valve Clearance ...Evaporative Emission Control System (California model only) ...Kawasaki Clean Air System ... 64 65 67 69 69 72 75 77 82 91 98 98 99 99 103 103 104 105 106 Air Cleaner ...Throttle Control System ...Idle Speed ...Clutch ...Brakes ...Brake Light Switches...Rear Shock Absorbers ...Wheels ...Battery...Headlight Beam...Fuses ...General Lubrication...Cleaning Your Motorcycle ...Bolt and Nut Tightening...STORAGE ...TROUBLESHOOTING GUIDE...
... Maintenance Chart...Engine Oil ...Cooling System ...Radiator and Cooling Fan - ...Radiator Hoses -...Coolant - ...Drive Belt...Spark Plugs...Valve Clearance ...Evaporative Emission Control System (California model only) ...Kawasaki Clean Air System ... 64 65 67 69 69 72 75 77 82 91 98 98 99 99 103 103 104 105 106 Air Cleaner ...Throttle Control System ...Idle Speed ...Clutch ...Brakes ...Brake Light Switches...Rear Shock Absorbers ...Wheels ...Battery...Headlight Beam...Fuses ...General Lubrication...Cleaning Your Motorcycle ...Bolt and Nut Tightening...STORAGE ...TROUBLESHOOTING GUIDE...

Owners Manual
Page 10
8 SPECIFICATIONS SPECIFICATIONS DIMENSIONS Overall Length Overall Width Overall Height Wheelbase Road Clearance Curb Mass ENGINE Type Displacement Bore x Stroke Compression Ratio Starting System Cylinder Numbering Method Firing Order Carburetion System Ignition System Ignition Timing (Electronically advanced) 2 535 mm (99...kg (884 lb) OHV, V-type 2-cylinder, 4-stroke, liquid-cooled 2 053 cm³ (125.3 cu in.) 103 x 123.2 mm (4.06 x 4.850 in.) 9.5 : 1 Electric starter Front to rear, 1-2 1-2 Digital fuel injection system (DFI) Battery and coil (transistorized ignition) Front: 13° BTDC @900...
8 SPECIFICATIONS SPECIFICATIONS DIMENSIONS Overall Length Overall Width Overall Height Wheelbase Road Clearance Curb Mass ENGINE Type Displacement Bore x Stroke Compression Ratio Starting System Cylinder Numbering Method Firing Order Carburetion System Ignition System Ignition Timing (Electronically advanced) 2 535 mm (99...kg (884 lb) OHV, V-type 2-cylinder, 4-stroke, liquid-cooled 2 053 cm³ (125.3 cu in.) 103 x 123.2 mm (4.06 x 4.850 in.) 9.5 : 1 Electric starter Front to rear, 1-2 1-2 Digital fuel injection system (DFI) Battery and coil (transistorized ignition) Front: 13° BTDC @900...

Owners Manual
Page 16
Brake Fluid Reservoir (Rear) Fuel Tank Steering Lock Mufflers Coolant Reserve Tank Oil Level Gauge Idle Speed Adjusting Screw 41. Rear Brake Light Switch 43. Tail/Brake Light Passenger's Seat Rider's Seat Tool Kit Compartment/Tool Kit 34. Rear Brake Pedal 42. Air Cleaner Element 35. 36. 37. 38. 39. 40. 14 LOCATION OF PARTS 30. 31. 32. 33.
Brake Fluid Reservoir (Rear) Fuel Tank Steering Lock Mufflers Coolant Reserve Tank Oil Level Gauge Idle Speed Adjusting Screw 41. Rear Brake Light Switch 43. Tail/Brake Light Passenger's Seat Rider's Seat Tool Kit Compartment/Tool Kit 34. Rear Brake Pedal 42. Air Cleaner Element 35. 36. 37. 38. 39. 40. 14 LOCATION OF PARTS 30. 31. 32. 33.

Owners Manual
Page 19
... the motorcycle. Maximum Load Weight of the steering assembly and can result in an unsafe riding condition. 8. Poorly designed or installed items can be remedied under warranty. Fairings, windshields, backrests, and other large items have not adversely affected any lighting components, road clearance, banking capability (i.e., lean angle), control operation, wheel travel, front fork movement, or any other vehicle. Make sure that...
... the motorcycle. Maximum Load Weight of the steering assembly and can result in an unsafe riding condition. 8. Poorly designed or installed items can be remedied under warranty. Fairings, windshields, backrests, and other large items have not adversely affected any lighting components, road clearance, banking capability (i.e., lean angle), control operation, wheel travel, front fork movement, or any other vehicle. Make sure that...

Owners Manual
Page 23
.... żThe clock works normally from the back-up power while the ignition switch is turned off. żWhen the battery is connected. To reset a trip meter: Push the mode button to 0.0, and then starts counting NOTE • • Odometer The odometer shows the total distance in kilometers (miles) traveled since they are stopped and locked. Push the reset...
.... żThe clock works normally from the back-up power while the ignition switch is turned off. żWhen the battery is connected. To reset a trip meter: Push the mode button to 0.0, and then starts counting NOTE • • Odometer The odometer shows the total distance in kilometers (miles) traveled since they are stopped and locked. Push the reset...

Owners Manual
Page 24
....9 while running, it resets to E (empty). As the fuel level in the fuel tank exactly. When the fuel tank is turned to check the fuel level. żThe data is maintained by one by the back -up power if the ignition key is full, all the segments are displayed. Stand upright the vehicle to "OFF". NOTE When vehicle stands with Side Stand, Fuel Gauge cannot...
....9 while running, it resets to E (empty). As the fuel level in the fuel tank exactly. When the fuel tank is turned to check the fuel level. żThe data is maintained by one by the back -up power if the ignition key is full, all the segments are displayed. Stand upright the vehicle to "OFF". NOTE When vehicle stands with Side Stand, Fuel Gauge cannot...
Owners Manual
Page 25
... fuel into the fuel tank with the engine not running, and go off when the engine oil pressure is high enough. NOTE GENERAL INFORMATION 23 Indicator Lights: N: When the transmission is in the ON position with the motorcycle held horizontal, the fuel gauge may not show the most right segment on high beam, the high beam indicator light is lit. : When the turn signal indicator light starts...
... fuel into the fuel tank with the engine not running, and go off when the engine oil pressure is high enough. NOTE GENERAL INFORMATION 23 Indicator Lights: N: When the transmission is in the ON position with the motorcycle held horizontal, the fuel gauge may not show the most right segment on high beam, the high beam indicator light is lit. : When the turn signal indicator light starts...

Owners Manual
Page 30
... Engine off . Taillight and P (Park) licence plate light on . The headlight goes on when the starter button is in the ON position. To avoid battery discharge, always start the engine immediately after starting the engine. Engine off . All electrical circuits off . żThe tail, running position and license NOTE plate lights are on for a long time, the battery may become totally discharged. żBe sure to turn the ignition key...
... Engine off . Taillight and P (Park) licence plate light on . The headlight goes on when the starter button is in the ON position. To avoid battery discharge, always start the engine immediately after starting the engine. Engine off . All electrical circuits off . żThe tail, running position and license NOTE plate lights are on for a long time, the battery may become totally discharged. żBe sure to turn the ignition key...
Owners Manual
Page 55
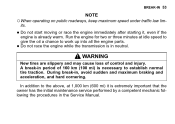
..., at idle speed to give the oil a chance to establish normal tire traction. not start moving or race the engine immediately after starting it is already warm. A break-in the Service Manual. Run the engine for two or three minutes at 1,000 km (600 mi) it , even if the • Do engine is extremely important that the owner has the initial maintenance service performed by a competent...
..., at idle speed to give the oil a chance to establish normal tire traction. not start moving or race the engine immediately after starting it is already warm. A break-in the Service Manual. Run the engine for two or three minutes at 1,000 km (600 mi) it , even if the • Do engine is extremely important that the owner has the initial maintenance service performed by a competent...

Owners Manual
Page 62
... motorcycle is equipped with a NOTE WARNING Downshifting at such a high speed that engine rpm jumps excessively. the throttle part way, while re• Open leasing the clutch lever. żThe transmission is standing still, the transmission cannot be shifted past neutral from 1st gear. The transmission will shift only into the next higher or lower gear. Downshift at the vehicle speeds shown in the table in...
... motorcycle is equipped with a NOTE WARNING Downshifting at such a high speed that engine rpm jumps excessively. the throttle part way, while re• Open leasing the clutch lever. żThe transmission is standing still, the transmission cannot be shifted past neutral from 1st gear. The transmission will shift only into the next higher or lower gear. Downshift at the vehicle speeds shown in the table in...

Owners Manual
Page 75
...², 36 psi) 290 kPa (2.90 kgf/cm², 42 psi) Install the air valve cap. No brake fluid leakage. No binding of control cables. Brakes ...Brake pad wear: Lining thickness more than 1 mm (0.04 in tank, no leaks. Electrical equipment ...All lights and horn work. Nuts, bolts, fasteners .. Engine stop switch ...Stops engine. Throttle ...Throttle grip play 2 a 3 mm (0.08 a 0.12 in .). Coolant ...No coolant leakage. SAFE OPERATION 73 Fuel ...Adequate supply in .) left.
...², 36 psi) 290 kPa (2.90 kgf/cm², 42 psi) Install the air valve cap. No brake fluid leakage. No binding of control cables. Brakes ...Brake pad wear: Lining thickness more than 1 mm (0.04 in tank, no leaks. Electrical equipment ...All lights and horn work. Nuts, bolts, fasteners .. Engine stop switch ...Stops engine. Throttle ...Throttle grip play 2 a 3 mm (0.08 a 0.12 in .). Coolant ...No coolant leakage. SAFE OPERATION 73 Fuel ...Adequate supply in .) left.

Owners Manual
Page 88
86 MAINTENANCE AND ADJUSTMENT Frequency Whichever comes first *Odometer Reading See km × 1000 ( mile × 1000) Page Operation (Chassis Items) K Brake hose installation condition - inspect Brake fluid level inspect Brake operation (effectiveness, play, drag) - inspect Brake light switch operation - inspect Suspensions: Front forks/rear shock absorber operation (damping and smooth stroke) - inspect Every year 6 month year 1 6 12 18 24 30 36 (0.6) (3.75) (7.5) (11.25) (15) (18.75) (22.5) - 116 118 119 -
86 MAINTENANCE AND ADJUSTMENT Frequency Whichever comes first *Odometer Reading See km × 1000 ( mile × 1000) Page Operation (Chassis Items) K Brake hose installation condition - inspect Brake fluid level inspect Brake operation (effectiveness, play, drag) - inspect Brake light switch operation - inspect Suspensions: Front forks/rear shock absorber operation (damping and smooth stroke) - inspect Every year 6 month year 1 6 12 18 24 30 36 (0.6) (3.75) (7.5) (11.25) (15) (18.75) (22.5) - 116 118 119 -
Owners Manual
Page 93
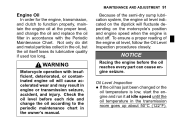
... engine speed when the engine is low, start the engine and run it at the proper level, and change the oil according to function properly, maintain the engine oil at idle speed until the oil temperature in the transmission room goes up about 50°C (122°F). NOTICE Racing the engine before each ride and change the oil and replace the oil filter in accordance with insufficient, deteriorated, or contaminated engine oil...
... engine speed when the engine is low, start the engine and run it at the proper level, and change the oil according to function properly, maintain the engine oil at idle speed until the oil temperature in the transmission room goes up about 50°C (122°F). NOTICE Racing the engine before each ride and change the oil and replace the oil filter in accordance with insufficient, deteriorated, or contaminated engine oil...

Owners Manual
Page 96
Oil Pressure Warning Light A. Clutch Cover Drain Plug B. Outer Clutch Cover Place an oil pan beneath the engine. 94 MAINTENANCE AND ADJUSTMENT Oil and/or Oil Filter Change Warm up the engine thoroughly, and then stop it. Remove the engine oil drain plug. • • • A.
Oil Pressure Warning Light A. Clutch Cover Drain Plug B. Outer Clutch Cover Place an oil pan beneath the engine. 94 MAINTENANCE AND ADJUSTMENT Oil and/or Oil Filter Change Warm up the engine thoroughly, and then stop it. Remove the engine oil drain plug. • • • A.

Owners Manual
Page 121
... your authorized Kawasaki dealer to "ON". Inspection Turn the ignition key to inspect the front brake light switch. Brake Pedal B. 10 mm (0.4 in accordance with the Periodic Maintenance Chart. The brake light should go on after about 10 mm (0.4 in.) of the rear brake • Check light switch by depressing the brake pedal. MAINTENANCE AND ADJUSTMENT 119 Brake Light Switches When either the front or rear brake is applied, the brake light goes on...
... your authorized Kawasaki dealer to "ON". Inspection Turn the ignition key to inspect the front brake light switch. Brake Pedal B. 10 mm (0.4 in accordance with the Periodic Maintenance Chart. The brake light should go on after about 10 mm (0.4 in.) of the rear brake • Check light switch by depressing the brake pedal. MAINTENANCE AND ADJUSTMENT 119 Brake Light Switches When either the front or rear brake is applied, the brake light goes on...

Owners Manual
Page 122
C. Rear Brake Light Switch Adjusting Nut Lights sooner. D. Lights later. A. NOTICE To avoid damaging the electrical connections inside the switch, be sure that the switch body does not turn during adjustment. • Adjustment To adjust the rear brake light switch, move the switch up or down by turning the adjusting nut. B. 120 MAINTENANCE AND ADJUSTMENT it does not, adjust the rear brake • If light switch.
C. Rear Brake Light Switch Adjusting Nut Lights sooner. D. Lights later. A. NOTICE To avoid damaging the electrical connections inside the switch, be sure that the switch body does not turn during adjustment. • Adjustment To adjust the rear brake light switch, move the switch up or down by turning the adjusting nut. B. 120 MAINTENANCE AND ADJUSTMENT it does not, adjust the rear brake • If light switch.

Owners Manual
Page 147
Brake Lever Pivot Bolt 17. Rear Axle Nut 18. Muffler Mounting Bolts 15. Brake Lever Holder Clamp Bolts 16. Rear Shock Absorber Mounting Nuts 21. Pivot Shaft Bolt 19. Front Axle Nut MAINTENANCE AND ADJUSTMENT 145 14. Brake Pedal Mounting Bolts 20.
Brake Lever Pivot Bolt 17. Rear Axle Nut 18. Muffler Mounting Bolts 15. Brake Lever Holder Clamp Bolts 16. Rear Shock Absorber Mounting Nuts 21. Pivot Shaft Bolt 19. Front Axle Nut MAINTENANCE AND ADJUSTMENT 145 14. Brake Pedal Mounting Bolts 20.

Owners Manual
Page 151
TROUBLESHOOTING GUIDE 149 TROUBLESHOOTING GUIDE Engine Does Not Start: Starter Motor Won't Turn Engine stop switch off Transmission not in neutral Fuse blown Battery leads do not make good electrical contact with battery terminals Battery discharged spark plug gap • Incorrect No first turning the ignition key to • "OFF" when the motorcycle falls down • Engine flooded • Spark plugs not in good contact • Spark plugs fouled or wet • • • While Riding fuel in tank •...
TROUBLESHOOTING GUIDE 149 TROUBLESHOOTING GUIDE Engine Does Not Start: Starter Motor Won't Turn Engine stop switch off Transmission not in neutral Fuse blown Battery leads do not make good electrical contact with battery terminals Battery discharged spark plug gap • Incorrect No first turning the ignition key to • "OFF" when the motorcycle falls down • Engine flooded • Spark plugs not in good contact • Spark plugs fouled or wet • • • While Riding fuel in tank •...