

Owner's Manual
Page 79
This section will help you plan to add any accessories to your Honda, you should know how to check the levels of important fluids. Break-in Period ...Gasoline ...Oxygenated Fuels ...Driving in this section first. If you . Before ...Driving Before you begin driving your car, please read the information in Foreign Countries ...Service Station Procedures . Filling the Fuel Tank ...Opening the Hood ...Fuel Economy ...Vehicle C o n d i t i o n ...Driving Habits ...Accessories ...Loading Cargo ...80 80 80 81 82 82 83 86 86 86 87 88 Before Driving You also need...
This section will help you plan to add any accessories to your Honda, you should know how to check the levels of important fluids. Break-in Period ...Gasoline ...Oxygenated Fuels ...Driving in this section first. If you . Before ...Driving Before you begin driving your car, please read the information in Foreign Countries ...Service Station Procedures . Filling the Fuel Tank ...Opening the Hood ...Fuel Economy ...Vehicle C o n d i t i o n ...Driving Habits ...Accessories ...Loading Cargo ...80 80 80 81 82 82 83 86 86 86 87 88 Before Driving You also need...

Owner's Manual
Page 83
... rod from the hole. Pull the support rod out of the dashboard. Lower the hood to Park or Neutral and set the parking brake. Shift to about a foot above...the left lower corner of its holding clip. Service Station Procedures Opening the Hood HOOD RELEASE HANDLE LATCH SUPPORT ROD CLIP 1. Slide your fingers under the left until it up slightly. 2. To close... the hood, lift it releases the hood. Before Driving The hood will pop up slightly to the right of the hood. Put the support rod back into its clip and insert ...
... rod from the hole. Pull the support rod out of the dashboard. Lower the hood to Park or Neutral and set the parking brake. Shift to about a foot above...the left lower corner of its holding clip. Service Station Procedures Opening the Hood HOOD RELEASE HANDLE LATCH SUPPORT ROD CLIP 1. Slide your fingers under the left until it up slightly. 2. To close... the hood, lift it releases the hood. Before Driving The hood will pop up slightly to the right of the hood. Put the support rod back into its clip and insert ...

Owner's Manual
Page 90
... items you may be carrying with you drive your passengers have fastened their seat belts (see page 7). 9. Turn the ignition ON (II). Check that the hood and trunk are stored properly or fastened down securely. 4. Check the adjustment of the steering wheel (see page 51). 5. Start the engine. 11. Fasten your...
... items you may be carrying with you drive your passengers have fastened their seat belts (see page 7). 9. Turn the ignition ON (II). Check that the hood and trunk are stored properly or fastened down securely. 4. Check the adjustment of the steering wheel (see page 51). 5. Start the engine. 11. Fasten your...

Owner's Manual
Page 113
... oil and filter according to used oil. 1. Drain the oil into an appropriate container. Unless you have the knowledge and proper equipment, you . Open the hood and remove the oil fill cap. The car should have this service. OIL DRAIN BOLT The oil, engine components and the exhaust system are not...
... oil and filter according to used oil. 1. Drain the oil into an appropriate container. Unless you have the knowledge and proper equipment, you . Open the hood and remove the oil fill cap. The car should have this service. OIL DRAIN BOLT The oil, engine components and the exhaust system are not...

Owner's Manual
Page 117
.... 4. When the coolant stops draining, tighten the drain plug in the engine block. Cooling System RESERVE TANK RESERVE TANK CAP DRAIN BOLT HOLDER 1. Open the hood. Remove the radiator cap. 3. Loosen the drain plug in its holder by pulling it securely. Remove the drain bolt from its holder. 5. Apply non-hardening...
.... 4. When the coolant stops draining, tighten the drain plug in the engine block. Cooling System RESERVE TANK RESERVE TANK CAP DRAIN BOLT HOLDER 1. Open the hood. Remove the radiator cap. 3. Loosen the drain plug in its holder by pulling it securely. Remove the drain bolt from its holder. 5. Apply non-hardening...

Owner's Manual
Page 140
... beam). Turn signals. License plate light. Side marker lights. When replacing a bulb, handle it with your car's exterior lights at least once a month. Open the hood. Lights Check the operation of replacement bulb is needed. Hazard light function. Remove the electrical connector from the bulb by its steel base and protect...
... beam). Turn signals. License plate light. Side marker lights. When replacing a bulb, handle it with your car's exterior lights at least once a month. Open the hood. Lights Check the operation of replacement bulb is needed. Hazard light function. Remove the electrical connector from the bulb by its steel base and protect...
Owner's Manual
Page 162
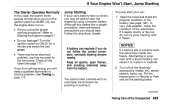
... no power to the fuel pump. If it seems slushy or like a simple procedure, there are several precautions you should take. Attempting to jump start a Honda with a frozen battery can cause it to ON (II) for a minute and watch the fuel gauge. continued Taking Care of the electrolyte. Do you will... (III), but the engine does not run down, you may be able to start your car's battery has run . Follow the directions closely. Open the hood and check the physical condition of the battery (see page 171). Keep all the fuses (see page 126 ). To jump start the engine by pushing...
... no power to the fuel pump. If it seems slushy or like a simple procedure, there are several precautions you should take. Attempting to jump start a Honda with a frozen battery can cause it to ON (II) for a minute and watch the fuel gauge. continued Taking Care of the electrolyte. Do you will... (III), but the engine does not run down, you may be able to start your car's battery has run . Follow the directions closely. Open the hood and check the physical condition of the battery (see page 171). Keep all the fuses (see page 126 ). To jump start the engine by pushing...

Owner's Manual
Page 164
... car's temperature gauge should start to cool down to overloading (climbing a long, steep hill on the hazard warning indicators. 2. Steam and spray from under the hood, turn off the climate control and all other accessories. In either case, you are driving up a long steep hill on a very hot day. If you... should take immediate action. 1. Do not open the hood if steam is due to the midpoint then continue driving. If it climbs to the side of the road. If it does, wait until the...
... car's temperature gauge should start to cool down to overloading (climbing a long, steep hill on the hazard warning indicators. 2. Steam and spray from under the hood, turn off the climate control and all other accessories. In either case, you are driving up a long steep hill on a very hot day. If you... should take immediate action. 1. Do not open the hood if steam is due to the midpoint then continue driving. If it climbs to the side of the road. If it does, wait until the...

Owner's Manual
Page 165
... the MAX mark. Run the engine and watch the temperature gauge. Wait until the pointer reaches the middle of steam or spray, then open the hood. 6. Look for any remaining pressure in the radiator reserve tank (see page 115). If the temperature stays normal, check the coolant level in the reserve...
... the MAX mark. Run the engine and watch the temperature gauge. Wait until the pointer reaches the middle of steam or spray, then open the hood. 6. Look for any remaining pressure in the radiator reserve tank (see page 115). If the temperature stays normal, check the coolant level in the reserve...

Owner's Manual
Page 166
... LIGHT Running the engine with the engine running . Taking Care of the Unexpected Safely pull off the road and shut off the engine. Open the hood and check the oil level (see page 111). 4.
... LIGHT Running the engine with the engine running . Taking Care of the Unexpected Safely pull off the road and shut off the engine. Open the hood and check the oil level (see page 111). 4.
Owner's Manual
Page 194
... Low Beams, Turning on ...39 Replacing Halogen Bulbs ...140 Turning on ...39 Heating and Cooling ...64 High Altitude, Starting a t ...92 High-Low Beam Switch ...34 Hood, Opening the ...83 Horn ...47 Index Fluids Automatic Transmission . 120, 200 Capacity ...178, 200 Brake ...122 Clutch ...123 Manual Transmission ...200 Capacity ...178, 200 Power...
... Low Beams, Turning on ...39 Replacing Halogen Bulbs ...140 Turning on ...39 Heating and Cooling ...64 High Altitude, Starting a t ...92 High-Low Beam Switch ...34 Hood, Opening the ...83 Horn ...47 Index Fluids Automatic Transmission . 120, 200 Capacity ...178, 200 Brake ...122 Clutch ...123 Manual Transmission ...200 Capacity ...178, 200 Power...

Owner's Manual
Page 196
... Items ...110 Record ...107 - 108 Schedule ...105 - 106 Malfunction Indicator Lamp (U.S.) 34 Manual T r a n s m i s s i o n ...93 Normal Shift Speeds ...94 NOTICE, Explanation o f ...ii Numbers, I d e n t i f i c a t i o n ...176 Opening the Hood ...83 Opening the Trunk ...50 Operation in Foreign Countries .. 81 Outside M i r r o r s ...55 Overheating, Engine ...165 Trunk ...50 Low Coolant Level ...115 Low Oil Pressure ...33...
... Items ...110 Record ...107 - 108 Schedule ...105 - 106 Malfunction Indicator Lamp (U.S.) 34 Manual T r a n s m i s s i o n ...93 Normal Shift Speeds ...94 NOTICE, Explanation o f ...ii Numbers, I d e n t i f i c a t i o n ...176 Opening the Hood ...83 Opening the Trunk ...50 Operation in Foreign Countries .. 81 Outside M i r r o r s ...55 Overheating, Engine ...165 Trunk ...50 Low Coolant Level ...115 Low Oil Pressure ...33...


