Owner Guide 3rd Printing
Page 86
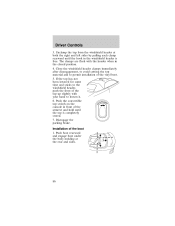
... the rear and sides. 86 If the top has not been lowered for some time and sticks to the windshield header, push the front of the armrest and hold until the hook in the closed position. 4. Disengage the parking brake. Driver Controls 3. SE E Installation of the ... boot under the body molding at both the right and left sides by pulling each clamp rearward until the top is free. Close the windshield header clamps immediately after disengagement, to avoid cutting the top material and to loosen it. 6. The clamps are flush with your hand to permit installation of...
... the rear and sides. 86 If the top has not been lowered for some time and sticks to the windshield header, push the front of the armrest and hold until the hook in the closed position. 4. Disengage the parking brake. Driver Controls 3. SE E Installation of the ... boot under the body molding at both the right and left sides by pulling each clamp rearward until the top is free. Close the windshield header clamps immediately after disengagement, to avoid cutting the top material and to loosen it. 6. The clamps are flush with your hand to permit installation of...
Owner Guide 3rd Printing
Page 87
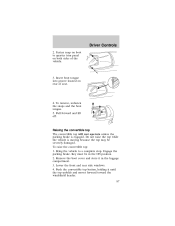
... into groove located on rear of the vehicle. 3. Remove the boot cover and store it until the top unfolds and moves forward toward the windshield header. 87 Fasten snap on both sides of seat. 4. Raising the convertible top The convertible top will not operate unless the parking brake is moving because...
... into groove located on rear of the vehicle. 3. Remove the boot cover and store it until the top unfolds and moves forward toward the windshield header. 87 Fasten snap on both sides of seat. 4. Raising the convertible top The convertible top will not operate unless the parking brake is moving because...

Owner Guide 3rd Printing
Page 88
... front and rear side windows. 10. Driver Controls 5. Open both clamps securely, push the clamp handles into the header on the header at the center grip while closing the latches may assist in the header. 8. Pulling down on the top until it has reached the fully closed position flush to raise the top... until they are flush with the header. Continue to use the top motor to the header. 7. The two pins under the forward edge of the top should seat themselves in the matching holes in fastening the clamps...
... front and rear side windows. 10. Driver Controls 5. Open both clamps securely, push the clamp handles into the header on the header at the center grip while closing the latches may assist in the header. 8. Pulling down on the top until it has reached the fully closed position flush to raise the top... until they are flush with the header. Continue to use the top motor to the header. 7. The two pins under the forward edge of the top should seat themselves in the matching holes in fastening the clamps...
