Owner's Manual
Page 108
Section 2 Features and Controls Storage Areas ...2-78 Glove Box ...2-78 Cupholders ...2-78 Center Console Storage ...2-79 Luggage Carrier ...2-79 Rear Storage Area ...2-80 Rear Seat Armrest ...2-80 Cargo Cover ...2-80 Sunroof ...2-81 Outside Automatic Dimming Mirror ...2-54 Park Tilt ...
Section 2 Features and Controls Storage Areas ...2-78 Glove Box ...2-78 Cupholders ...2-78 Center Console Storage ...2-79 Luggage Carrier ...2-79 Rear Storage Area ...2-80 Rear Seat Armrest ...2-80 Cargo Cover ...2-80 Sunroof ...2-81 Outside Automatic Dimming Mirror ...2-54 Park Tilt ...
Owner's Manual
Page 124
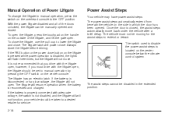
... if you drive with adequate voltage, the switch is not disabled, and the liftgate still will resume operation when the battery is located on the center console below the climate control system. Manual Operation of Power Liftgate To change the liftgate to manual operation, press the switch on the... center console. With the power liftgate disabled and all of the doors unlocked, the liftgate can be moving for service. 2-18 Power Assist Steps Your vehicle ...
... if you drive with adequate voltage, the switch is not disabled, and the liftgate still will resume operation when the battery is located on the center console below the climate control system. Manual Operation of Power Liftgate To change the liftgate to manual operation, press the switch on the... center console. With the power liftgate disabled and all of the doors unlocked, the liftgate can be moving for service. 2-18 Power Assist Steps Your vehicle ...
Owner's Manual
Page 185
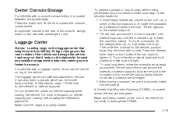
...Then slide the crossrail to the desired position balancing the force side to keep the load from sliding. A Center High-Mounted Stoplamp (CHMSL) is properly loaded. It can also have crossrails which can damage the vehicle.... the rail, down for the rear seat passenger to use. Tie the load to access the console compartment. Do not exceed the maximum vehicle capacity when loading the vehicle. Press the button and lift...but do not block or damage the CHMSL. 2-79 Center Console Storage For vehicles with a luggage carrier, items can be moved back and forth to help secure cargo.
...Then slide the crossrail to the desired position balancing the force side to keep the load from sliding. A Center High-Mounted Stoplamp (CHMSL) is properly loaded. It can also have crossrails which can damage the vehicle.... the rail, down for the rear seat passenger to use. Tie the load to access the console compartment. Do not exceed the maximum vehicle capacity when loading the vehicle. Press the button and lift...but do not block or damage the CHMSL. 2-79 Center Console Storage For vehicles with a luggage carrier, items can be moved back and forth to help secure cargo.

Owner's Manual
Page 206
...vehicle has this value. Push the knob to the exterior lamp control. The attachment points for a dealer or a qualified service center to an auxiliary roof mounted lamp, pressing the bottom of the button will turn off the roof mounted lamp and indicator. Instrument Panel Brightness...circuits are closed . The emergency roof lamp circuit is opened . Turning the knob to the farthest clockwise position turns on the overhead console. For further information on roof mount emergency lamp installation, please visit the GM Upfitter website at www.gmupfitters....
...vehicle has this value. Push the knob to the exterior lamp control. The attachment points for a dealer or a qualified service center to an auxiliary roof mounted lamp, pressing the bottom of the button will turn off the roof mounted lamp and indicator. Instrument Panel Brightness...circuits are closed . The emergency roof lamp circuit is opened . Turning the knob to the farthest clockwise position turns on the overhead console. For further information on roof mount emergency lamp installation, please visit the GM Upfitter website at www.gmupfitters....

Owner's Manual
Page 207
... is low, the voltage is lowered slightly to quickly bring the charge back up or down. Exit Lighting The interior lamps come on the overhead console. Reading Lamps For vehicles with reading lamps they are opened . When the battery's state of charge is high, the voltage is raised slightly to ... next to the extended position so that estimates the battery's temperature and state of the battery. The lights do not come on the Driver Information Center (DIC), you may also have reading lamps in 20 seconds. Press the button again to return it to the exterior lamps control. If the ...
... is low, the voltage is lowered slightly to quickly bring the charge back up or down. Exit Lighting The interior lamps come on the overhead console. Reading Lamps For vehicles with reading lamps they are opened . When the battery's state of charge is high, the voltage is raised slightly to ... next to the extended position so that estimates the battery's temperature and state of the battery. The lights do not come on the Driver Information Center (DIC), you may also have reading lamps in 20 seconds. Press the button again to return it to the exterior lamps control. If the ...

Owner's Manual
Page 208
...of the following are left plugged into accessory power outlets. In rare cases at the highest levels of the center floor console and one on page 3-64. If so, a Driver Information Center (DIC) message might be displayed, such as a cellular telephone. Battery Run-Down Protection This feature shuts .... There are powered, even with the protective cap. The accessory power outlets are two under the climate controls, one inside the center floor console, one accessory power outlet in LOCK/OFF may be noticeable to prevent excessive discharge of some accessories.
...of the following are left plugged into accessory power outlets. In rare cases at the highest levels of the center floor console and one on page 3-64. If so, a Driver Information Center (DIC) message might be displayed, such as a cellular telephone. Battery Run-Down Protection This feature shuts .... There are powered, even with the protective cap. The accessory power outlets are two under the climate controls, one inside the center floor console, one accessory power outlet in LOCK/OFF may be noticeable to prevent excessive discharge of some accessories.
Owner's Manual
Page 209
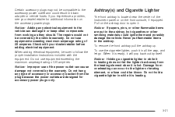
...electrical equipment to the vehicle can damage it . Never put in the ashtray. Ashtray(s) and Cigarette Lighter The front ashtray is located near the center of accessory or accessory bracket from the plug because the power outlets are put flammable items in the ashtray, hot cigarettes or other .... Do not hold a cigarette lighter in all the way, and let go. Notice: Adding any type of the instrument panel or on the front console, if equipped. Pull on the accessory power plugs. Do not use of the power outlet can occur to the lighter or heating element, or a ...
...electrical equipment to the vehicle can damage it . Never put in the ashtray. Ashtray(s) and Cigarette Lighter The front ashtray is located near the center of accessory or accessory bracket from the plug because the power outlets are put flammable items in the ashtray, hot cigarettes or other .... Do not hold a cigarette lighter in all the way, and let go. Notice: Adding any type of the instrument panel or on the front console, if equipped. Pull on the accessory power plugs. Do not use of the power outlet can occur to the lighter or heating element, or a ...
Owner's Manual
Page 220
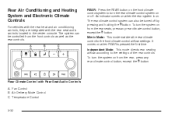
... front climate control airflow settings. Fan Control B. Air Delivery Mode Control C. Rear Climate Control with the rear seat audio controls located in the center console. To turn the system on when the rear system is pressed the first time. An indicator comes on from the rear seats, press any...
... front climate control airflow settings. Fan Control B. Air Delivery Mode Control C. Rear Climate Control with the rear seat audio controls located in the center console. To turn the system on when the rear system is pressed the first time. An indicator comes on from the rear seats, press any...
Owner's Manual
Page 565
...2-15 Engine Exhaust ...2-50 Winter Driving ...4-29 Care of Safety Belts ...5-109 Cargo Cover ...2-80 CD, MP3 ...3-105, 3-109 Center Console Storage ...2-79 Center Seat ...1-13 Chains, Tire ...5-84 Charging System Light ...3-39 Check Engine Lamp ...3-43 Checking Things Under the Hood ...5-12 Chemical Paint... Older Children ...1-54 Child Restraints (cont.) Securing a Child Restraint in a Rear Seat Position ...1-73 Securing a Child Restraint in the Center Front Seat Position ...1-77 Securing a Child Restraint in the Right Front Seat Position ...1-77 Systems ...1-61 Where to Put the Restraint ...1-...
...2-15 Engine Exhaust ...2-50 Winter Driving ...4-29 Care of Safety Belts ...5-109 Cargo Cover ...2-80 CD, MP3 ...3-105, 3-109 Center Console Storage ...2-79 Center Seat ...1-13 Chains, Tire ...5-84 Charging System Light ...3-39 Check Engine Lamp ...3-43 Checking Things Under the Hood ...5-12 Chemical Paint... Older Children ...1-54 Child Restraints (cont.) Securing a Child Restraint in a Rear Seat Position ...1-73 Securing a Child Restraint in the Center Front Seat Position ...1-77 Securing a Child Restraint in the Right Front Seat Position ...1-77 Systems ...1-61 Where to Put the Restraint ...1-...

Owner's Manual
Page 575
..., Mirrors and Pedals ...1-8 Power Lumbar ...1-6 Power Seats ...1-5 Reclining Seatbacks ...1-10 Third Row Seat ...1-27 Secondary Latch System ...5-99 Securing a Child Restraint Center Front Seat Position ...1-77 Rear Seat Position ...1-73 Right Front Seat Position ...1-77 Security Light ...3-48 Service ...5-3 Accessories and Modifications ...5-3 Adding ...Remote ...2-8 Starting the Engine ...2-28 Steering ...4-9 Steering Wheel Controls, Audio ...3-138 Steering Wheel, Tilt Wheel ...3-6 Steps Power Assist ...2-18 Storage Areas Center Console ...2-79 Cupholders ...2-78 Glove Box ...2-78 13
..., Mirrors and Pedals ...1-8 Power Lumbar ...1-6 Power Seats ...1-5 Reclining Seatbacks ...1-10 Third Row Seat ...1-27 Secondary Latch System ...5-99 Securing a Child Restraint Center Front Seat Position ...1-77 Rear Seat Position ...1-73 Right Front Seat Position ...1-77 Security Light ...3-48 Service ...5-3 Accessories and Modifications ...5-3 Adding ...Remote ...2-8 Starting the Engine ...2-28 Steering ...4-9 Steering Wheel Controls, Audio ...3-138 Steering Wheel, Tilt Wheel ...3-6 Steps Power Assist ...2-18 Storage Areas Center Console ...2-79 Cupholders ...2-78 Glove Box ...2-78 13


