Owner's Manual
Page 340
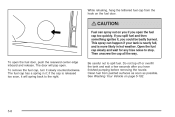
...on page 5-102. 5-8 To remove the fuel cap, turn it ; See Washing Your Vehicle on you if you have finished pumping before removing the nozzle. To open the fuel door, push the rearward center edge inboard and release. if the cap is more likely in it slowly counterclockwise. While ...refueling, hang the tethered fuel cap from painted surfaces as soon as possible. Open the fuel cap slowly and wait for any hiss noise to spill fuel....
...on page 5-102. 5-8 To remove the fuel cap, turn it ; See Washing Your Vehicle on you if you have finished pumping before removing the nozzle. To open the fuel door, push the rearward center edge inboard and release. if the cap is more likely in it slowly counterclockwise. While ...refueling, hang the tethered fuel cap from painted surfaces as soon as possible. Open the fuel cap slowly and wait for any hiss noise to spill fuel....
Owner's Manual
Page 341
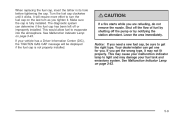
...get one for you tighten it. If your fuel tank and emissions system. This may cause your malfunction indicator lamp to turn the fuel cap on the last turn as you . Shut off the flow of fuel by shutting off or improperly installed. This would allow ... Malfunction Indicator Lamp on page 3-43. 5-9 When replacing the fuel cap, insert the tether in its hole before tightening the cap. Turn the fuel cap clockwise until it may damage your vehicle has a Driver Information Center (DIC), the TIGHTEN GAS CAP message will require more effort to light and may not fit ...
...get one for you tighten it. If your fuel tank and emissions system. This may cause your malfunction indicator lamp to turn the fuel cap on the last turn as you . Shut off the flow of fuel by shutting off or improperly installed. This would allow ... Malfunction Indicator Lamp on page 3-43. 5-9 When replacing the fuel cap, insert the tether in its hole before tightening the cap. Turn the fuel cap clockwise until it may damage your vehicle has a Driver Information Center (DIC), the TIGHTEN GAS CAP message will require more effort to light and may not fit ...

Owner's Manual
Page 343
... fully close the hood. 5-11 Before closing the hood, be sure all the filler caps are on it. Hood Release To open to within 6 inches (152 mm) from the closed position, pause, then push the front center of the hood with this symbol on properly. Pull the handle with a swift, fi...;rm motion to the front of the vehicle and locate the secondary hood release, near the center of the grille. 3.
... fully close the hood. 5-11 Before closing the hood, be sure all the filler caps are on it. Hood Release To open to within 6 inches (152 mm) from the closed position, pause, then push the front center of the hood with this symbol on properly. Pull the handle with a swift, fi...;rm motion to the front of the vehicle and locate the secondary hood release, near the center of the grille. 3.

Owner's Manual
Page 358
... a hot engine. In addition, the messages ENGINE OVERHEATED STOP ENGINE, ENGINE OVERHEATED IDLE ENGINE, or ENGINE POWER IS REDUCED could appear in the Driver Information Center (DIC) on page 3-42. Coolant contains ethylene glycol, and it . Turn it off and get everyone away from it will find a coolant ...hear steam coming from the vehicle until there is cool. Stay away from the engine if you just open the hood. When replacing the pressure cap, make sure it cools down. Wait until it is hand-tight and fully seated. See Engine Compartment Overview on page 5-12 for more ...
... a hot engine. In addition, the messages ENGINE OVERHEATED STOP ENGINE, ENGINE OVERHEATED IDLE ENGINE, or ENGINE POWER IS REDUCED could appear in the Driver Information Center (DIC) on page 3-42. Coolant contains ethylene glycol, and it . Turn it off and get everyone away from it will find a coolant ...hear steam coming from the vehicle until there is cool. Stay away from the engine if you just open the hood. When replacing the pressure cap, make sure it cools down. Wait until it is hand-tight and fully seated. See Engine Compartment Overview on page 5-12 for more ...

Owner's Manual
Page 395
...;ation pressure matches the recommended pressure on the Tire and Loading Information label. Remove the valve cap from the tire valve stem. Sustained high-speed driving causes excessive heat build up and can be ... a pressure measurement. Some high-speed rated tires require in flation pressure to put the valve caps back on the valve stems. They help prevent leaks by pushing on the metal stem in flation...end this high-speed driving, return the tires to the correct cold tire in the center of the tire valve. See Loading Your Vehicle on page 5-62. 5-63 Tire Pressure on page 4-35...
...;ation pressure matches the recommended pressure on the Tire and Loading Information label. Remove the valve cap from the tire valve stem. Sustained high-speed driving causes excessive heat build up and can be ... a pressure measurement. Some high-speed rated tires require in flation pressure to put the valve caps back on the valve stems. They help prevent leaks by pushing on the metal stem in flation...end this high-speed driving, return the tires to the correct cold tire in the center of the tire valve. See Loading Your Vehicle on page 5-62. 5-63 Tire Pressure on page 4-35...

Owner's Manual
Page 417
See Changing a Flat Tire on the wheel and gently pry the cap out. Jacking Locations (Overall View) A. Do a safety check before proceeding. To remove the center cap, place the chiseled end of the wheel wrench in the slot on page 5-79 for more information. 2. Rear Position {CAUTION: 3. Getting under a vehicle when it ...
See Changing a Flat Tire on the wheel and gently pry the cap out. Jacking Locations (Overall View) A. Do a safety check before proceeding. To remove the center cap, place the chiseled end of the wheel wrench in the slot on page 5-79 for more information. 2. Rear Position {CAUTION: 3. Getting under a vehicle when it ...

Owner's Manual
Page 421
... specification. 11. 9. Turn the wheel wrench counterclockwise to a crash. See Capacities and Specifications on the back of the cap with a torque wrench to brake pulsation and rotor damage. Tighten each wheel nut by turning the wheel wrench clockwise. {CAUTION: Incorrect or improperly...off. Notice: Improperly tightened wheel nuts can cause the wheel to get new original equipment wheel nuts. If you must also reinstall the center cap. When you reinstall the regular wheel and tire, you have the nuts tightened with the slot in the proper sequence and to tighten...
... specification. 11. 9. Turn the wheel wrench counterclockwise to a crash. See Capacities and Specifications on the back of the cap with a torque wrench to brake pulsation and rotor damage. Tighten each wheel nut by turning the wheel wrench clockwise. {CAUTION: Incorrect or improperly...off. Notice: Improperly tightened wheel nuts can cause the wheel to get new original equipment wheel nuts. If you must also reinstall the center cap. When you reinstall the regular wheel and tire, you have the nuts tightened with the slot in the proper sequence and to tighten...

Owner's Manual
Page 489
... ...1-61 Older Children ...1-50 Securing a Child Restraint in a Rear Seat Position ...1-69 Securing a Child Restraint in the Center Front Seat Position ...1-71 Securing a Child Restraint in the Right Front Seat Position ...1-72 Where to Put the Restraint ...1-...Deterrent ...2-21 Control of a Vehicle ...4-3 Convenience Net ...2-63 Coolant Engine Temperature Gage ...3-42 Heater, Engine ...2-28 Surge Tank Pressure Cap ...5-26 Cooled Seats ...1-5 Cooling System ...5-29 Cruise Control ...3-13 Cruise Control Light ...3-47 Cupholder(s) ...2-60 Customer Assistance Information Courtesy Transportation...
... ...1-61 Older Children ...1-50 Securing a Child Restraint in a Rear Seat Position ...1-69 Securing a Child Restraint in the Center Front Seat Position ...1-71 Securing a Child Restraint in the Right Front Seat Position ...1-72 Where to Put the Restraint ...1-...Deterrent ...2-21 Control of a Vehicle ...4-3 Convenience Net ...2-63 Coolant Engine Temperature Gage ...3-42 Heater, Engine ...2-28 Surge Tank Pressure Cap ...5-26 Cooled Seats ...1-5 Cooling System ...5-29 Cruise Control ...3-13 Cruise Control Light ...3-47 Cupholder(s) ...2-60 Customer Assistance Information Courtesy Transportation...