
Owner's Manual
Page 145
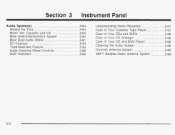
... Wheel Controls ...DVD Distortion ... Instrument Panel Understanding Radio Reception ...3.97 Care of Your Cassette Tape Player ...3-97 Care of Your CDs and DVDs ...3-98 Care of Your CD Changer ...3-98 Care of Your CD and DVD Player ...3-98 Cleaning the Video Screen ...3-99 Diversity Antenna System ...3-99 XMTMSatellite Radio Antenna System ...3-99 -3-64 .3.64...
... Wheel Controls ...DVD Distortion ... Instrument Panel Understanding Radio Reception ...3.97 Care of Your Cassette Tape Player ...3-97 Care of Your CDs and DVDs ...3-98 Care of Your CD Changer ...3-98 Care of Your CD and DVD Player ...3-98 Cleaning the Video Screen ...3-99 Diversity Antenna System ...3-99 XMTMSatellite Radio Antenna System ...3-99 -3-64 .3.64...

Owner's Manual
Page 235
... listening to something different for each of these functions to work: SRC (Source): Press this button to go to the beginning of the CD. When a CD is in the CD changer, press this button to go back to the previous station and stay there. (Volume): Turn the knob to increase or to select a ...disc. 3-92 next track on your vehicles options. While listening to a CD, press the up or the down arrow to go to the preset radio stations ...
... listening to something different for each of these functions to work: SRC (Source): Press this button to go to the beginning of the CD. When a CD is in the CD changer, press this button to go back to the previous station and stay there. (Volume): Turn the knob to increase or to select a ...disc. 3-92 next track on your vehicles options. While listening to a CD, press the up or the down arrow to go to the preset radio stations ...

Owner's Manual
Page 236
... the ignition being on each numbered button indicates a CD is not pressed within five seconds, the changer will damage the player. 3. amber. Repeat Step 2 until all CDs are loaded into the changer. CD Changer To load a CD, perform the following steps: 1. If a button is loaded in the respective position. CDs can cancel the load all function by pressing...
... the ignition being on each numbered button indicates a CD is not pressed within five seconds, the changer will damage the player. 3. amber. Repeat Step 2 until all CDs are loaded into the changer. CD Changer To load a CD, perform the following steps: 1. If a button is loaded in the respective position. CDs can cancel the load all function by pressing...

Owner's Manual
Page 237
...press this pushbutton to the beginning of the CD you do not remove the CD from the player within five seconds, the current or last played CD will be ejected. Q: 3-94 The CD changer will go to advance quickly through a track. To eject a single CD, perform the following : With the radio... on, press the desired numbered button with loaded CDs will be displayed. If you hold this ...
...press this pushbutton to the beginning of the CD you do not remove the CD from the player within five seconds, the current or last played CD will be ejected. Q: 3-94 The CD changer will go to advance quickly through a track. To eject a single CD, perform the following : With the radio... on, press the desired numbered button with loaded CDs will be displayed. If you hold this ...
Owner's Manual
Page 238
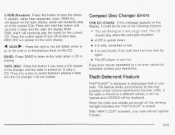
...the right or the left SEEK arrow to go to the next or to discourage theft of your radio. Compact Disc Changer Errors CHK CD (Check): If this button until you have a CD loaded in random, rather than sequential, order. It is very hot. If any error occurs repeatedly or if an ... for one of the following reasons: You are driving or, 2 very rotlgh road. Press this button to hear the tracks in the changer and the radio is playing. A CD is dirty, scratched or wet. 6 RDM (Random): Press this button to switch between playing a tape and the CD changer if all of the loaded...
...the right or the left SEEK arrow to go to the next or to discourage theft of your radio. Compact Disc Changer Errors CHK CD (Check): If this button until you have a CD loaded in random, rather than sequential, order. It is very hot. If any error occurs repeatedly or if an ... for one of the following reasons: You are driving or, 2 very rotlgh road. Press this button to hear the tracks in the changer and the radio is playing. A CD is dirty, scratched or wet. 6 RDM (Random): Press this button to switch between playing a tape and the CD changer if all of the loaded...
Owner's Manual
Page 239
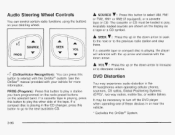
.... If a cassette tape is playing, press this button to play the other side of these devices in the CD changer, press this button to play a station you have programmed on the radio preset buttons on the selected band. ...to select AM, FMI or FM2, XMl or XM2 (if equipped), or a cassette tape or CD. See the Onstar@manual provided with the up or the down arrow to increase or to turn off... the DVD player when operating one of the tape. The cassette or CD must be necessary to decrease volume. A (((7 (OnStarNoice Recognition): You can control certain radio functions using ...
.... If a cassette tape is playing, press this button to play the other side of these devices in the CD changer, press this button to play a station you have programmed on the radio preset buttons on the selected band. ...to select AM, FMI or FM2, XMl or XM2 (if equipped), or a cassette tape or CD. See the Onstar@manual provided with the up or the down arrow to increase or to turn off... the DVD player when operating one of the tape. The cassette or CD must be necessary to decrease volume. A (((7 (OnStarNoice Recognition): You can control certain radio functions using ...
Owner's Manual
Page 241
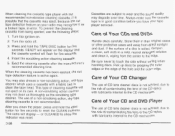
...in their original cases or other protective cases and away from direct sunlight and dust. Store them in error. or CLEANED to the CD mechanism. Care of Your CD Changer The use the following steps: Cassettes are subject to clean the tape head. Be sure never to the edge. Pick up discs... by grasping the outer edges or the edge of Your CDs and DVDs Handle discs carefully. Eject the cleaning cassette after the manufacturer's ...
...in their original cases or other protective cases and away from direct sunlight and dust. Store them in error. or CLEANED to the CD mechanism. Care of Your CD Changer The use the following steps: Cassettes are subject to clean the tape head. Be sure never to the edge. Pick up discs... by grasping the outer edges or the edge of Your CDs and DVDs Handle discs carefully. Eject the cleaning cassette after the manufacturer's ...
Owner's Manual
Page 453
... Audio Steering Wheel Controls ...Care of Your Cassette Tape Player ...3-97 Care of Your CD and DVD Player ...3-98 Care of Your CD Changer ...3-98 Care ofYour CDs and DVDs ...3-98 CD Changer ...3-93 Diversity Antenna System ...3-99 Radio with Cassette and CD ...3-65 3-91 Rear Seat Audio (RSA) ...Setting the Time ...3-64 Theft-Deterrent Feature ...3-95...
... Audio Steering Wheel Controls ...Care of Your Cassette Tape Player ...3-97 Care of Your CD and DVD Player ...3-98 Care of Your CD Changer ...3-98 Care ofYour CDs and DVDs ...3-98 CD Changer ...3-93 Diversity Antenna System ...3-99 Radio with Cassette and CD ...3-65 3-91 Rear Seat Audio (RSA) ...Setting the Time ...3-64 Theft-Deterrent Feature ...3-95...
Owner's Manual
Page 455
..., 2-13, 2-28 Care of Safety Belts ...5-92 Care of Your Cassette Tape Player ...3-97 CD and DVDPlayer ...3-98 CD Changer ...3-98 CDs and DVDs ...3-98 Cargo Cover ...2-44 Cassette Tape Messages ...3-77 Cassette Tape Player Service ...6-10 CDAdapterKits ...3-77 CD Changer ...3-93 CDFunctions ...3-94 Center Console Storage Area ...2-41 Center High-Mounted Stoplamp (CHMSL) ...5-61 Center...
..., 2-13, 2-28 Care of Safety Belts ...5-92 Care of Your Cassette Tape Player ...3-97 CD and DVDPlayer ...3-98 CD Changer ...3-98 CDs and DVDs ...3-98 Cargo Cover ...2-44 Cassette Tape Messages ...3-77 Cassette Tape Player Service ...6-10 CDAdapterKits ...3-77 CD Changer ...3-93 CDFunctions ...3-94 Center Console Storage Area ...2-41 Center High-Mounted Stoplamp (CHMSL) ...5-61 Center...
Owner's Manual
Page 464
Safety Belts ...1-41 Rear Storage Area ...2-43 Rear Window Defogger ...3-27 Rearview Mirror, Automatic Dimming with Cassette and CD ...3-65 Rear Seat Audio ...3-91 Setting the Time ...3-64 Theft-Deterrent ...3-95 Understanding Reception ...3-97 RDS Messages ...3-... Passengers. R Radio Messages ...3-72 Radios ...3-64 Care ofYour Cassette Tape Player ...3-97 Care of Your CD and DVD Player ...3-98 Care ofYour CD Changer ...3-98 Care ofYour CDs and DVDs ...3-98 CD Changer ...3-93 Radio with Onstar@, Compass and Temperature Display ...2-30 Reclining Seatbacks ...1-5 1-22 Reclining the Seatbacks ...
Safety Belts ...1-41 Rear Storage Area ...2-43 Rear Window Defogger ...3-27 Rearview Mirror, Automatic Dimming with Cassette and CD ...3-65 Rear Seat Audio ...3-91 Setting the Time ...3-64 Theft-Deterrent ...3-95 Understanding Reception ...3-97 RDS Messages ...3-... Passengers. R Radio Messages ...3-72 Radios ...3-64 Care ofYour Cassette Tape Player ...3-97 Care of Your CD and DVD Player ...3-98 Care ofYour CD Changer ...3-98 Care ofYour CDs and DVDs ...3-98 CD Changer ...3-93 Radio with Onstar@, Compass and Temperature Display ...2-30 Reclining Seatbacks ...1-5 1-22 Reclining the Seatbacks ...


