Get support for eMachines T2682

eMachines T2682 Support Question

eMachines T2682 Support Question

Find answers below for this question about eMachines T2682.
Need a eMachines T2682 manual? We have 2 online manuals for this item!
Question posted by Tonymess on October 31st, 2011

Adding Memory To T2682 Emachine

Where can i find an instruction guide for adding memory

Current Answers

Answer #1: Posted by smcclurken on October 31st, 2011 10:07 AM
This answer was accepted by the poster of the original question.
smcclurken

Member since:
October 28th, 2011

Points: 49,700
1,100
points
First go navigate to the following link to ensure you have the correct RAM:

http://www.memorystock.com/memory/eMachineseMachinesT2682.html

Then, your guide can be foundn right here :)


  1. Shut down the computer.
  2. REMOVE ALL CORDS AND CABLES!
  3. Remove the screws on the side panel.
  4. Remove the side panel.
  5. PUT ON YOUR ESD WRISTBAND AND CONNECT TO THE METAL FRAME OF THE COMPUTER! If you do not have an Electrostatic Discharge wristband, touch something metal first (doorknob, metal chair leg, etc.)
  6. Locate your RAM and ensure it is clear of other cables. Unplug and remember the location of cables if needed.
  7. Press down on the locks located to either side of RAM and ensure it is unlocked.
  8. Using two hands, grab the ends of RAM and pull straight up to release from the socket.
  9. Reverse this process to install new ram.

Answer #2: Posted by pchelper on November 2nd, 2011 3:04 AM
pchelper

Member since:
October 20th, 2011

Points: 206,890
110
points
eMachines T2682 RAM Specifications Standard Memory 256 MB (removable) Maximum Memory 2.0 GB Memory Expansion 2 sockets Memory Comments PC2100 DDR SDRAM DIMMs CPU Type 2.60GHz Intel Celeron Model Comments 400MHz FSB, Intel 845GV Chipset

Upgrading RAM on your eMachines eMachines T2682 Computer is easy, we carry compatible RAM Upgrade for eMachines eMachines T2682 Computer, the eMachines eMachines T2682 Computer takes the PC2100 DDR SDRAM DIMMs RAM Type, and comes installed with 256 MB (removable) of RAM. You can upgrade your eMachines eMachines T2682 Computer to up to a maximum of 2.0 GB RAM, the Computer has 2 sockets to install RAM, already with 256 MB (removable) standard RAM installed. For best Computer performance use the maximum amount of allowed RAM per slot for your system.
Buy our Computer RAM with confidence, we provide lifetime warranty on all RAM Modules purchased, backed with an excelled customer support. Choose the following RAM Upgrade for eMachines eMachines T2682 Computer.


http://www.memorystock.com/ram/eMachineseMachinesT2682RAM.html

Related eMachines T2682 Manual Pages

User Guide - Page 1

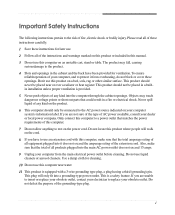
...of this computer near or over a radiator or heat register. Please read all of these instructions carefully. 1 Save these openings. Also, make sure that could result in a builtin ... ventilation is provided. 5 Never push objects of the extension cord. i Important Safety Instructions The following instructions pertain to the risk of your computer, and to protect it does not exceed the...
User Guide - Page 2

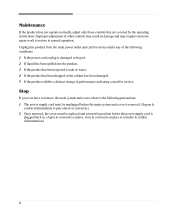
Maintenance If the product does not operate normally, adjust only those controls that are covered by the operating instructions. Stop If you ever have to remove the main system unit cover, observe the following conditions: 1 If the power cord or plug is plugged back ...
User Guide - Page 5

... other product and brand names are either trademarks or registered trademarks of this user's guide is subject to change without notice. eMachines, stylized "e" and figure logo are trademarks of their respective owners. ©2003 eMachines, Inc. in this material. v eMachines, Inc. nor for technical or editorial errors or omissions contained herein; All other countries...
User Guide - Page 8

Approval Statements Battery Warning Instruction B-1 Fuse Warning Instruction B-1 Laser Product ...B-2 viii Solving Common Problems Power ...A-1 Hard Disk Drive ...A-1 Optical Drive ...A-2 Audio ...A-2 Floppy Disk Drive A-3 Display & Monitor A-3 Keyboard ...A-4 Mouse ...A-4 Appendix B. Chapter 4 Installing and Removing ...
User Guide - Page 14

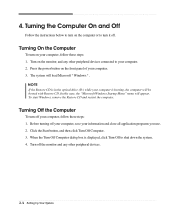
... booted with Restore CD. Press the power button on the computer or to shut down the system. 4. Turning the Computer On and Off Follow the instructions below to turn on the front panel of your information and close all application programs you use. 2. Turning On the Computer To turn it off...
User Guide - Page 15

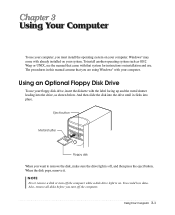
When the disk pops, remove it clicks into the drive, as OS/2 Warp or UNIX, see the manual that system for instructions on . The procedures in this manual assume that you want to remove the disk, make sure the drive light is on installation and use. To ...
User Guide - Page 16

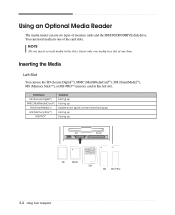
...MICRODRIVE disk drive. Card type SD (Secure DigitalTM) MMC(MultiMediaCardTM) SM (SmartMediaTM) MS (Memory StickTM) MS-PROTM Insertion Facing up Facing up Upside down (gold contact area facing up) ... can use the SD (Secure DigitalTM), MMC (MultiMediaCardTM), SM (SmartMediaTM), MS (Memory StickTM), or MS-PROTM memory card in a slot at one time. Insert only one media in this left slot.
User Guide - Page 17

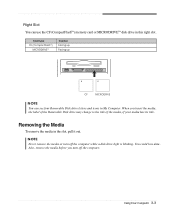
... 3-3 When you turn off the computer. Card type CF (CompactFlashTM) MICRODRIVETM Insertion Facing up Facing up CF MICRODRIVE NOTE You can use the CF (CompactFlashTM) memory card or MICRODRIVETM disk drive in the slot, pull it out. Also, remove the media before you insert the media, the label of the Removable...
User Guide - Page 21

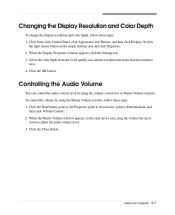
... can control the audio volume level by using the volume control box or Master Volume window. Or click the right mouse button on the empty desktop area and click Properties. 2. Click the Close button. Select the color depth from the Color quality area and the resolution from the Screen resolution area...
User Guide - Page 26

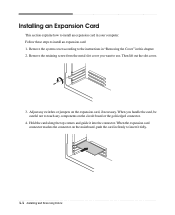
... card, if necessary. Follow these steps to use. Hold the card along the top corners and guide it fully. 4-4 Installing and Removing Drives Remove the retaining screw from the metal slot cover you handle...the connector on the mainboard, push the card in firmly to the instructions in "Removing the Cover" in your computer. Remove the system cover according to insert it into the connector...
User Guide - Page 27

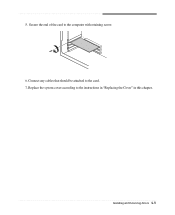
Installing and Removing Drives 4-5 Secure the end of the card to the card. 7. Connect any cables that should be attached to the computer with retaining screw. 6. Replace the system cover according to the instructions in "Replacing the Cover" in this chapter. 5.
User Guide - Page 28

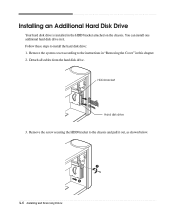
... 3. You can install one additional hard disk drive in it out, as shown below. 4-6 Installing and Removing Drives Remove the system cover according to the instructions in "Removing the Cover" in the HDD bracket attached on the chassis. Installing an Additional Hard Disk Drive Your hard disk drive is installed in...
User Guide - Page 30

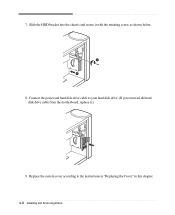
Connect the power and hard disk drive cable to the instructions in "Replacing the Cover" in this chapter. 4-8 Installing and Removing Drives Slide the HDD bracket into the chassis and secure it .) 9. Replace the system cover according to your hard disk drive. (If you removed the hard disk drive cable from the motherboard, replace it with the retaining screw, as shown below. 8. 7.
User Guide - Page 31

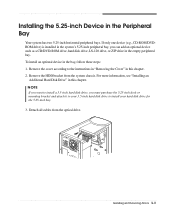
Remove the cover according to install your 3.5-inch hard disk drive to the instructions in "Removing the Cover" in this chapter. 2. NOTE If you want to install a 3.5-inch hard disk drive, you can add an optional device such as a ...
User Guide - Page 36

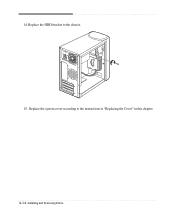
14. Replace the HDD bracket to the instructions in "Replacing the Cover" in this chapter. 4-14 Installing and Removing Drives Replace the system cover according to the chassis. 15.
User Guide - Page 37

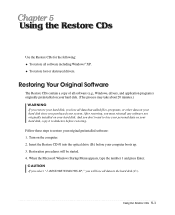
... disk, you lose all software including Windows® XP. Using the Restore CDs Use the Restore CDs for the following: To restore all data that added files, programs, or other data on your hard disk since you purchased your system. RESTORE WINDOWS XP," you don't want to lose your personal data...
User Guide - Page 41

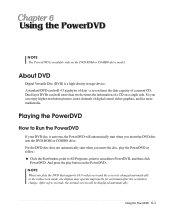
... on the DVD-ROM or COMBO drive model. And press the play the DVD that supports 16:9 widescreen and the screen is changed automatically to emachines PowerDVD, and then click PowerDVD. Using the PowerDVD 6-1 A standard DVD can hold 4.7 gigabytes of a current CD. After a few seconds, the normal screen will automatically start...
User Guide - Page 43

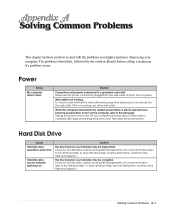
... the Windows Help. To open Windows Help, click the Start button, and then click Help and Support.) Solving Common Problems A-1 Solving Common Problems This chapter instructs you how to deal with the problems you press the power button. The problem is firmly plugged into the wall outlet and into the wall...
User Guide - Page 45

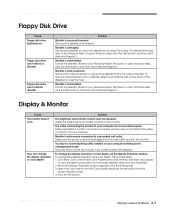
... the wall outlet and into the monitor. Solution The brightness and contrast controls aren't set properly Adjust the brightness and contrast controls on the empty desktop area and click Properties. 2. Click Start, click Control Panel, click Appearance and Themes, and then click Display. Click the OK button. Solving Common Problems...
User Guide - Page 47

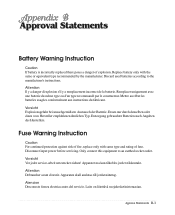
... Entsorgung gebraushter Batterien nach Angaben des Herstellers. Only connect this equipment to the manufacturer's instructions. Attention Il y a danger d'explosion s'il y a remplacement incorrect de la batterie.... Mettre au rébut les batteries usagées conformément aux instructions du fabricant. Disconnect input power before servicing. Remplacer uniquement avec une batterie du ...

Similar Questions

How To Get My Emachine Desktop To Work?
I have all the correct cords but can't get a signal on the monitor.
(Posted by 44nini37 2 years ago)
Emachine Desktop W3107 Printing Connection
Why does the emachine desktop w3107 have problems connecting to the printer?
(Posted by kedwards 12 years ago)
Ask a New Question
Use the box below to post a new question about this eMachines product .
Points & Prizes
  • You can earn points for nearly everything you do on HelpOwl.com
  • You can trade in those points for gift cards at leading retailers such as Amazon.com and Walmart
  • It's that simple!
See How it Works
Create a Free Account

eMachines Manuals

Find free eMachines T2682 manuals and user guides available at ManualOwl.com. Try out our unique manual viewer allowing you to interact with manuals from directly within your browser!

eMachines Reviews

View thousands of eMachines user reviews and customer ratings available at ReviewOwl.com.

Contact Information

Complete eMachines customer service contact information including steps to reach representatives, hours of operation, customer support links and more from ContactHelp.com.

Scoreboard Ratings

See detailed eMachines customer service rankings, employee comments and much more from our sister site.