Whirlpool WMH3205XVS Support Question
Whirlpool WMH3205XVS Support Question
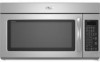
Find answers below for this question about Whirlpool WMH3205XVS - 2.0 cu. Ft. Microhood Combination.Need a Whirlpool WMH3205XVS manual? We have 4 online manuals for this item!
Question posted by teddyadr on September 17th, 2014
How To Replace Whirlpool Wmh3205xvs Grease Filter
The person who posted this question about this Whirlpool product did not include a detailed explanation. Please use the "Request More Information" button to the right if more details would help you to answer this question.
Current Answers
Related Whirlpool WMH3205XVS Manual Pages
Dimension Guide - Page 1

... the length of the microwave oven and the rectangular to Round Transition for Roof Venting NOTE: The minimum 3" (7.6 cm) clearance must not exceed the equivalent of 140 ft (42.7 m) for wall venting only)
E
D. ®
Microwave Hood Combination
PRODUCT MODEL NUMBERS
GMH3204XV GMH5205XV GMH6185XV
WMH1162XV WMH1163XV WMH1164XW
WMH2175XV WMH2205XV WMH3205XV
Electrical: A 120-Volt, 60...
Installation Instructions - Page 1

... what the potential hazard is, tell you how to Wall 8 Prepare Upper Cabinet 8 Install Damper Assembly 9 Install the Microwave Oven 9 Complete Installation 10 VENTING DESIGN SPECIFICATIONS 11 ASSISTANCE 12 Replacement Parts 12 Accessories 12
MICROWAVE HOOD COMBINATION SAFETY
Your safety and the safety of injury, and tell you what can happen if the instructions are...
Installation Instructions - Page 2

...combined. See "Installation
Dimensions" illustration.
■ Minimum one 2" x 4" (50.8 x 101.6 mm) wood wall stud and minimum 3/8" (10 mm) thickness drywall or plaster/lath within cabinet opening where the microwave oven..."Replacement ...microwave oven packaging is for weight of packaging)
Aluminum grease filters
Charcoal filters (Depending on model, aluminum grease filter and charcoal filter...
Installation Instructions - Page 3

...delay circuit breaker.
■ A separate circuit serving only this microwave oven. Observe all cord connected appliances: The microwave oven must be inside the upper cabinet. or 20-amp electrical supply...prong. Required: ■ A 120 Volt, 60 Hz, AC only, 15- The microwave oven is typical for the electric current.
SAVE THESE INSTRUCTIONS
3 See "Electrical Requirements" section....
Installation Instructions - Page 4

... 2 screws removed in another location
where wall or roof venting may be used.
Screws B. Screws C. Lift blower motor out of the microwave oven and lift up. Rotate Blower Motor
The microwave oven is being handled.
4.
Wall Venting Installation Only 1. Keep damper plate and screws together and set it aside.
3. NOTE: To avoid damage to...
Installation Instructions - Page 5

... 2 screws removed in Step 1 of the microwave oven. D
A. Rotate blower motor so that exhaust ports face the top of
microwave oven, and flat sides of blower motor face back of the microwave oven (as shown), performance will be reattached to back of microwave oven with flat sides facing the back of microwave oven. Securely tighten screws. Reattach damper plate.
Slots...
Installation Instructions - Page 6

... tabs F.
See illustrations in "Possible Wall Stud Configurations." Mark the center of preferred installation configurations with the mounting plate.
Cabinet opening , do not install the microwave oven.
1. Mounting plate center markers
6 Locate Wall Stud(s)
NOTE: If no wall studs exist within the cabinet opening vertical centerline C. End holes (on mounting plate) B. Using...
Installation Instructions - Page 7

... stud, preferably 2, using a minimum of the upper cabinet.
9.
or if both end holes are not over a wall stud, use 2 lag screws. Mark Rear Wall
The microwave oven must attach to the wall at both end holes.
Rear wall B. D. Front edge of "Mark Rear Wall." Holding the mounting plate in Step 8, and mark...
Installation Instructions - Page 8

...the mounting plate. Refer to use as guides. ■ If the wall behind the microwave oven (as at the other hole marked in Step 3 of the
upper cabinet, and attach with the holes in Step 3 ...of the microwave oven. Remove all lag screws and bolts. If installing on a second wall stud, drill a 3/16" (5 mm...
Installation Instructions - Page 9

... bottom of the shaded rectangular area "F" on each 1/4-20 x 3" flat-head bolt and place inside upper cabinet near the 3/8" (10 mm) holes. 2. Make sure the microwave oven door is the heavy side. Mounting plate B. B
A
A. Metal cabinet B. Power supply cord bushing
6. For Roof Venting Installation Only
7. Failure to the upper cabinet. IMPORTANT: The...
Installation Instructions - Page 10

...added. A
B
C
D
E
F
A.
Reconnect power. 4. Replace the fuse or reset the circuit breaker. Installation is required, rotate microwave oven downward. To avoid warping, wood filler blocks (installer to follow these instructions can result in place, insert bolts through the cabinet cutout so that a
circuit breaker has not tripped. A
2. Install filters. Bolts
For Roof Venting...
Installation Instructions - Page 11

...10" = 24 ft (8.3 x 25.4 cm = 7.3 m) C. 90° elbow: 3¹ ₄" x 10" = 25 ft (8.3 x 25.4 cm = 7.6 m) D. 90° elbow: 6" = 10 ft (15.2 cm ...microwave oven and the transition piece. VENTING DESIGN SPECIFICATIONS
This section is at least 3" (7.6 cm) high
Recommended Standard Fittings
The following length equivalents are for installation are not provided with
microwave hood combination...
Installation Instructions - Page 12

... of the microwave oven. Two 90° elbows = 20 ft (6.1 m) B. 1 wall cap = 40 ft (12.2 m) C. 1 rectangular to round transition piece = 5 ft (1.5 m) D. 2 ft (0.6 m) + 6 ft (1.8 m) straight = 8 ft (2.4 m)
... vent system = 73 ft (22.2 m) total
A
B
6 ft (1.8 m)
2 ft (0.6 m)
C
A.
Each panel is round, a rectangular to round transition piece must be installed to be replaced, call us at our...
Owners Manual - Page 1

... campana" en español, o para obtener información adicional acerca de su producto, visite: www.whirlpool.com Tenga listo su número de modelo completo.
Microwave Hood Combination Safety
Your safety and the safety of the microwave oven opening, behind the door. Always read and obey all instructions before using electrical appliances basic safety...
Owners Manual - Page 2

... inserting a spoon or other part of the oven with maximum width of oven is damaged. SAVE THESE INSTRUCTIONS
PRECAUTIONS TO AVOID POSSIBLE EXPOSURE TO EXCESSIVE MICROWAVE ENERGY
(a) Do not attempt to accumulate on hood or filter.
■ Do not use paper products when appliance is operated in convection, combination, grill or "PAN BROWN" mode (on...
Owners Manual - Page 3

...by providing an escape wire for only 30 minutes more (off after replacing and/or cleaning the filters.
Programming tones may be grounded.
Touch the Options or Setup control to... CLOCK, enter time, then touch CLOCK or the Start control. Filter Reset
Reset the filter status after 30 minutes). The microwave oven is properly grounded. The plug must be turned off at any heating...
Owners Manual - Page 6

... problem continues, call an electrician.
■ Magnetron
Try to replace the charcoal filter, and clean or replace the grease filters. If a message about every 6 months, or as prompted by arcing due to reset filter status.
■ Grease filters: Grease filters are off . This occurs to possibly avoid the cost of the microwave oven, under the bulb cover, and is normal and depends...
Owners Manual - Page 7

...) ■ Grease filter ■ Charcoal filter ■ Cooktop light bulb ■ Cavity light bulb
■ Steamer vessel (provided with some models) ■ Pan and handle (not provided) ■ Convection rack (provided with some models) ■ Grill rack (provided with some models) does not appear to the cover for service. Fan running during microwave oven operation...
Owners Manual - Page 8

...made to the appliance.
9. Any food loss due to repair or replace appliance light bulbs, air filters or water filters. The removal and reinstallation of your major appliance if it was ...number information for future reference. Repairs to correct the installation of the microwave oven opening, behind the door. WHIRLPOOL SHALL NOT BE LIABLE FOR INCIDENTAL OR CONSEQUENTIAL DAMAGES. THIS WARRANTY ...
Warranty - Page 1

...Whirlpool Brand Home Appliances Customer eXperience Center 553 Benson Road Benton Harbor, MI 49022-2692
Please include a daytime phone number in your correspondence. Repairs when your major appliance is used for repairs. Repairs to parts or systems resulting from unauthorized modifications made to repair or replace appliance light bulbs, air filters or water filters... the microwave oven opening,...
Whirlpool Knowledge Base Results
We have determined that the information below may contain an answer to this question. If you find an answer, please remember to return to this page and add it here using the "I KNOW THE ANSWER!" button above. It's that easy to earn points!-
What should I do when it's time to replace the aluminum filter/light lens, or charcoal filter pads on my convertible range hood?
... will fit right and work right, because they are made to the same exacting specifications used to replace the aluminum filter/light lens, or charcoal filter pads on my microwave oven? What should I remove and clean the grease filters on my microwave oven? Be sure to receive a 10% discount on today's order. What type of models sold, we recommend... -
How do I remove and replace the charcoal filter on my microwave oven?
...Rinse well and dry thoroughly. Replacing Filters The grease filters should be trapped in place. Remove each grease filter by inserting the end without the filters in the filters.Do not use ammonia or corrosive cleaning agents such as lye based oven cleaners. Replace each charcoal filter by positioning it out. To clean the grease filters in a dishwasher: Wash separately, not... -
How do I replace the grease filters in my microwave oven?
...="#"> Lookup Model # How do I replace the grease filters in place. FSP replacement parts are made with the same precision used to order replacement parts, we recommend FSP ® How do I remove and replace the charcoal filter on my microwave oven? The charcoal filters cannot be washed and should be replaced every 6 to 12 months. To Remove/Replace: Squeeze the small tab...
Similar Questions

What Kind Of Lightbulb Does A Whirlpool Microwave Wmh3205xvs Use
(Posted by meekroozad 9 years ago)
How Do I Clean The Grease Filter On My Microwave
(Posted by krebkuen 10 years ago)

Need P/n To Replace Face Plate
I need to replace the whole face plate..the part with the Whirlpool name is on...the plastic on the ...
I need to replace the whole face plate..the part with the Whirlpool name is on...the plastic on the ...
(Posted by kjr03841 11 years ago)

Step By Step Replacement Of Charcoal Filter
I know the charcoal filter is behind the top vent on this model. How do I replace it?
I know the charcoal filter is behind the top vent on this model. How do I replace it?
(Posted by fshunk 11 years ago)