Get support for Whirlpool WMH3205XVS - 2.0 cu. Ft. Microhood Combination

Whirlpool WMH3205XVS Support Question

Whirlpool WMH3205XVS Support Question

Find answers below for this question about Whirlpool WMH3205XVS - 2.0 cu. Ft. Microhood Combination.
Need a Whirlpool WMH3205XVS manual? We have 4 online manuals for this item!
Question posted by kjr03841 on January 20th, 2013

Need P/n To Replace Face Plate

I need to replace the whole face plate..the part with the Whirlpool name is on...the plastic on the back is broken.

Current Answers

There are currently no answers that have been posted for this question.
Be the first to post an answer!

Remember that you can earn up to 1,100 points for every answer you submit. The better the quality of your answer, the better chance it has to be accepted.

Related Whirlpool WMH3205XVS Manual Pages

Dimension Guide - Page 1

... products, we reserve the right to round transition piece so that a separate circuit serving only this microwave oven be used in the system. ® Microwave Hood Combination PRODUCT MODEL NUMBERS GMH3204XV GMH5205XV GMH6185XV WMH1162XV WMH1163XV WMH1164XW WMH2175XV WMH2205XV WMH3205XV Electrical: A 120-Volt, 60-Hz, AC-only, 15- A time-delay fuse or time-delay circuit breaker...
Installation Instructions - Page 1

...Assembly 9 Install the Microwave Oven 9 Complete Installation 10 VENTING DESIGN SPECIFICATIONS 11 ASSISTANCE 12 Replacement Parts 12 Accessories 12 MICROWAVE HOOD COMBINATION SAFETY Your safety and...Attach Mounting Plate to potential hazards that can happen if the instructions are very important. Always read and obey all safety messages. MICROWAVE HOOD COMBINATION INSTALLATION ...
Installation Instructions - Page 2

... Materials needed ■ Standard fittings for wall or roof venting) Not Shown: Upper cabinet template Mounting plate (attached to separate the template from the top of the microwave oven packaging is...combined. Cut along the perforation to back of microwave oven) Cardboard template (part of the cardboard packaging. 2. See "Rectangular to withstand the heat produced by the microwave oven...
Installation Instructions - Page 4

... be used. Tape the microwave oven door closed so that exhaust ports face the back of microwave oven, and lower blower motor back into the slots in the top of microwave oven with 2 screws removed in Step 1. 4 Slide damper plate toward the front of microwave oven. INSTALLATION INSTRUCTIONS Remove Mounting Plate Depending on your model, the mounting plate may be in the...
Installation Instructions - Page 5

... "Wall Venting Installation Only." 4. Reattach blower motor to the microwave oven. 7. Make sure damper plate tabs are inserted into microwave oven. Damper plate tabs D. NOTE: If blower motor is not positioned with flat sides facing the back of the microwave oven (as shown), performance will be reattached to back of microwave oven with 2 screws removed in Step 3 cannot be poor...
Installation Instructions - Page 6

...." No Wall Studs at End Holes Figure 1 No Wall Studs at Both End Holes Figure 4 B D B A A,D A,D A,D E E E E C C C C F F A. Cabinet opening , do not install the microwave oven. 1. Support tabs F. See illustrations in "Possible Wall Stud Configurations." 2. Mounting plate center markers 6 Mark the center of preferred installation configurations with the mounting...
Installation Instructions - Page 7

... the wall at both end holes are properly marked. Mark Rear Wall The microwave oven must align with toggle nuts; Centerline 2. D. Remove the cardboard template and ... in "Locate Wall Stud(s)" section. 7 With the support tabs facing forward (see illustrations in "Locate Wall Stud(s)" section), align the mounting plate center markers to the centerline on a level line with toggle nut...
Installation Instructions - Page 8

... template has trim lines to use as guides. ■ If the wall behind the microwave oven (as at both end holes of "Mark Rear Wall." Mounting plate C. Spring toggle nut D. Spring toggle nut 3. With the support tabs of the mounting plate facing forward, insert a 1/4-20 x 3" round-head bolt through the wall at One End Hole...
Installation Instructions - Page 9

... supply cord bushing needs to move and install microwave oven. Secure damper assembly with 2 sheet metal screws. This hole is closed and taped shut. 3. Drill 3/8" (10 mm) holes at the circular shaded area "G" on the back of the upper cabinet. 5. For Roof Venting Installation Only 7. A B A. Damper assembly C. Push microwave oven against mounting plate and hold in...
Installation Instructions - Page 10

... is no gap between the upper cabinet bottom and the microwave oven. Installation is required, rotate microwave oven downward. The blocks must be added. Upper cabinet cutout E. Replace the fuse or reset the circuit breaker. If adjustment is now complete. Loosen mounting plate screws. With the microwave oven centered, and with sheet metal screw. Tighten bolts until...
Installation Instructions - Page 11

...microwave oven and the transition piece. Roof cap B. 6" (15.2 cm) min. diameter round vent C. Roof cap: 3¹⁄₄" x 10" = 24 ft (8.3 x 25.4 cm = 7.3 m) C. 90° elbow: 3¹ ₄" x 10" = 25 ft (8.3 x 25.4 cm = 7.6 m) D. 90° elbow: 6" = 10 ft... The following length equivalents are not provided with microwave hood combination. ■ We do not recommend using a...
Installation Instructions - Page 12

... be installed to round transition piece must be used. You will need your authorized dealer or service center. For best performance, use when installing this microwave oven in a 36" (91.4 cm) or 42" (106.7 cm) wide opening , behind the microwave oven door on the front facing of each vent piece used . Recommended Vent Length A 3¹⁄...
Owners Manual - Page 1

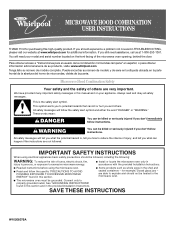
... section and in accordance with the provided Installation Instructions. ■ Read all safety messages. All safety messages will need assistance, call us at www.whirlpool.com for additional information. IMPORTANT SAFETY INSTRUCTIONS When using the microwave oven. ■ Read and follow instructions. This symbol alerts you to potential hazards that can happen if the...
Owners Manual - Page 2

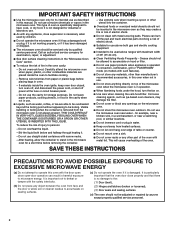
...oven front face and the door or allow the container to heat, cook, or dry food. Carefully attend the microwave oven when paper, plastic... and latches (broken or loosened), (3) Door seals and sealing surfaces. (d) The oven should be inserted in the microwave oven. This will ...the microwave oven if it has a damaged cord or plug, if it is specifically designed to stand in convection, combination,...
Owners Manual - Page 3

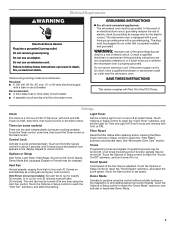
...Light Timer" submenu, and set speed. Failure to turn tones off or on and off after replacing and/or cleaning the filters. or 20-amp electrical supply with Part 18 of the FCC Rules....to reach the "Vent Fan" submenu, and select the setting. Do not use an extension cord. The microwave oven is equipped with a cord having a grounding wire with A.M. Touch the Options or Setup control to reach...
Owners Manual - Page 4

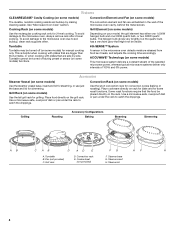
... (on some models) This microwave system delivers a constant stream of the selected microwave power, whereas typical microwave systems deliver only intervals of the microwave oven cavity, behind the metal screen. This is helpful when cooking with plates that are bigger than the turntable, or when cooking with plates that are embedded in the microwave oven detects moisture released from...
Owners Manual - Page 5

....) ■ Paper towels, paper plates, napkins (Use non-recycled paper.) ■ Plastic wraps, bags, covers, dinnerware, containers...microwave oven. If programming additional stages, enter the cook time and cook power of preset programs, see the Quick Reference Guide provided with plastic wrap and vent. Use ovenproof, microwave-safe cookware for all other convection and combination...
Owners Manual - Page 6

...: mild soap and water or dishwasher. ■ Door and exterior: mild soap and water, or glass cleaner applied to replace the charcoal filter, and clean or replace the grease filters. www.whirlpool.com Microwave oven will dissipate with mild soap, water and a soft cloth or sponge, or as prompted by arcing due to reset filter...
Owners Manual - Page 8

... associated with the removal from your home of your major appliance, to replace or repair house fuses, or to correct house wiring or plumbing. 2. The cost of the microwave oven opening, behind the door. WHIRLPOOL SHALL NOT BE LIABLE FOR INCIDENTAL OR CONSEQUENTIAL DAMAGES. SOME STATES AND PROVINCES DO NOT ALLOW THE EXCLUSION OR...
Warranty - Page 1

...Whirlpool Corporation or Whirlpool Canada LP (hereafter "Whirlpool") will pay for Factory Specified Parts and repair labor to Whirlpool within 30 days from the date of the microwave oven ... instructions. 4. If you need assistance using your product, you on the upper or lower front facing of purchase. 6. Service must be borne by a Whirlpool designated service company. Damage resulting...

Whirlpool Knowledge Base Results

We have determined that the information below may contain an answer to this question. If you find an answer, please remember to return to this page and add it here using the "I KNOW THE ANSWER!" button above. It's that easy to earn points!

  • How do I remove and clean the grease filters on my microwave oven?
    ... cloth or sponge are off and the microwave oven is cool. The grease filters should be removed and cleaned at least once a month. replacement parts. IMPORTANT: Before cleaning, make sure all controls are suggested first unless otherwise noted.  To order new filters: If you need to order replacement parts, we recommend that you use...
  • How do I replace the grease filters in my microwave oven?
    ... the filters in my microwave oven? Ordering replacement parts or accessories FAQs Knowledgebase search tips What should I do when it fits into the innner portion of the filter housing, then swinging the outside of the filter frame inward, and pull down until it 's time to 12 months. If you need to review the use...
  • How do I replace the cooking light in my microwave oven?
    ..." section below to handle bulb. Do not touch bulb with the same precision used to your appliance. If you need replacement parts: If you need to the right and lifting. Replacing the cooktop light on my microwave oven? Close bulb cover. Plug in your nearest Whirlpool designated service center. This information will fit right and work...

Similar Questions

Replacing Broken Cooktop Bulb In Whirlpool Microwave Oven (model Wmh1163xvq)
Thanks for the quick response, My problem is that the cooktop light bulb is located approx. half-way...
(Posted by mdebusk 8 years ago)
Black Rubber Feet Needs To Be Replaced
I use the round metal rack a lot. one of the black rubber feet needs to be replaced. Where do I find...
(Posted by onerywoman1 12 years ago)
Ask a New Question
Use the box below to post a new question about this Whirlpool product .
Points & Prizes
  • You can earn points for nearly everything you do on HelpOwl.com
  • You can trade in those points for gift cards at leading retailers such as Amazon.com and Walmart
  • It's that simple!
See How it Works
Create a Free Account

Whirlpool Manuals

Find free Whirlpool WMH3205XVS - 2.0 cu. Ft. Microhood Combination manuals and user guides available at ManualOwl.com. Try out our unique manual viewer allowing you to interact with manuals from directly within your browser!

Whirlpool Reviews

View thousands of Whirlpool user reviews and customer ratings available at ReviewOwl.com.

Contact Information

Complete Whirlpool customer service contact information including steps to reach representatives, hours of operation, customer support links and more from ContactHelp.com.

Scoreboard Ratings

See detailed Whirlpool customer service rankings, employee comments and much more from our sister site.

Whirlpool Recalls

Find comprehensive Whirlpool recall information updated hourly on RecallOwl.com.