Get support for Whirlpool WMH3205XVS - 2.0 cu. Ft. Microhood Combination

Whirlpool WMH3205XVS Support Question

Whirlpool WMH3205XVS Support Question

Find answers below for this question about Whirlpool WMH3205XVS - 2.0 cu. Ft. Microhood Combination.
Need a Whirlpool WMH3205XVS manual? We have 4 online manuals for this item!
Question posted by meekroozad on August 20th, 2014

What Kind Of Lightbulb Does A Whirlpool Microwave Wmh3205xvs Use

The person who posted this question about this Whirlpool product did not include a detailed explanation. Please use the "Request More Information" button to the right if more details would help you to answer this question.

Current Answers

There are currently no answers that have been posted for this question.
Be the first to post an answer!

Remember that you can earn up to 1,100 points for every answer you submit. The better the quality of your answer, the better chance it has to be accepted.

Related Whirlpool WMH3205XVS Manual Pages

Dimension Guide - Page 1

...E D. Rectangular to round transition piece so that a separate circuit serving only this microwave oven be used in the system. One 3 " x 10" (8.3 x 25.4 cm) 90° elbow = 25 ft (7.6 m) B. 1 wall cap = 40 ft (12.2 m) C. 2 ft (0.6 m) + 6 ft (1.8 m) straight = 8 ft (2.4 m) B C 3" (7.6 cm) D A. Grounded 3-prong outlet *30" (76.2 cm) is recommended. Specifications subject to...
Installation Instructions - Page 1

... Assembly 9 Install the Microwave Oven 9 Complete Installation 10 VENTING DESIGN SPECIFICATIONS 11 ASSISTANCE 12 Replacement Parts 12 Accessories 12 MICROWAVE HOOD COMBINATION SAFETY Your safety and ... models. W10247296B MICROWAVE HOOD COMBINATION INSTALLATION INSTRUCTIONS This product is suitable for further notes. See "Installation Requirements" section for use above electric or...
Installation Instructions - Page 2

..., charcoal filters may be sure to it during the "Mark Rear Wall" part of wall structures, be combined. Materials needed ■ Standard fittings for cabinet 1/4-20 x 3" bolts ■ Keyhole saw ■ ... with your builder or cabinet supplier to withstand the heat produced by the microwave oven for use appropriate fasteners. hole drill ■ No. 2 Phillips screwdriver bit for ...
Installation Instructions - Page 3

....0 cm) GROUNDING INSTRUCTIONS ■ For all governing codes and ordinances. The plug must be plugged into a grounded 3 prong outlet. Do not use an extension cord. Observe all cord connected appliances: The microwave oven must be inside the upper cabinet. Required: ■ A 120 Volt, 60 Hz, AC only, 15- Exact dimensions may vary depending...
Installation Instructions - Page 4

... recirculation installation. A A. Remove any remaining contents from the microwave oven cavity. 2. Damper plate 2. Lift blower motor out of microwave oven. Blower motor 5. Remove screws attaching damper plate to the microwave oven, do not grip or use the door or door handle while the microwave oven is reinstalled in Step 3. 7. Exhaust port 6. Screws (in Step...
Installation Instructions - Page 6

Using a stud finder, locate the edges of the vertical centerline (see "Mark...A A E E E E F F NOTE: If wall stud is within 6" (15.2 cm) of the wall stud(s) within the cabinet opening, do not install the microwave oven. 1. Holes for lag screws E. End holes (on mounting plate) B. Mounting plate center markers 6 Support tabs F. Locate Wall Stud(s) NOTE: If no wall studs exist ...
Installation Instructions - Page 7

... template C. Make sure the mounting plate is the venting cutout area. 13. Using measuring tape, find the wall stud centerline(s) drawn in Step 4. Remove the ... centerline. 5. This is level. 6. Mark Rear Wall The microwave oven must be installed on a level line with each be on a minimum of 1 wall stud, preferably 2, using a minimum of 1 lag screw, preferably 2. 1. Draw the...
Installation Instructions - Page 8

... in "Locate Wall Stud(s)" section. The template has trim lines to use as guides. ■ If the wall behind the microwave oven (as at both end holes. 3. Spring toggle nut D. Installation for... be secured to the wall on the bolt from upper cabinet. 3. Check alignment of the microwave oven. Insert lag screws into the remaining end hole. 6. Check alignment of the mounting plate. ...
Installation Instructions - Page 9

... bushing 6. Install Damper Assembly (for wall venting only) 1. Check that the damper blade hinge is for two 1/4-20 x 3" bolts and washers used to secure the microwave oven to move and install microwave oven. IMPORTANT: The control side of the upper cabinet. 5. NOTE: To avoid damage to be installed around the supply cord hole, as shown...
Installation Instructions - Page 10

... fuse has not blown, or that the long tab of the damper assembly slides under vent) Complete Installation 1. Installation is required, rotate microwave oven downward. Using 2 or more people, lift microwave oven off of 1 minute at 100% power. Loosen mounting plate screws. Tighten bolts until there is no gap between the upper cabinet bottom and...
Installation Instructions - Page 11

... are not provided with microwave hood combination. ■ We do not recommend using a flexible metal vent. ■ To avoid possible product damage, be sure to vent air outside, unless using caulking compound to seal ...minimum 3" (7.6 cm) clearance must exist between the top of the microwave oven and the rectangular to round transition piece F. Vent extension piece, at least 3" (7.6 cm) ...
Installation Instructions - Page 12

..., use when installing this microwave oven in the "Tools and Parts" section) A A. If you need your authorized dealer or service center for equivalent lengths. W10247296B SP PN W10345003B © 2010. All rights reserved. 461965617428 9/10 Printed in pairs. One 3¹⁄₄" x 10" (8.3 x 25.4 cm) 90° elbow = 25 ft (7.6 m) B. 1 wall cap = 40 ft (12.2 m) C. 2 ft...
Owners Manual - Page 1

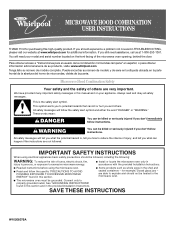
... read and obey all instructions before using the microwave oven. ■ Read and follow instructions...whirlpool.com Tenga listo su número de modelo completo. This symbol alerts you and others are not followed. Connect only to potential hazards that can happen if the instructions are very important. Microwave Hood Combination Safety Your safety and the safety of the microwave oven...
Owners Manual - Page 2

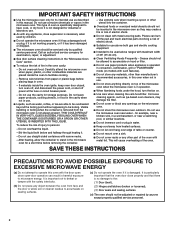
... on hood or filter. ■ Do not use paper products when appliance is operated in convection, combination, grill or "PAN BROWN" mode (on sealing surfaces. (c) Do not operate the oven if it is damaged. Do not use straight-sided containers with narrow necks. - Carefully attend the microwave oven when paper, plastic, or other part of 36...
Owners Manual - Page 3

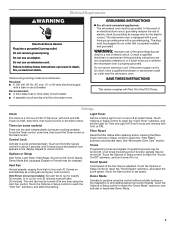
..., Filter Reset, Sound On/Off, Scroll Speed, Demo Mode and Language (English or French) may be turned off . See "Microwave Oven Care" section. Demo Mode Activate to turn tones off . Do not use of -function signals) may be adjusted. Touch Options or Setup control to reach the "Vent Fan" submenu, and select the...
Owners Manual - Page 4

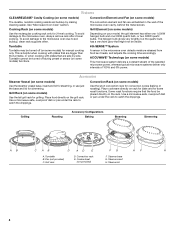
...) functions. 6th SENSE™ System A sensor in the wall of 100% and 0% power. Turntable cannot be visible. Use a microwave-safe, ovenproof dish or pan under the rack to catch the drippings. Steamer lid 4 See "Microwave Oven Care" section. ACCUWAVE® Technology (on some models) The durable, nonstick coating resists soil buildup by side. Cooking...
Owners Manual - Page 5

... the microwave oven. For optimal performance, wait at least 30 minutes after a sensor cycle, the cook power will cancel the function. 5 The cook power and/or temperature (on some models) before touching the Start control. Hot cooked food can result in for all other convection and combination cycles. The Warm Hold function uses 10...
Owners Manual - Page 6

...sure control is off . Close bulb cover, replace vent grille, and secure with repeated use. 6 Remove bulb cover screw, and open the bulb cover. Troubleshooting First try the... door, remove it is replaceable. Remove two screws on cleaning products. www.whirlpool.com Microwave oven will dissipate with screws. If the problem continues, call for assistance. On some...
Owners Manual - Page 8

... major appliance for repairs. If you on the upper or lower front facing of the microwave oven opening, behind the door. All rights reserved. ® Registered Trademark/TM Trademark of Whirlpool, U.S.A. 461966100641 9/08 Printed in which it is used in the country in China Consumable parts are excluded from your home of your major...
Warranty - Page 1

...model number and serial number on the label located on how to use or when it was purchased. You can write to Whirlpool within 30 days from accident, alteration, misuse, abuse, fire, ... OR FITNESS, SO THESE EXCLUSIONS OR LIMITATIONS MAY NOT APPLY TO YOU. Proof of the microwave oven opening, behind the door. Service calls to correct the installation of your major appliance, to...

Whirlpool Knowledge Base Results

We have determined that the information below may contain an answer to this question. If you find an answer, please remember to return to this page and add it here using the "I KNOW THE ANSWER!" button above. It's that easy to earn points!

  • How do I make a baked potato in my microwave oven?
    To use the Baked Potato feature: Place potato(es) on my microwave oven? How do I set the clock on the turntable and close the door. The Baked Potato program can ... on the turntable, off to replace the aluminum filter/light lens, or charcoal filter pads on my microwave oven? Microwave use the timer on my convertible range hood? How do I make a baked potato in electric convection...
  • What is the Convection-Roast menu on my SpeedCook microwave oven with convection, and how do I use it?
    ... minutes after the cycle. Use the provided steamer vessel base and lid, or a microwavable dish with convection, and how do I use it? Use oven mitts to remove the hot rack and Sizzle Pan from which to make your selections, prepare your food. How does combination cooking work in my SpeedCook microwave oven with the convection rack and...
  • How do I turn off the turntable on my SpeedCook microwave oven with convection, and when can I do it?
    ... to the On mode.  To turn On/Off: Touch Turntable On/Off. Product Literature (Use and Care Manuals, Parts Lists, etc) When the manual cycle is helpful when cooking with plates that.... Select "Off," then touch "OK." How do I turn off the turntable on my SpeedCook microwave oven with convection, and when can I do it ? The display shows the Turntable On/Off screen. The ...

Similar Questions

What Would Be The Newest Version With Same Size As This Microwave Oven
What Would Be The Newest Version With Same Size As This Microwave Oven (wmc50522as)
(Posted by chicity1992 5 months ago)
Whirlpool Microwave Oven Wmh31017aw
my microwave keep running no heat how can I fix this problem ?
(Posted by Anonymous-150142 9 years ago)
What Is The Cfm
What is the CFM for the Whiirlpool WMH3205XVS
(Posted by ivjohnsons 11 years ago)
My Microwave Oven Wmh1163xvq-1 Turns On And Rotates,but No Heat.
When I try to heat a cup of coffee I use 70 sec on high. Hit start and it turns on and table turns, ...
(Posted by clomas 11 years ago)
Ask a New Question
Use the box below to post a new question about this Whirlpool product .
Points & Prizes
  • You can earn points for nearly everything you do on HelpOwl.com
  • You can trade in those points for gift cards at leading retailers such as Amazon.com and Walmart
  • It's that simple!
See How it Works
Create a Free Account

Whirlpool Manuals

Find free Whirlpool WMH3205XVS - 2.0 cu. Ft. Microhood Combination manuals and user guides available at ManualOwl.com. Try out our unique manual viewer allowing you to interact with manuals from directly within your browser!

Whirlpool Reviews

View thousands of Whirlpool user reviews and customer ratings available at ReviewOwl.com.

Contact Information

Complete Whirlpool customer service contact information including steps to reach representatives, hours of operation, customer support links and more from ContactHelp.com.

Scoreboard Ratings

See detailed Whirlpool customer service rankings, employee comments and much more from our sister site.

Whirlpool Recalls

Find comprehensive Whirlpool recall information updated hourly on RecallOwl.com.