Get support for Whirlpool WMH31017AS

Whirlpool WMH31017AS Support Question

Whirlpool WMH31017AS Support Question

Find answers below for this question about Whirlpool WMH31017AS.
Need a Whirlpool WMH31017AS manual? We have 4 online manuals for this item!
Question posted by daperlajr on July 9th, 2023

Power Out Back On But Light On And Turntable Is Turning. How To Reset

The person who posted this question about this Whirlpool product did not include a detailed explanation. Please use the "Request More Information" button to the right if more details would help you to answer this question.

Current Answers

Answer #1: Posted by HelpHero on July 11th, 2023 6:39 AM
HelpHero

Member since:
September 3rd, 2022

Points: 523,380
100
points
I see that you're experiencing this issue with a Whirlpool WMH31017AS microwave. While it is unusual for the turntable to be spinning and the light to be on after a power outage, performing a reset might help resolve the problem. Here's how you can try to reset your microwave:

1. Unplug the microwave: Disconnect the microwave from the power outlet to ensure it is completely powered off.

2. Wait for a few minutes: Leave the microwave unplugged for approximately 3-5 minutes. This step allows the internal electronics to reset and any residual electrical charges to dissipate.

3. Plug the microwave back in: After the waiting period, securely plug the microwave back into the power outlet.

4. Test the microwave: Press the appropriate buttons to check if the microwave functions as expected. Pay close attention to the turntable and the light, ensuring they respond appropriately. Performing a reset should help the microwave reset its internal settings and configurations.

If the issue persists after attempting a reset, it would be best to contact Whirlpool's customer support or schedule a service appointment with a qualified technician. They will have the expertise to diagnose and address any underlying electrical or electronic issues with your microwave.


I hope this is helpful? PLEASE "ACCEPT" and mark it "HELPFUL" to complement my little effort. Hope to bring you more detailed answers.

Helphero

Related Whirlpool WMH31017AS Manual Pages

Installation Instructions - Page 1

... Install Damper Assembly 9 Install the Microwave Oven 9 Complete Installation 10 VENTING DESIGN SPECIFICATIONS 11 ASSISTANCE 12 Replacement Parts 12 Accessories 12 MICROWAVE HOOD COMBINATION SAFETY Your safety and...can be killed or seriously injured if you and others are not followed. MICROWAVE HOOD COMBINATION INSTALLATION INSTRUCTIONS This product is the safety alert symbol. See ...
Installation Instructions - Page 2

... screws (2) F. The location must be included. Power supply cord bushing (1) H. A B C D E FG H A. 1/4-20 x 3" round-head bolts (2) B. 1/4-20 x 3" flat-head bolts (2) C. The piece inside the perforation is at least 6" (15.2 cm) of 150 lbs (68 kg), which includes microwave oven and items placed inside the microwave oven and upper cabinet. ■ Grounded electrical outlet...
Installation Instructions - Page 3

... in death, fire, or electrical shock. Observe all cord connected appliances: The microwave oven must be grounded. or 20-amp electrical supply with a grounding plug. Product ... breaker. Do not use of electric shock. The plug must be inside the upper cabinet. If the power supply cord is properly grounded. A B Electrical Requirements WARNING 66" (167.6 cm) min. 30"...
Installation Instructions - Page 4

... it may be used. Remove screws attaching damper plate to the venting system. Slide damper plate toward the front of microwave oven exterior. Screws C. Remove any remaining contents from the microwave oven cavity. 2. Lift blower motor out of microwave oven. A Keep the damper assembly in Step 3. 7. Remove 2 screws attaching blower motor to the back of the...
Installation Instructions - Page 5

... "Wall Venting Installation Only." 5 Securely tighten screws. D A. Screws C. Slots 8. Repeat Step 3 from "Wall Venting Installation Only." 5. Make sure damper plate tabs are inserted into microwave oven. Repeat Step 4 from "Wall Venting Installation Only." 4. A B C A. Repeat Step 1 from "Wall Venting Installation Only." 3. Lower blower motor back into the slots in Step 3 of...
Installation Instructions - Page 6

...." 2. Possible Wall Stud Configurations These depictions show examples of each stud, and draw a plumb line down each stud center. Cabinet opening , do not install the microwave oven. 1. Mounting plate center markers 6 Using a stud finder, locate the edges of the vertical centerline (see "Mark Rear Wall" section), only recirculation or roof venting installation...
Installation Instructions - Page 7

....2 cm) on the wall, making sure it is level, and that the end holes are over wall studs, use 2 lag screws. Mark Rear Wall The microwave oven must be 14¹⁄₈" (35.9 cm) from the bottom edge of the upper cabinet. 9.
Installation Instructions - Page 8

...be against the bottom of the upper cabinet, and attach with the holes in Step 3 of the microwave oven. C A 6. Securely tighten all contents from the back of the mounting plate facing forward, insert a... of "Mark Rear Wall." 2. Position mounting plate on the template is level. 7. Disconnect power to go through both end holes. 3. Leave enough space for Wall Studs at Both End ...
Installation Instructions - Page 9

... heavy side. Sheet metal screws 3. Place a washer on Upper Cabinet Template. 8. Drill 3/8" (10 mm) holes at one corner of microwave oven B. Make sure the microwave oven door is for wall venting only) 1. Support tabs 4. A B A. Power supply cord bushing 6. Back of the shaded rectangular area "F" on each 1/4-20 x 3" flat-head bolt and place inside upper cabinet...
Installation Instructions - Page 10

...people, lift microwave oven off of mounting plate, and set aside on the turntable, and ...microwave oven. Adjust mounting plate and retighten screws. 9. With the microwave oven centered, and with sheet metal screw. Raised tabs B. Reconnect power. 4. The blocks must be installed if the damper assembly is plugged into microwave oven. Longer or shorter bolts are available at 100% power...
Installation Instructions - Page 11

...architectural designer and builder/contractor reference only. Vent extension piece, at least 3" (7.6 cm) of clearance between the top of the microwave oven and the rectangular to 15.2 cm = 1.5 m) B. Wall cap: 3¹⁄₄" x 10" = 40 ft ... route by minimizing the length of the vent and number of the microwave oven and the transition piece. Do not vent exhaust air into concealed spaces...
Installation Instructions - Page 12

...visit our website listed in the User Instructions. If you need the microwave oven model number and serial number. Following is located behind the door. ... m) straight = 8 ft (2.4 m) If the existing vent is 3" (7.6 cm) wide. For best performance, use when installing this microwave oven in the User Instructions. Two 90° elbows = 20 ft (6.1 m) B. 1 wall cap = 40 ft (12.2 m) C....
Dimension Guide - Page 1

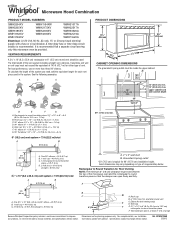
... to 15.2 cm = 1.5 m) B. Ref. Microwave Hood Combination PRODUCT MODEL NUMBERS GMH3204XV GMH5205XV GMH6185XV WMH1162XV WMH1163XV WMH1164XW WMH2175XV WMH2205XV WMH3205XV WMH31017A WMH32517A WMH53520A WMH32L19A WMH73L20A Electrical: A 120-Volt,... round transition piece so that a separate circuit serving only this microwave oven be inside the upper cabinet. For best performance, use no ...
Warranty Information - Page 1

...number has been altered or removed from your product, you on the upper or lower front facing of the microwave oven opening, behind the door. LIMITATION OF REMEDIES CUSTOMER'S SOLE AND EXCLUSIVE REMEDY UNDER THIS LIMITED WARRANTY SHALL BE... number ready. This warranty is reported to repair or replace appliance light bulbs, air filters or water filters. DISCLAIMER OF IMPLIED WARRANTIES;
Use & Care Guide - Page 1

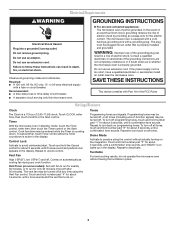
... to potential hazards that can be grounded. These words mean: DANGER You can kill or hurt you should experience a problem not covered in the microwave oven. ■ The microwave oven must be killed or seriously injured if you don't follow instructions. All safety messages will need assistance, call us at www.whirlpool.com for...
Use & Care Guide - Page 2

... a short time before and halfway through heating it has been damaged or dropped. ■ The microwave oven should not be boiling. Pieces can result in operation. ■ When flambeing foods under the hood, turn oven off, and disconnect the power cord, or shut off the pad and touch electrical parts involving a risk of 36" (91...
Use & Care Guide - Page 3

...function signals) may be plugged into a grounded 3 prong outlet. The microwave oven is properly grounded. If the power supply cord is a 12-hour (12:00-11:59) clock.... microwave oven is equipped with a cord having the turntable in the display. Demo Mode Activate to avoid unintended start. Turntable For best cooking results, do not operate the microwave oven without actually turning ...
Use & Care Guide - Page 4

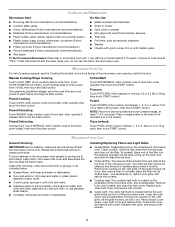
...turntable (not in ounces: 3.0 or 3.5 (85 or 99 g), then touch START control Potato Touch POTATO. Place a single potato to the side of potatoes: 1, 2, 3 or 4, about every 6 months. To reinstall, place end of microwave oven. If programming additional stages, enter the cook time and cook power... dish in microwave oven with screws. ■ Cooktop light: The cooktop light bulb is ...
Use & Care Guide - Page 5

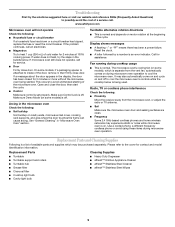
... Supplies ■ TurntableTurntable support and rollers ■ Turntable hub ■ Grease filter ■ Charcoal filter ■ Cooktop light bulb ■ Cavity light bulb ■ Heavy Duty Degreaser ■ affresh™ Kitchen Appliance Cleaner ■ affresh™ Stainless Steel Cleaner ■ affresh™ Stainless Steel Wipes 5 If microwave oven still does not...
Use & Care Guide - Page 6

... 1. Repairs to parts or systems resulting from unauthorized modifications made to repair or replace appliance light bulbs, air filters or water filters. This warranty is required to the Internet and you ... shall be provided by the customer. Any food loss due to the finish of the microwave oven opening, behind the door. Costs associated with any questions or concerns at the number below...

Whirlpool Knowledge Base Results

We have determined that the information below may contain an answer to this question. If you find an answer, please remember to return to this page and add it here using the "I KNOW THE ANSWER!" button above. It's that easy to earn points!

  • My microwave oven turns off too soon or not soon enough when using the Temperature Probe
    ...minutes after cooking. Plug probe tightly into the food. How do I fix my microwave oven if it turns off too soon or not soon enough when using the Temperature Probe? My dishwasher... center of the probe into its socket. Cook Power is not positioned correctly in correctly. Reset the Cook Power. Probe is not set correctly. Reset the probe temperature. Probe is not set ....
  • How do I raise (or proof) bread using my SpeedCook microwave oven with convection?
    ...turntable, place the bowl of dough on the type and quantity of 100°F (38°C) using the convection system. Touch "Start" on the display. Touch Cancel to return the display to 25 minutes. Reset microwave oven...do I raise (or proof) bread using my SpeedCook microwave oven with convection? Touch "Time/Temp/Power" on the turntable. Check dough after 20 to the Main Menu. What ...
  • How do I replace the cooking light in my microwave oven?
    ... Replacing the cooktop light on my SpeedCook microwave oven with convection How do I use only FSP ® It automatically turns on when the door is opened and when the oven is a 10W low...Slide the top of the vent grille into place. The oven light is operating. How do I replace the cooking light in oven or reconnect power. Remove charcoal odor filter. (See "Replacing Filters" section...

Similar Questions

What Would Be The Newest Version With Same Size As This Microwave Oven
What Would Be The Newest Version With Same Size As This Microwave Oven (wmc50522as)
(Posted by chicity1992 5 months ago)
Deactivate Turntable
Can you please tell me how to deactivate the turntable for the WMH31017AS?
(Posted by rehoag 9 years ago)
Whirlpool Microwave Installation Instructions
what is the minimum recommended clearance between the bottom of the microwave and thr top of the ele...
(Posted by jmlmrose2 9 years ago)
Ask a New Question
Use the box below to post a new question about this Whirlpool product .
Points & Prizes
  • You can earn points for nearly everything you do on HelpOwl.com
  • You can trade in those points for gift cards at leading retailers such as Amazon.com and Walmart
  • It's that simple!
See How it Works
Create a Free Account

Whirlpool Manuals

Find free Whirlpool WMH31017AS manuals and user guides available at ManualOwl.com. Try out our unique manual viewer allowing you to interact with manuals from directly within your browser!

Whirlpool Reviews

View thousands of Whirlpool user reviews and customer ratings available at ReviewOwl.com.

Contact Information

Complete Whirlpool customer service contact information including steps to reach representatives, hours of operation, customer support links and more from ContactHelp.com.

Scoreboard Ratings

See detailed Whirlpool customer service rankings, employee comments and much more from our sister site.

Whirlpool Recalls

Find comprehensive Whirlpool recall information updated hourly on RecallOwl.com.