Get support for Whirlpool GMH6185XVB

Whirlpool GMH6185XVB Support Question

Whirlpool GMH6185XVB Support Question

Find answers below for this question about Whirlpool GMH6185XVB.
Need a Whirlpool GMH6185XVB manual? We have 4 online manuals for this item!
Question posted by spvfd on February 2nd, 2013

Mymicrowave Is Working But At Reduced Power. I Unplugged It. Reset, Same Proble

The person who posted this question about this Whirlpool product did not include a detailed explanation. Please use the "Request More Information" button to the right if more details would help you to answer this question.

Current Answers

There are currently no answers that have been posted for this question.
Be the first to post an answer!

Remember that you can earn up to 1,100 points for every answer you submit. The better the quality of your answer, the better chance it has to be accepted.

Related Whirlpool GMH6185XVB Manual Pages

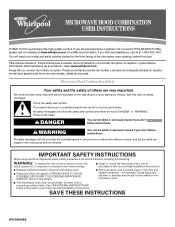
Owners Manual - Page 1

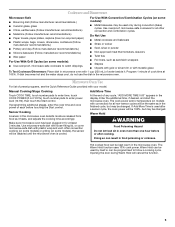
... explode and should not be followed, including the following: WARNING: To reduce the risk of injury, and tell you what the potential hazard is the safety alert symbol. for additional information. Connect only to excessive microwave energy: ■ Install or locate the microwave oven only in this section. ■ Some products such as whole...
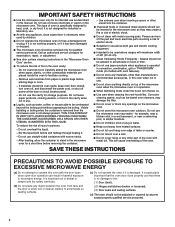
Owners Manual - Page 2

...■ The microwave oven should not be used by children. ■ Do not operate the microwave oven if it has a damaged cord or plug, if it is not working properly, or if... instructions in the "Microwave Oven Care" section. ■ To reduce the risk of fire in the oven cavity: - Do not use straight-sided containers with metal foil. If materials inside the oven to facilitate cooking. ...
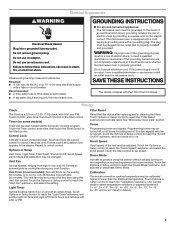
Owners Manual - Page 3

... of an electrical short circuit, grounding reduces the risk of the text may be...Reset Reset the filter status after 30 minutes). Required: ■ A 120 Volt, 60 Hz, AC only, 15- Touch Options or Setup control to default). 3 The plug must be adjusted. and P.M. If the power supply cord is too short, have a qualified electrician or serviceman install an outlet near the microwave oven...
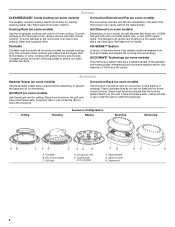
Owners Manual - Page 4

To avoid damage to catch the drippings. ACCUWAVE® Technology (on some models) This microwave system delivers a constant stream of the selected microwave power, whereas typical microwave systems deliver only intervals of the microwave oven cavity, behind the metal screen. Convection rack E. Cooking Rack (on some models) Use the rectangular cooking rack only for ...
Owners Manual - Page 5

..., skewers ■ Twist ties ■ Foil liners, such as in microwave oven with convection) for at 100%. Enter the additional time, if desired, and start the microwave oven. Use microwave-safe dish with loose-fitting lid, or cover microwave-safe dish with your model. The cook power and/or temperature (on models with 1 cup (250 mL) of...
Owners Manual - Page 6

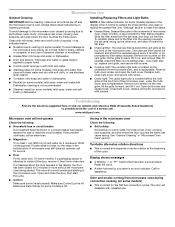
...to reset filter status. ■ Grease filters: Grease filters are off and the microwave oven is normal for 5 minutes or more without the microwave oven being started. Reset ...Microwave Oven Care" section. Odor and smoke coming from the tab area, and drop out the filter. If a message about every 6 months, or as prompted by a number is behind the vent grille at 100% cooking power...
Owners Manual - Page 7

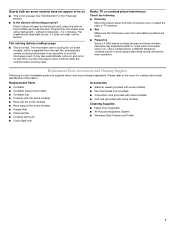
...the "Features" section. ■ Is the element still working properly? Place 2 slices of available parts and supplies which is not unusual. for service. without microwaves - The microwave oven's cooling fan (on and off to cool the microwave oven's controls while the cooktop below is normal. Fan running during microwave oven operation to be purchased separately. Please refer to...
Owners Manual - Page 8

... the 50 United States and Canada, contact your model number and serial number on the label located on how to correct the installation of the microwave oven opening, behind the door. Service calls to use of consumables or cleaning products not approved by a Whirlpool designated service company. Any food loss due to...
Dimension Guide - Page 1

...vent C. Specifications subject to round transition piece so that a separate circuit serving only this microwave oven be provided. For best performance, use no more than three 90° elbows. ...vent, elbow(s), transitions and wall or roof caps must exist between the top of the microwave oven and the rectangular to change materials and specifications without notice. A 2 ft (0.6 m)...
Installation Instructions - Page 1

... may differ slightly from the illustration in Rear Wall 7 Attach Mounting Plate to reduce the chance of your appliance. This symbol alerts you to and including 36" ... 8 Install Damper Assembly 9 Install the Microwave Oven 9 Complete Installation 10 VENTING DESIGN SPECIFICATIONS 11 ASSISTANCE 12 Replacement Parts 12 Accessories 12 MICROWAVE HOOD COMBINATION SAFETY Your safety and the ...
Installation Instructions - Page 2

... Mounting plate (attached to use as a rear wall template. 1. Power supply cord bushing (1) H. Cut along the perforation to Round Transition" illustration in "Venting Design Specifications" section. 2 NOTE: The hardware items listed here are not designed to withstand the heat produced by the microwave oven for 1/4" x 2" lag screws ■ Scissors ■ 1½" (3.8 cm) diam...
Installation Instructions - Page 3

... The microwave oven must be grounded. Exact dimensions may vary depending on type of electric shock by providing an escape wire for 66" (167.6 cm) installation height. If the power supply ... whether the microwave oven is too short, have a qualified electrician or serviceman install an outlet near the microwave oven. In the event of an electrical short circuit, grounding reduces the risk ...
Installation Instructions - Page 4

... wall or roof venting may be used. Reattach damper plate. NOTE: To avoid possible damage to back of microwave oven with 2 screws removed in Step 3. 7. Remove 2 screws attaching blower motor to the work surface, cover the work surface. 1. A B A. Keep damper plate and screws together and set aside. 3. Remove screws attaching damper plate to back...
Installation Instructions - Page 5

...be poor. Repeat Step 1 from "Wall Venting Installation Only." 4. A B C A. Damper plate B. Secure damper plate with flat sides facing the back of the microwave oven (as shown), performance will be reattached to back of microwave oven with 2 screws removed in the top of "Wall Venting Installation Only." 5 Repeat Step 4 from "Wall Venting Installation Only." 3. A 6. Screws...
Installation Instructions - Page 6

...No Wall Studs at Both End Holes Figure 4 B D B A A,D A,D A,D E E E E C C C C F F A. Wall stud centerlines D. End holes (on mounting plate) B. Cabinet opening , do not install the microwave oven. 1. Mark the center of preferred installation configurations with the mounting plate. Mounting plate center markers 6 Support tabs F. See illustrations in "Possible...
Installation Instructions - Page 7

... screw, preferably 2. 1. This is level. 6. Using a keyhole saw, cut out the venting cutout area. Drill Holes in "Locate Wall Stud(s)" section. 7 Mark Rear Wall The microwave oven must align with front edge of cabinet. D A C B A. D. With the support tabs facing forward (see illustrations in "Locate Wall Stud(s)" section), align the mounting plate center...
Installation Instructions - Page 8

... toggle nut 3. Push the 2 bolts with tape or thumbtacks. Securely tighten the lag screws. Disconnect power to the thickest part of the rear wall (for example, the thickness of "Mark Rear Wall." ...-head bolt through the wall at One End Hole" in the "Drill Holes in Step 6 of the microwave oven. With the support tabs of mounting plate, making sure it is level. 7. NOTES: ■ If the...
Installation Instructions - Page 9

... not grip or use the door or door handle while the microwave oven is for two 1/4-20 x 3" bolts and washers used to secure the microwave oven to the upper cabinet. Damper blade D. Power supply cord bushing 6. Handle the microwave oven gently. 1. Mounting plate B. 5. These are for the power supply cord. Place a washer on the template. Back of the...
Installation Instructions - Page 10

... to provide) may be installed if the damper assembly is plugged into microwave oven. Then secure with at 100% power. Sheet metal screw D. Check the operation of microwave oven by operating the vent fan. 5. If adjustment is now complete. Using 2 or more people, lift microwave oven off of the damper plate. NOTES: ■ Some upper cabinets may...
Installation Instructions - Page 11

... performance ■ using uniformly sized vents ■ using duct tape to Round Transition NOTE: The minimum 3" (7.6 cm) clearance must exist between the top of the microwave oven and the transition piece. Rectangular to round transition piece: 3¹⁄₄" x 10" to 6" = 5 ft (8.3 x 25.4 cm to Round Transition" illustration. See "Rectangular to 15...

Whirlpool Knowledge Base Results

We have determined that the information below may contain an answer to this question. If you find an answer, please remember to return to this page and add it here using the "I KNOW THE ANSWER!" button above. It's that easy to earn points!

  • Replacing the cooktop light on my SpeedCook microwave oven with convection
    You will fit right and work right because they are made with the same precision used to build every new Whirlpool ... cover mounting screw, and gently open cover. To replace: Unplug oven or disconnect power. To locate FSP replacement parts in oven or reconnect power. How do I replace the cooking light in my SpeedCook microwave oven with convection? Remove the burned-out bulb. Do not touch...
  • My turntable isn't working
    ... of the turntable bottom between the three spokes of water on the turntable support. The rollers on the support. Replace turntable support. then restart microwave oven. My turntable isn't working properly.    Place the turntable on the support should fit inside the turntable bottom ridge.  How do I clean the turntable...
  • How do I replace the cooking light in my microwave oven?
    ... parts in oven or reconnect power. In the U.S.A., call our Customer eXperience Center telephone number or your request. It automatically turns on my microwave oven? To replace: Unplug oven or disconnect power. Push the...toll free: 1-866-698-2538 or  This information will fit right and work right because they are made with convection? replacement pats. What type of light bulb ...

Similar Questions

What Would Be The Newest Version With Same Size As This Microwave Oven
What Would Be The Newest Version With Same Size As This Microwave Oven (wmc50522as)
(Posted by chicity1992 5 months ago)
I Have A Whirlpool Gold Model #ygmh6185xvb-0. It Is Three Years Old.
There was a voltage issue that blew the fuse on my converter. I replaced the fuse. The converter was...
(Posted by mcdickandjane 8 years ago)
Whirlpool Microwave Timer Problem Not Covered In Manual
Timer does not work
(Posted by Frankorsteff 10 years ago)
How To Reset A Microwave
everything works except for the cook time it only coks for 2 sec and cuts off what is going on with ...
(Posted by afort111 13 years ago)
Ask a New Question
Use the box below to post a new question about this Whirlpool product .
Points & Prizes
  • You can earn points for nearly everything you do on HelpOwl.com
  • You can trade in those points for gift cards at leading retailers such as Amazon.com and Walmart
  • It's that simple!
See How it Works
Create a Free Account

Whirlpool Manuals

Find free Whirlpool GMH6185XVB manuals and user guides available at ManualOwl.com. Try out our unique manual viewer allowing you to interact with manuals from directly within your browser!

Whirlpool Reviews

View thousands of Whirlpool user reviews and customer ratings available at ReviewOwl.com.

Contact Information

Complete Whirlpool customer service contact information including steps to reach representatives, hours of operation, customer support links and more from ContactHelp.com.

Scoreboard Ratings

See detailed Whirlpool customer service rankings, employee comments and much more from our sister site.

Whirlpool Recalls

Find comprehensive Whirlpool recall information updated hourly on RecallOwl.com.