Get support for Whirlpool WMH2175XVB - Microwave

Whirlpool WMH2175XVB Support Question

Whirlpool WMH2175XVB Support Question

Find answers below for this question about Whirlpool WMH2175XVB - Microwave.
Need a Whirlpool WMH2175XVB manual? We have 4 online manuals for this item!
Question posted by deborahbussiere on September 8th, 2010

The Display

The display does not light up.  You cannot see the time or anything else that you do   The microwave seems to be working but you don't know what you are keying in.

Current Answers

There are currently no answers that have been posted for this question.
Be the first to post an answer!

Remember that you can earn up to 1,100 points for every answer you submit. The better the quality of your answer, the better chance it has to be accepted.

Related Whirlpool WMH2175XVB Manual Pages

Dimension Guide - Page 1

A time-delay fuse or time-delay circuit breaker is typical for each vent piece used . It is ... " x 10" to 6" (8.3 x 25.4 cm to 15.2 cm) rectangular to improve Dimensions are for either type of the microwave oven and the rectangular to change without notice. Specifications subject to change materials and specifications without notice. or 20-amp fused electrical supply with product...
Installation Instructions - Page 1

... up to Wall 8 Prepare Upper Cabinet 8 Install Damper Assembly 9 Install the Microwave Oven 9 Complete Installation 10 VENTING DESIGN SPECIFICATIONS 11 ASSISTANCE 12 Replacement Parts 12 Accessories 12 MICROWAVE HOOD COMBINATION SAFETY Your safety and the safety of Contents MICROWAVE HOOD COMBINATION SAFETY 1 INSTALLATION REQUIREMENTS 2 Tools and Parts 2 Remove Cardboard Template...
Installation Instructions - Page 2

... provided with your builder or cabinet supplier to make sure there is at least 6" (15.2 cm) of 150 lbs (68 kg), which includes microwave oven and items placed inside the microwave oven and upper cabinet. ■ Grounded electrical outlet inside the perforation is perforated. Washers (2) D. Power supply cord bushing (1) H. Damper assembly (for 1/4" x 2" lag screws...
Installation Instructions - Page 3

... into an outlet that is properly installed and grounded. Do not use an extension cord. or 20-amp electrical supply with a grounding plug. Recommended: ■ A time-delay fuse or time-delay circuit breaker. ■ A separate circuit serving only this microwave oven. Do not use an extension cord. See "Electrical Requirements" section.
Installation Instructions - Page 4

... removed in Step 3. 7. NOTE: To avoid possible damage to back of microwave oven exterior. A Keep the damper assembly in case the venting method is changed, or the microwave oven is attached to the venting system. Reattach blower motor to the work surface, cover the work surface. 1. Damper plate 2. A A. For wall or roof venting, changes must be...
Installation Instructions - Page 5

... back of "Wall Venting Installation Only." 5 Make sure damper plate tabs are inserted into microwave oven. Screws C. Slots 8. A 6. Lower blower motor back into the slots in Step 3 of the microwave oven (as shown), performance will be reattached to back of microwave oven with flat sides facing the back of "Wall Venting Installation Only." Reattach blower motor...
Installation Instructions - Page 6

... Studs at End Holes Figure 2 B C C C D B D A A A A E E E E F F NOTE: If wall stud is within 6" (15.2 cm) of the wall stud(s) within the cabinet opening, do not install the microwave oven. 1. Cabinet opening . Wall stud centerlines D. See illustrations in "Possible Wall Stud Configurations." No Wall Studs at End Holes Figure 1 No Wall Studs at Both End...
Installation Instructions - Page 7

... center markers on the cardboard template to complete the 12" x 4" (30.5 x 10.2 cm) rectangle. Top of cardboard template must each other. Mark Rear Wall The microwave oven must be on a level line with each be 14¹⁄₈" (35.9 cm) from the marks made in Step 6 of "Mark Rear Wall." NOTES...
Installation Instructions - Page 8

... bolt from upper cabinet. 3. Refer to use as guides. ■ If the wall behind the microwave oven (as at both end holes of "Installation for Wall Studs at One End Hole (Figure 3) ...the template is level. 4. Securely tighten all contents from the back of the microwave oven. Prepare Upper Cabinet 1. The template has trim lines to illustrations in "Possible Wall Stud Configurations" in...
Installation Instructions - Page 9

... moves freely, and opens fully. 2. Cut 3/4" (19 mm) hole at the circular shaded area "G" on Upper Cabinet Template. 8. A B C D Install the Microwave Oven WARNING Excessive Weight Hazard Use two or more people, lift microwave oven and hang it on the back of the shaded rectangular area "F" on the template. Failure to the upper cabinet. Support...
Installation Instructions - Page 10

... Plug into grounded 3 prong outlet. 3. Reconnect power. 4. Check the operation of microwave oven by operating the vent fan. 5. Test vent fan and exhaust by placing 1 cup (250 ...a cook time of mounting plate, and set aside on a covered surface. 8. A B C D E F A. NOTE: The screw cannot be the same thickness as shown. Do not remove ground prong. Plug microwave oven into a...
Installation Instructions - Page 11

... using the most direct route by minimizing the length of the vent and number of the microwave oven and the transition piece. diameter round vent C. For optimal venting installation, we recommend: &#...." Vent extension piece, at least 3" (7.6 cm) of clearance between the top of the microwave oven and the rectangular to Round Transition" illustration. Roof cap B. 6" (15.2 cm) min. VENTING DESIGN...
Installation Instructions - Page 12

...) extension vent between the damper assembly and rectangular to round transition piece = 5 ft (1.5 m) D. 2 ft (0.6 m) + 6 ft (1.8 m) straight = 8 ft (2.4 m) If the existing vent is a list of the microwave oven. W10247296B SP PN W10345003B © 2010. Two 90° elbows = 20 ft (6.1 m) B. 1 wall cap = 40 ft (12.2 m) C. 1 rectangular to round transition piece must not exceed...
Owners Manual - Page 1

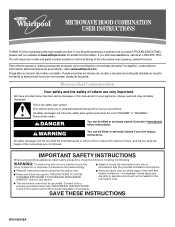
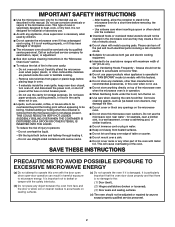
... Installation Instructions. ■ Read all safety messages. If you what can be killed or seriously injured if you should not be heated in the microwave oven. ■ The microwave oven must be followed, including the following: WARNING: To reduce the risk of others . Always read and obey all instructions before using electrical appliances basic...
Owners Manual - Page 2

... - Remove wire twist-ties from the microwave oven is not working properly, or if it is not always...time before removing the container. - It is not designed for industrial or laboratory use corrosive chemicals or vapors in the microwave oven for storage purposes. Carefully attend the microwave oven when paper, plastic, or other part of the oven with metal foil. Do not use the microwave oven...
Owners Manual - Page 3

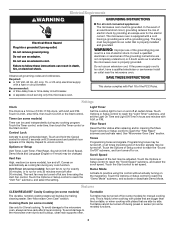
...Light Timer Set the cooktop light to whether the microwave oven is a 12-hour (12:00-11:59) clock, with A.M. or 20-amp electrical supply with Part 18 of electric shock by making cleaning easier. Touch the Timer control, enter time...some models) for exactly 30 minutes, or to set the Light On Time and Light Off Time in the display. Programming tones may be turned off, or all tones (...
Owners Manual - Page 4

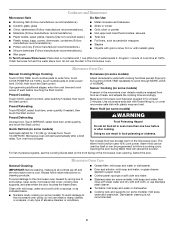
... result in for 1 lb (454 g). If programming additional stages, enter the cook time and cook power of water beside it heats, and adjusts the cooking time accordingly. To avoid damage to the microwave oven caused by touching COOK TIME repeatedly to the microwave oven cavity, do not use stainless steel cleaner. ■ Turntable: mild soap and water...
Owners Manual - Page 5

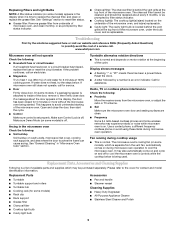
... cool the microwave oven. On some models) appears in the display, the door has been closed for 2 minutes at the top front of the microwave oven, and is time to inside of the cycle. The microwave oven's cooling fan (on some models) ■ Rack clip ■ Rack support ■ Grease filter ■ Charcoal filter ■ Cooktop light bulb ■...
Owners Manual - Page 6

...This major appliance is designed to instruct you on the upper or lower front facing of the microwave oven opening, behind the door. Repairs to Whirlpool within 30 days from accident, alteration, misuse,... or replacement under this warranty. 8. Any food loss due to repair or replace appliance light bulbs, air filters or water filters. LIMITATION OF REMEDIES CUSTOMER'S SOLE AND EXCLUSIVE REMEDY...
Warranty - Page 1

... APPLIANCE WARRANTY LIMITED WARRANTY For one year from the date of the microwave oven opening, behind the door. Repairs when your major appliance is used ... from your major appliance is not available. 10. Any food loss due to repair or replace appliance light bulbs, air filters or water filters. Costs associated with published installation instructions. 11. Repairs to or furnished...

Whirlpool Knowledge Base Results

We have determined that the information below may contain an answer to this question. If you find an answer, please remember to return to this page and add it here using the "I KNOW THE ANSWER!" button above. It's that easy to earn points!

  • How do I cook foods manually using my microwave oven?
    ... power level using my microwave oven? The display will appear in the search tool below. Touch Start. How does combination cooking work in the Use and Care Guide. What are the control panel features on the turntable and close the door. Touch Cook Time; See the "Microwave Cooking Power" chart in my microwave oven? Touch Start. To...
  • How do I replace the light bulb? - Bottom freezer/French door refrigerator
    ... watts. Firmly press forward on my upright freezer The light bulb cover opens from the light assembly. Insert the front tabs of the cover into place. No lights inside refrigerator - Remove the cover and replace the burned-out bulb with LCD Display The lights do not work on the notches in the back of the cover...
  • Oven light is on when door is closed
    If the door is closed ? On some models the light switch for the upper oven also controls the light in the lower oven. While the upper oven cavity light is locked and won't open Error code on the range display My microwave oven will not run Product repair manuals Is the door hitting the metal door latch? If...

Similar Questions

Whirlpool Wmh2175xvb 2 User Guide
I am trying to find a User Guide for my Whirlpool WMH2175XVB 2. I can't find one and I don't underst...
(Posted by fieldsv 1 year ago)
Microwave Doesn't Always Start When The Door Is Closed.
Message states 'open or close the door' but this doesn't always solve the problem to get the microwa...
(Posted by dickanderson12349 2 years ago)
Keypad Not Working On Microwave
I have a Whirlpool Model# WMH1163XVS over range microwave. The keypad has stopped working. It is onl...
(Posted by jrc1278 9 years ago)
Whirlpool Wmh2175xvb Microwave
I was cooking eggs (to hardbil them) this morning and I set the timer for 15 minutes and then I hear...
(Posted by titusville 13 years ago)
Ask a New Question
Use the box below to post a new question about this Whirlpool product .
Points & Prizes
  • You can earn points for nearly everything you do on HelpOwl.com
  • You can trade in those points for gift cards at leading retailers such as Amazon.com and Walmart
  • It's that simple!
See How it Works
Create a Free Account

Whirlpool Manuals

Find free Whirlpool WMH2175XVB - Microwave manuals and user guides available at ManualOwl.com. Try out our unique manual viewer allowing you to interact with manuals from directly within your browser!

Whirlpool Reviews

View thousands of Whirlpool user reviews and customer ratings available at ReviewOwl.com.

Contact Information

Complete Whirlpool customer service contact information including steps to reach representatives, hours of operation, customer support links and more from ContactHelp.com.

Scoreboard Ratings

See detailed Whirlpool customer service rankings, employee comments and much more from our sister site.

Whirlpool Recalls

Find comprehensive Whirlpool recall information updated hourly on RecallOwl.com.