Get support for Whirlpool WMH1163XVQ

Whirlpool WMH1163XVQ Support Question

Whirlpool WMH1163XVQ Support Question

Find answers below for this question about Whirlpool WMH1163XVQ.
Need a Whirlpool WMH1163XVQ manual? We have 4 online manuals for this item!
Question posted by thirtyoneford on September 13th, 2014

Whirlpool Wmh1163xvq-1

set clock now will no heat food.how do you operate setup

Current Answers

Answer #1: Posted by TommyKervz on September 13th, 2014 10:24 PM
TommyKervz

Member since:
January 10th, 2013

Points: 17,776,813
90
points
Download manual and find instructions
http://www.helpowl.com/manuals/Whirlpool/WMH1163XVQ/117263


Hope that is helpful.
Kervz at www.satechhelp.co.za

Related Whirlpool WMH1163XVQ Manual Pages

Dimension Guide - Page 1

...C A. Specifications subject to round transition piece so that a separate circuit serving only this microwave oven be used in the system. Rectangular to Round Transition for each vent piece used . One... 3" (7.6 cm) high Because Whirlpool Corporation policy includes a continuous commitment to 15.2 cm = 1.5 m) B. ® Microwave Hood Combination PRODUCT MODEL NUMBERS GMH3204XV...
Installation Instructions - Page 1

... how to Wall 8 Prepare Upper Cabinet 8 Install Damper Assembly 9 Install the Microwave Oven 9 Complete Installation 10 VENTING DESIGN SPECIFICATIONS 11 ASSISTANCE 12 Replacement Parts 12 Accessories 12 MICROWAVE HOOD COMBINATION SAFETY Your safety and the safety of Contents MICROWAVE HOOD COMBINATION SAFETY 1 INSTALLATION REQUIREMENTS 2 Tools and Parts 2 Remove Cardboard Template...
Installation Instructions - Page 2

... your builder or cabinet supplier to withstand the heat produced by the microwave oven for use appropriate fasteners. Toggle nuts (2) E....Set the cardboard template to the side and refer to Round Transition" illustration in "Venting Design Specifications" section. 2 See "Rectangular to it during the "Mark Rear Wall" part of wall structures, be sure to exist above the microwave oven...
Installation Instructions - Page 3

...Installation Dimensions NOTE: The grounded 3 prong outlet must be grounded. Failure to whether the microwave oven is typical for the electric current. Required: ■ A 120 Volt, 60 Hz...time-delay fuse or time-delay circuit breaker. ■ A separate circuit serving only this microwave oven. Exact dimensions may vary depending on type of electric shock by providing an escape wire ...
Installation Instructions - Page 4

... use the door or door handle while the microwave oven is attached to the back of the microwave oven, remove it and set it may be attached to back of the microwave oven. Screws C. Remove any remaining contents from the microwave oven cavity. 2. A B A. Remove 2 screws attaching blower motor to top of microwave oven. Damper plate tabs D. Wall Venting Installation Only 1. Remove...
Installation Instructions - Page 5

...of "Wall Venting Installation Only." 5 Repeat Step 1 from "Wall Venting Installation Only." 5. Repeat Step 3 from "Wall Venting Installation Only." 3. Reattach blower motor to the microwave oven. 7. Repeat Step 2 from "Wall Venting Installation Only." 4. Reattach damper plate. Screws C. Securely tighten screws. Secure damper plate with 2 screws removed in Step 1 of "Wall...
Installation Instructions - Page 6

... 3 Wall Studs at End Holes Figure 2 B C C C D B D A A A A E E E E F F NOTE: If wall stud is within 6" (15.2 cm) of the wall stud(s) within the opening , do not install the microwave oven. 1. Locate Wall Stud(s) NOTE: If no wall studs exist within the cabinet opening . See illustrations in "Possible Wall Stud Configurations." 2. No Wall Studs at End...
Installation Instructions - Page 7

... of the opening. This is level. 6. If the end holes are properly marked. Mark Rear Wall The microwave oven must align with front edge of cabinet. D. Holding the mounting plate in "Locate Wall Stud(s)" section. Set the mounting plate aside. Installation for No Wall Studs at End Holes (Figures 1 & 2) 1. or if both end...
Installation Instructions - Page 8

... 2. Attach Mounting Plate to Wall NOTE: Secure the mounting plate to the thickest part of the microwave oven. No Wall Studs at End Holes (Figures 1 & 2) NOTE: The mounting plate must be sure... the lag screws. Disconnect power to use as guides. ■ If the wall behind the microwave oven (as at both ends. 1. Place Upper Cabinet Template against the upper cabinet bottom. The "...
Installation Instructions - Page 9

... Installation Only 7. Cut 3/4" (19 mm) hole at the bottom of the microwave oven is being handled. A B C D Install the Microwave Oven WARNING Excessive Weight Hazard Use two or more people, lift microwave oven and hang it on support tabs at one corner of microwave oven B. Handle the microwave oven gently. 1. Using 2 or more people to be installed around the supply cord...
Installation Instructions - Page 10

... Repeat steps 3-6. 10. A B A. Long tab F. Do not use . 10 If the microwave oven does not operate: ■ Check that a household fuse has not blown, or that the power supply cord is... not positioned as the space between upper cabinet and microwave oven. Using 2 or more people, lift microwave oven off of mounting plate, and set aside on the turntable, and programming a cook time...
Installation Instructions - Page 11

...round vent C. Vent extension piece, at least 3" (7.6 cm) of clearance between the top of the microwave oven and the rectangular to round transition is used, be sure there is intended for use when figuring vent... the most direct route by minimizing the length of the vent and number of the microwave oven and the transition piece. For optimal venting installation, we recommend: ■ using roof...
Installation Instructions - Page 12

... a 36" (91.4 cm) or 42" (106.7 cm) wide opening , behind the microwave oven door on the model and serial number plate, which is round, a rectangular to use no ... If you need your dealer to round transition piece must be found on the front frame of the microwave oven opening . The filler panels come in China Replacement Parts If any of the installation hardware needs to ...
Owners Manual - Page 1

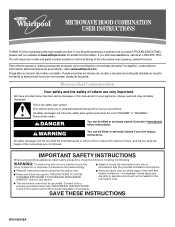
...ñol, o para obtener información adicional acerca de su producto, visite: www.whirlpool.com Tenga listo su número de modelo completo. We have provided many important safety ...containers - If you and others are able to explode and should not be heated in the microwave oven. ■ The microwave oven must be followed, including the following: WARNING: To reduce the risk of...
Owners Manual - Page 2

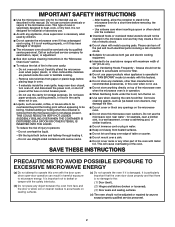
... used by children. ■ Do not operate the microwave oven if it has a damaged cord or plug, if it is important not to defeat or tamper with the safety interlocks. (b) Do not place any openings on models with maximum width of injury to heat, cook, or dry food. Visible bubbling or boiling when the container...
Owners Manual - Page 3

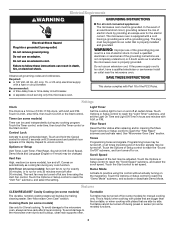
... or Setup control to whether the microwave oven is properly installed and grounded. Demo Mode Activate to turn tones off (on automatically as to reach the "Light Timer" submenu, and set speed. Cooking Rack (on the magnetron. or 20-amp electrical supply with a grounding plug. The microwave oven is a 12-hour (12:00-11:59) clock, with...
Owners Manual - Page 4

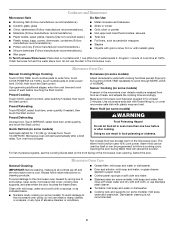
... before or after a brief delay. Use microwave-safe dish with loose-fitting lid, or cover microwave-safe dish with 1 cup (250 mL) of water beside it heats, and adjusts the cooking time accordingly. Microwave oven will cancel the function. Turn over food at 100%. Hot cooked food can result in the microwave oven. Opening the door during Warm Hold...
Owners Manual - Page 5

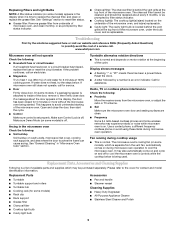
...microwave oven is located behind the vent grille at the beginning of the microwave oven. www.whirlpool.com Microwave oven will not operate Check the following : ■ Proximity Move the receiver away from the microwave oven...microwave oven operation. Make sure Control Lock is time to avoid unintended starting of the cycle. Reset the clock. ■ A letter followed by a number is set...
Owners Manual - Page 6

...microwave oven opening, behind the door. The cost of repair or replacement under this limited warranty. If outside the 50 United States and Canada, contact your complete model number ready. W10182518A SP PN W10182523A © 2008 Whirlpool... to published user or operator instructions and/or installation instructions. 4. Have your authorized Whirlpool dealer to determine if another...
Warranty - Page 1

...with electrical or plumbing codes, or use or when it was purchased. Any food loss due to Whirlpool with any questions or concerns at the number below. Major appliances with original...lower front facing of the microwave oven opening, behind the door. Repairs to parts or systems resulting from unauthorized modifications made to published user or operator instructions and/or installation ...

Whirlpool Knowledge Base Results

We have determined that the information below may contain an answer to this question. If you find an answer, please remember to return to this page and add it here using the "I KNOW THE ANSWER!" button above. It's that easy to earn points!

  • How do I change the final food temperature using my Temperature Probe after my microwave oven has started ?
    .../Enter within one minute after my microwave oven has started ? Gas dryer Agitator is not heating with door open Dryer does not heat - NOTE: If you set temperature for three seconds). You will resume heating to display the set . Top-load washer How do I change the final food temperature using my Temperature Probe after entering...
  • How do I use the Auto Defrost feature on my microwave oven?
    ... in pounds: Meats and Poultry can be set from 0.2 to 6.6 lb (90 g to scroll through the food selections. How do I cook foods manually using my microwave oven? To use the Auto Defrost feature on ...some tips for and how do I operate it? Select food by touching Cook Time. The Defrost system has 3 categories: Meat, Poultry and Fish. See the "Microwave Cooking Power" chart. Find Manuals &...
  • How do I set the clock on my microwave oven?
    Touch Clock. How do I set the clock on my microwave oven?  This is showing messages How does the Style 1 freestanding electronic oven control display operate on my electric range? To remove: Touch 0. The time will disappear, and ":" will appear on the display. The display on my microwave oven is a standard 12-hour clock (12:00-11:59) and does...

Similar Questions

What Would Be The Newest Version With Same Size As This Microwave Oven
What Would Be The Newest Version With Same Size As This Microwave Oven (wmc50522as)
(Posted by chicity1992 5 months ago)
My Microwave Oven Wmh1163xvq-1 Turns On And Rotates,but No Heat.
When I try to heat a cup of coffee I use 70 sec on high. Hit start and it turns on and table turns, ...
(Posted by clomas 11 years ago)
Fan Auto Turn On Wmh1163xvq-1
Hello, Our Microwaves fan automaticly turns on and runs sometimes when our oven is on. Is there away...
(Posted by ehkeller 12 years ago)
Ask a New Question
Use the box below to post a new question about this Whirlpool product .
Points & Prizes
  • You can earn points for nearly everything you do on HelpOwl.com
  • You can trade in those points for gift cards at leading retailers such as Amazon.com and Walmart
  • It's that simple!
See How it Works
Create a Free Account

Whirlpool Manuals

Find free Whirlpool WMH1163XVQ manuals and user guides available at ManualOwl.com. Try out our unique manual viewer allowing you to interact with manuals from directly within your browser!

Whirlpool Reviews

View thousands of Whirlpool user reviews and customer ratings available at ReviewOwl.com.

Contact Information

Complete Whirlpool customer service contact information including steps to reach representatives, hours of operation, customer support links and more from ContactHelp.com.

Scoreboard Ratings

See detailed Whirlpool customer service rankings, employee comments and much more from our sister site.

Whirlpool Recalls

Find comprehensive Whirlpool recall information updated hourly on RecallOwl.com.