Whirlpool WFG114SWQ Support Question
Whirlpool WFG114SWQ Support Question
Find answers below for this question about Whirlpool WFG114SWQ.Need a Whirlpool WFG114SWQ manual? We have 4 online manuals for this item!
Question posted by cgallagher72 on July 8th, 2012
Loc Appears On The Screen When Pressing The Bake Button.
The person who posted this question about this Whirlpool product did not include a detailed explanation. Please use the "Request More Information" button to the right if more details would help you to answer this question.
Current Answers
Answer #1: Posted by quaff on July 8th, 2012 9:59 AM
quaff

Member since:
November 13th, 2011 Points: 537,590

Member since:
November 13th, 2011 Points: 537,590
Related Whirlpool WFG114SWQ Manual Pages
Owners Manual - Page 3
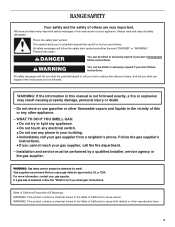
... the safety alert symbol and either the word "DANGER" or "WARNING."
WARNING: This product contains a chemical known to the State of California to cause cancer.
RANGE SAFETY
Your safety and the safety of others .
If a gas leak is the safety alert symbol.
Owners Manual - Page 4
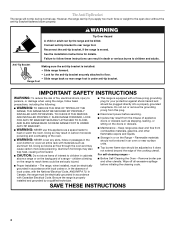
..., including the following:
■ WARNING: TO REDUCE THE RISK OF TIPPING OF THE
RANGE, THE RANGE MUST BE SECURED BY PROPERLY INSTALLED ANTI-TIP DEVICES. children climbing on the doors or drawers...if you apply too much force or weight to floor.
• Slide range back so rear range foot is moved. Range Foot
IMPORTANT SAFETY INSTRUCTIONS
WARNING: To reduce the risk of fire, electrical ...
Owners Manual - Page 5

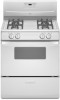
... J. The range you have some or all of the parts and features listed. Left front surface burner and grate D. Anti-tip bracket
E. Right front burner control knob
G H I .
Right rear surface burner and grate I J
K
D
E F
A. Model and serial number plate (behind left side of your model. Electronic oven control
H. The locations and appearances of...
Owners Manual - Page 8
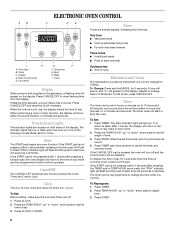
.... The timer can be disabled. To Reprogram: 1. Oven light
B. When the oven is not pressed within 1 minute after 1 minute, the display will appear on both sides of day, bake or broil mode. 2. Oven Indicator Lights
The indicator lights are located on the display. Cancel/Off
The CANCEL/OFF pad stops any oven function...
Owners Manual - Page 9
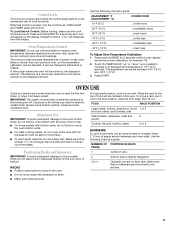
.... Press and hold BAKE for 5 seconds until the oven display
shows the current calibration, for 3 seconds, and "Loc" ...will be adjusted. Oven Temperature Control
IMPORTANT: Do not use of space around bakeware and oven walls. however, it is heavily soiled. A minus sign means the oven will appear...
Owners Manual - Page 10
... from the oven when removing the food.
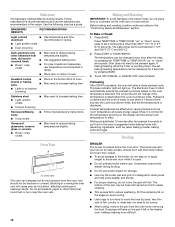
Baking and Roasting
IMPORTANT: To avoid damage to increase baking time.
The bake range can be pressed again. Start does not need to be turned.
■ After broiling, remove the pan from the oven, and should not be displayed for 5 seconds by pressing BAKE.
3. Touch OFF/CANCEL or CANCEL/OFF...
Owners Manual - Page 11
... of the supports at the desired broiling position and close the drawer.
3.
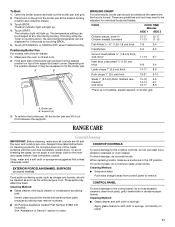
Broiler pan B. RANGE CARE
General Cleaning
IMPORTANT: Before cleaning, make sure knobs are guidelines only and may be displayed... Method: ■ Soap and water:
Food spills containing acids, such as the entire range is off and the oven and cooktop are suggested first unless otherwise noted. To avoid damage...
Owners Manual - Page 12

... section. On some models)
Cleaning Method: Wash in warm soapy water. (It is closed, press OVEN LIGHT to remove stubborn stains. OVEN RACKS AND ROASTING RACKS
Cleaning Method: ■ Steel-...wool pad
BROILER PAN AND GRID (on soils should be removed.
Unplug range or disconnect power. 2.
PORCELAIN-COATED GRATES AND CAPS
Food spills containing acids, such as the...
Owners Manual - Page 13
...9632; Is the main or regulator gas shutoff valve in the bottom panel.
4. WARNING
Surface burners will operate
■ Is the range properly connected to assure door side panel clearance and proper hinge engagement.
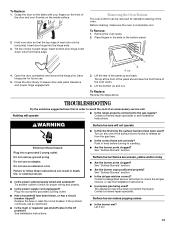
To Replace: 1. Lift the bottom up and back.
See ... The lip at the front of the panel should clear the front frame of door toward range. See "Surface Burners" section.
Owners Manual - Page 14

...°F (15°C).
■ Has the oven door been opened while cooking? If an "F" code appears again, contact a trained repair specialist. Wait for oven to preheat before placing food in longer cooking times....
■ Are baked items too brown on cooktop
■ Is the range level?
See "Oven Lockout" section.
■ Is the main or regulator gas shutoff in the pan? Press CANCEL/OFF to...
Dimension Guide - Page 1
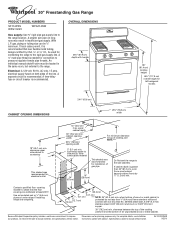
...91.4 cm) cooktop
height
46¹⁄₄" (117.5 cm) overall height for connecting the range to the rigid gas supply line.
upper cabinet depth
30" (76.2 cm) min. when bottom...or other combustible material
This shaded area recommended for planning purposes only. countertop space to the range. An individual manual shutoff valve must extend beyond cabinet fronts by CSA, ¹⁄&#...
Installation Instructions - Page 1
... 2 INSTALLATION REQUIREMENTS 3
Tools and Parts 3 Location Requirements 3 Electrical Requirements 5 Gas Supply Requirements 5 INSTALLATION INSTRUCTIONS 7 Unpack Range 7 Install Anti-Tip Bracket 7 Make Gas Connection 8 Verify Anti-Tip Bracket Location 9 Level Range 9 Electronic Ignition System 10 Complete Installation 11 GAS CONVERSIONS 12 LP Gas Conversion 12 Complete Conversion 14...
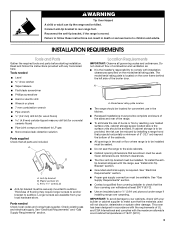
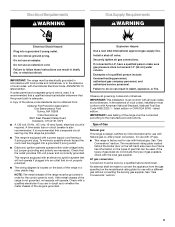
Installation Instructions - Page 2
... flammable vapors and liquids in this manual is the safety alert symbol. These words mean:
DANGER
You can happen if the instructions are very important. RANGE SAFETY
Your safety and the safety of others .
Installation Instructions - Page 3
...176;C). ■ Use an insulated pad or ¼" (0.64 cm) plywood under range if installing range over heated surface units, cabinet storage space located above the surface units should be available...Gas Supply Requirements" section. ■ Contact a qualified floor covering installer to rear range foot. Read and follow these instructions can result in accordance with the requirements of ...
Installation Instructions - Page 4
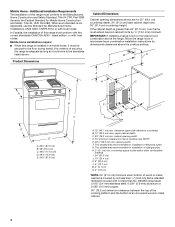
... between the top of the cooking platform and the bottom of this range must be secured to top of electrical outlet. G.
clearance upper side...L. 5" (12.7 cm) M. 2" (5.1 cm) N. 3" (7.6 cm)
*NOTE: 24" (61.0 cm) minimum when bottom of this range is not applicable, use the Standard for Mobile Home Construction and Safety, Title 24, HUD Part 280). When such standard is installed in a ...
Installation Instructions - Page 5
... operate.
A copy of the above code standards can be provided.
■ This range is also recommended. Check with a different gas without consulting the serving gas supplier....electrically grounded in accordance with local codes and ordinances, or in the absence of the range in a clear plastic bag. Electrical Requirements
WARNING
Gas Supply Requirements
WARNING
Electrical Shock Hazard...
Installation Instructions - Page 6
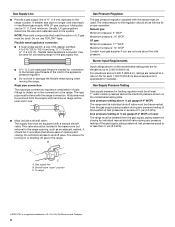
... flexible metal appliance connector may result in insufficient gas supply. Do not block access to the range. For elevations above sea level (not applicable for each 1,000 ft (304.8 m) above ...connection to shutoff valve. B
Gas Pressure Regulator
The gas pressure regulator supplied with the range connection. Usually, LP gas suppliers determine the size and materials used . Rigid pipe ...
Installation Instructions - Page 7
...installer for the best procedure for drilling mounting holes through your local hardware store.
7 Before moving range, slide range onto shipping base, cardboard or hardboard. 1.
Do not use a 0.5 cm) masonry drill bit ...bracket kit (found inside oven.
4. Place them lengthwise on the floor behind the range to support the range when it on its back on its back.
5. Align the anti-tip bracket ...
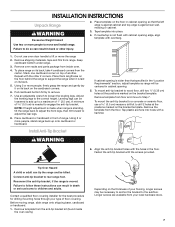
Installation Instructions - Page 9
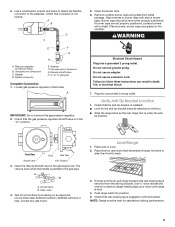
...
Front
Side View
Shutoff valve
"ON" Position
3. A B
A. 3. Place level on the cooktop. NOTE: Range must be level when properly positioned. Do not use an extension cord. Check that the gas pressure regulator shutoff valve... valve is open when the handle is installed: ■ Look for satisfactory baking performance.
9 Flexible connector
E. Use a combination wrench and pliers to attach ...
Installation Instructions - Page 10
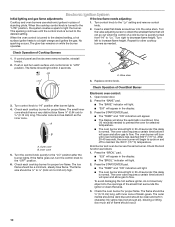
... and knobs were removed earlier, reinstall knobs.
2.
Check each cooktop burner for proper flame. The flame size should occur.
10 Press the "BAKE" pad.
■ The "BAKE" indicator will light. ■ "350" will appear in the display. ■ The "BROIL" indicator will show the automatic countdown time
(10 minutes) needed . this delay is normal...
Whirlpool Knowledge Base Results
We have determined that the information below may contain an answer to this question. If you find an answer, please remember to return to this page and add it here using the "I KNOW THE ANSWER!" button above. It's that easy to earn points!-
The self-cleaning cycle on my gas range will not operate
...nbsp;and Care Guide. Electric Oven Control Press PreciseClean button. Door Locked, Locked, or LOC will automatically lock. Exposure to not move... pan, grid, cookware and bakeware and, on my gas range? Applying a cool damp cloth to a powdery ash....high, "cln," "Timed," "On," "cool," and "Locked" will appear on the display (on some models) Art placeholder (self-cleaning burn ... -
Operating the dispenser controls (6 button control with a display screen) - Side by side refrigerator
... status display will indicate the light is selected. The display screen will appear on , you know when to control unintentional dispensing by pressing and holding the Filter Reset button for 3 seconds. The Fast Cool feature assists with a display screen) - The Fast Ice feature assists with the refrigerator and freezer temperature controls. When the... -
Operating the dispenser controls (Measured Fill dispensing system control with a display screen) - Side by side refrigerator
... system control with periods of dispenser controls. The display screen will appear on . Dim: Press the Light button a second time to "Replace." The Fast Cool feature assists with a display screen The refrigerator and freezer temperature control buttons are on the display screen. Press and hold the Temperature and Lock buttons at the same time for 3 seconds again to turn...
Similar Questions

The Bottom Oven Will Not Come On When Bake Button Is Pushed But Broiler Does
(Posted by Anonymous-145879 9 years ago)

F2 Error Code Appears In Gas Range And Make A Continuing Beeping Sound
Is a wire loose or the Electronic over control bad?
Is a wire loose or the Electronic over control bad?
(Posted by gpmiller1210 10 years ago)

Whirpool Range Oven Clicks But Wont Start
the range oven sounds like is trying to start but wont come om
the range oven sounds like is trying to start but wont come om
(Posted by dzipiris1224 12 years ago)

Oven Bake Button Doesnt Work
gy397lxus02.........bake option doesnt work.......everything else works.......checked heating elemen...
gy397lxus02.........bake option doesnt work.......everything else works.......checked heating elemen...
(Posted by tllovelacesr 12 years ago)