Whirlpool WED9400SW Support Question
Whirlpool WED9400SW Support Question
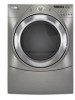
Find answers below for this question about Whirlpool WED9400SW - ADA Compliant, 7.2 Capacity.Need a Whirlpool WED9400SW manual? We have 1 online manual for this item!
Question posted by nitrofarm on April 19th, 2014
Press & Hold Start Button But Nothing Happens.
Dryer has power(grenn lights etc ok). But when we press & hold "start', nothing happens.
Current Answers
Related Whirlpool WED9400SW Manual Pages
Use and Care Guide - Page 1
www.whirlpool.com
Table of Contents 2
W10110850A ®
®
ELECTRONIC ELECTRIC DRYER
Use & Care Guide
For questions about features, operation/performance, parts, accessories or service, call: 1-800-253-1301 or visit our website at...
Use and Care Guide - Page 2
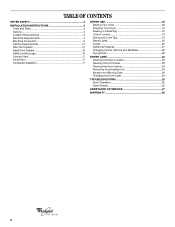
... 15 Install Vent System 16 Install Leveling Legs 16 Connect Vent 17 Level Dryer 17 Complete Installation 17
DRYER USE 18 Starting Your Dryer 18 Stopping Your Dryer 19 Pausing or Restarting 19 Control Locked 19 Drying and Cycle Tips 19 Status Lights 20 Cycles 20 Additional Features 21 Changing Cycles, Options and Modifiers 22 Drying...
Use and Care Guide - Page 3
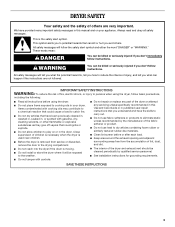
... recommended in this manual and on or in published user-repair instructions that can happen if the instructions are very important.
This symbol alerts you to carry out. s Do not use heat to play on your dryer. s Before the dryer is removed from the accumulation of lint, dust, and dirt.
s Do not install...
Use and Care Guide - Page 4
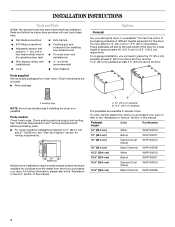
....5" (39.4 cm) pedestal at least 3.5" (8.9 cm) above the floor.
4 Leveling legs
NOTE: Do not use leveling legs if installing the dryer on a pedestal? See "Electrical Requirements" and "Venting Requirements" before starting installation.
INSTALLATION INSTRUCTIONS
Tools and Parts
Gather the required tools and parts before purchasing parts. For a garage installation, you purchased your...
Use and Care Guide - Page 5

... vapors, such as gasoline, away from whom you purchased your DUET® washer and dryer? Failure to support the total dryer weight of a companion appliance should also be installed or stored in garages, ...18" (46 cm) to the "Assistance or Service" section of the dryer. If using a power supply cord, a grounded electrical
outlet located within 2 ft (61 cm) of either side of this manual...
Use and Care Guide - Page 6
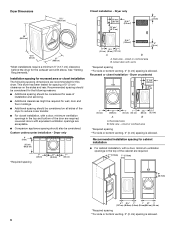
...189;" (80 cm)
27" (68.6 cm)
*Most installations require a minimum 5" (12.7 cm) clearance behind the dryer for ease of 0" (0 cm) clearance on pedestal
14" max.* (35.6 cm)
18" min.* (45.72 cm)...or confined area B.
Recommended installation spacing for spacing of
installation and servicing. This dryer has been tested for cabinet installation
s For cabinet installation, with a door, minimum...
Use and Care Guide - Page 7

...s Do not use an extension cord. Electrical Connection To properly install your dryer, you must be obtained from: National Fire Protection Association, One Batterymarch Park..."Electrical Connection" section.
s This dryer is adequate.
s To be used , it here.
s A 4-wire power supply connection must conform to install with stacked washer and dryer
The dimensions shown are for the ...
Use and Care Guide - Page 8
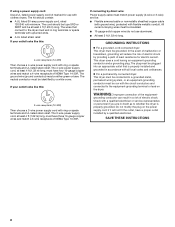
...-carrying wires must be : s Flexible armored cable or nonmetallic sheathed copper cable
(with ground wire), protected with the circuit conductors and connected to the dryer must match power supply (4-wire or 3-wire) and be grounded. Check with ring or spade terminals and UL listed strain relief. If your outlet looks like this...
Use and Care Guide - Page 9

... center terminal (silver). Ground wire (green or bare wire) must be connected to do so can result in place. Remove the hold-down , and hold the two clamp sections together.
Style 1: Power supply cord strain relief s Remove the screws from a ³⁄₄" (1.9 cm) UL listed strain relief (UL marking on strain relief...
Use and Care Guide - Page 11
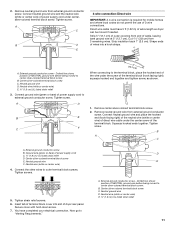
... wire (white or center wire) of direct wire cable under the center screw of power supply cord C 1.9 cm) UL listed strain relief D. External ground conductor screw B. Secure cover with hold-down screw. 7. Strip 5" (12.7 cm) of extra length so dryer can be moved if needed. Remove neutral ground wire from 3 remaining wires. A C
B
D
E
4-wire...
Use and Care Guide - Page 12

...
1" (2.5
cm)
3¹⁄₂" (8.9 cm)
12
Shape ends of wires into slot of extra length so dryer can be moved if needed. 3.
C
A
B
D
E
A. Ground wire (green or bare) of cable. ...conductor screw B. Secure cover with hold -down screw.
6. Neutral (white or center wire)
1. Strip 3¹⁄₂" (8.9 cm) of outer covering from end of power supply cable C. ¾" ...
Use and Care Guide - Page 13

...power supply cord where local codes do not permit connecting cabinet-ground conductor to "Venting Requirements."
4. Tighten screw. External ground conductor screw B. External ground conductor screw B. Insert tab of terminal block cover into slot of dryer rear panel. Tighten strain relief screws.
5. Secure cover with hold...white or center wire) of power supply cord/cable under the ...
Use and Care Guide - Page 17

....2 cm) clamp, connect vent to its final location. Check that all packaging materials.
4. Slide the dryer on the cardboard. For direct wire installation, reconnect power.
7. See illustration.
3. s Start button has been pushed firmly. When the dryer has been running or "On" position. If the dryer is level.
Do not select the Air Only Temperature setting. Move...
Use and Care Guide - Page 18
...select an Automatic Cycle.
18
Fire Hazard No washer can select a different dryness level, depending on your control panel.
s Press the POWER button.
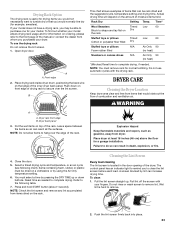
Please refer to persons, read the IMPORTANT ... it (including cooking oils). See "Cleaning the Lint
Screen." 2.
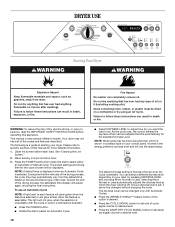
DRYER USE
WARNING
Starting Your Dryer
WARNING
Explosion Hazard
Keep flammable materials and vapors, such as gasoline,...
Use and Care Guide - Page 19
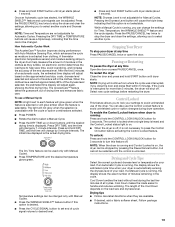
..., the display shows the exact number of minutes remaining in the dryer drum help save time, avoid overdrying, and increase the accuracy of the dryer. s Press and hold START button until dryer starts (about 1 second). NOTE: When the dryer is running , you can also use a Manual Cycle NOTE: A light next to avoid unintended cycle or option changes during the last...
Use and Care Guide - Page 20
... Features" section. Cool Down The Cool Down light glows during the cool down buttons. This indicator stays on your load is especially important for ease in an Automatic Cycle.
See Automatic Preset or Manual Preset Cycle Settings chart. s The dryer enters the cool down for permanent press, knits and synthetic fabrics. NOTE: The Damp...
Use and Care Guide - Page 21

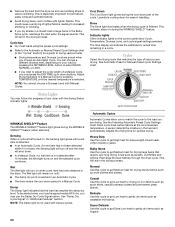
... from the dryer as soon as rubber, plastic and heat-sensitive fabrics. Additional Features
Drum Light Select Drum Light to turn the drum light ON or OFF. WRINKLE SHIELD™ Feature When you are not available when using the Air Only setting. s Press the WRINKLE SHIELD™ feature to get up or down buttons.
To be...
Use and Care Guide - Page 22
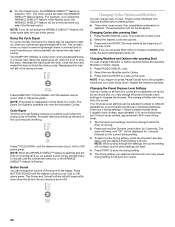
...Press PAUSE/CANCEL once.
2. Press and hold START.
When the signal goes off . The Damp Dry Signal is selected.
Press and hold the Dryness Level button for 5 seconds. Press and hold START to "ON." This change will be changed while the dryer... the drying cycle. The Power and Cancel buttons will become your dryer shuts down period.
NOTE: If you selected will still beep softly ...
Use and Care Guide - Page 23
... hold START button (about 1 second). Rack Dry
Setting Temp. Dryer ...pressing the DRY TIME up . Push the lint screen firmly back into place. 23 To use automatic cycles with your dryer.... Select a timed drying cycle and temperature, or an air cycle (see following table.
7. The control panel has an indicator light to remind you purchased your fingers. Place drying rack inside dryer...
Use and Care Guide - Page 25
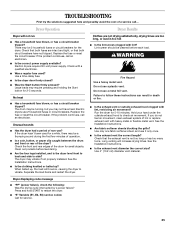
...the circuit breaker. Clean out pockets before each load. The dryer may require pressing and holding the Start button for service.
25 Dryer Operation
Dryer will increase drying times. s Was the Start button firmly pressed? Electric dryers use a plastic vent. If the dryer hasn't been used ? Separate the load items and restart the dryer. s Is the exhaust vent or outside exhaust hood to...
Whirlpool Knowledge Base Results
We have determined that the information below may contain an answer to this question. If you find an answer, please remember to return to this page and add it here using the "I KNOW THE ANSWER!" button above. It's that easy to earn points!-
Operating the dispenser controls (4 or 5 button control without a display screen) - Side by side refrigerator
... to change your water filter. Off: Press the Light button a third time to turn on my refrigerator? The display will indicate which is selected with a display screen) - Press and hold the Lockout button to lock the dispenser. Operating the dispenser controls (4 or 5 button control without a display screen Operating the dispenser buttons: Your ice maker can be turned... -
Reset the water filter indicator - Side by side refrigerator
...has a water filter indicator, but no reset button, press the light switch in some models, will change ...light changes to red, or when water flow to "Good" when the system is almost time to a water source or replacing the water filter, flush the water system. If your water filter. Reset the water filter indicator - Side by pressing and holding the Filter button... -
Why is my cooktop not working
... fully reinsert the element into the receptacle. Press down and hold the control lock button for 5 seconds to unlock the control lock. The light next to the lock should turn off. If it still appears to the cooktop for a minute, and then turn power back on my electric range? If...
Similar Questions

Washer Won't Start When I Press The Start Button
I press the start button and I press for 3 seconds, the door locks sometimes. The usual lights come ...
I press the start button and I press for 3 seconds, the door locks sometimes. The usual lights come ...
(Posted by Kkissell 9 years ago)

Whirlpool Cabrio Washer Why Does My Lid Lock Light Blink During The Delay Start
cycle
cycle
(Posted by JASOagra 9 years ago)

Whirlpool Duet Dryer Won't Start Beeps
(Posted by csbpurd 10 years ago)

The Dryer Will Not Turn, But It Has Power And Lcd Lights Showing.
Whirlpool Duet model numberWeD9400sw0. The power lights come on. However, when you press start, all ...
Whirlpool Duet model numberWeD9400sw0. The power lights come on. However, when you press start, all ...
(Posted by manofomega5 11 years ago)

Whirlpool Duet Wed9400swo Dryer Won't Start It Turns On And Clicks Only
dryer won't start it turns on and clicks only
dryer won't start it turns on and clicks only
(Posted by hpl8nite 11 years ago)