Whirlpool WDT710PAYM Support Question
Whirlpool WDT710PAYM Support Question
Find answers below for this question about Whirlpool WDT710PAYM.Need a Whirlpool WDT710PAYM manual? We have 5 online manuals for this item!
Question posted by jablanier on November 3rd, 2016
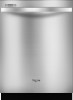
Whirlpool Wdt710paym Washing Machine: Top Rack Loose On Right Side
The Top Rack of my dishwasher has come loose on the right side. All parts appear to be intact but just not put together properly. It looks like the support bar on right side has jumped off the wheel rollers which are fastened to the inside housing of the washer. How can I get the support bar back in place?Please Help!Thanks,John Bishop PS if this is the second time I have submitted this request please forgive me. Your Site knocked me off before I submitted it the first time, I think.
Supporting Images
You can click the images below to enlarge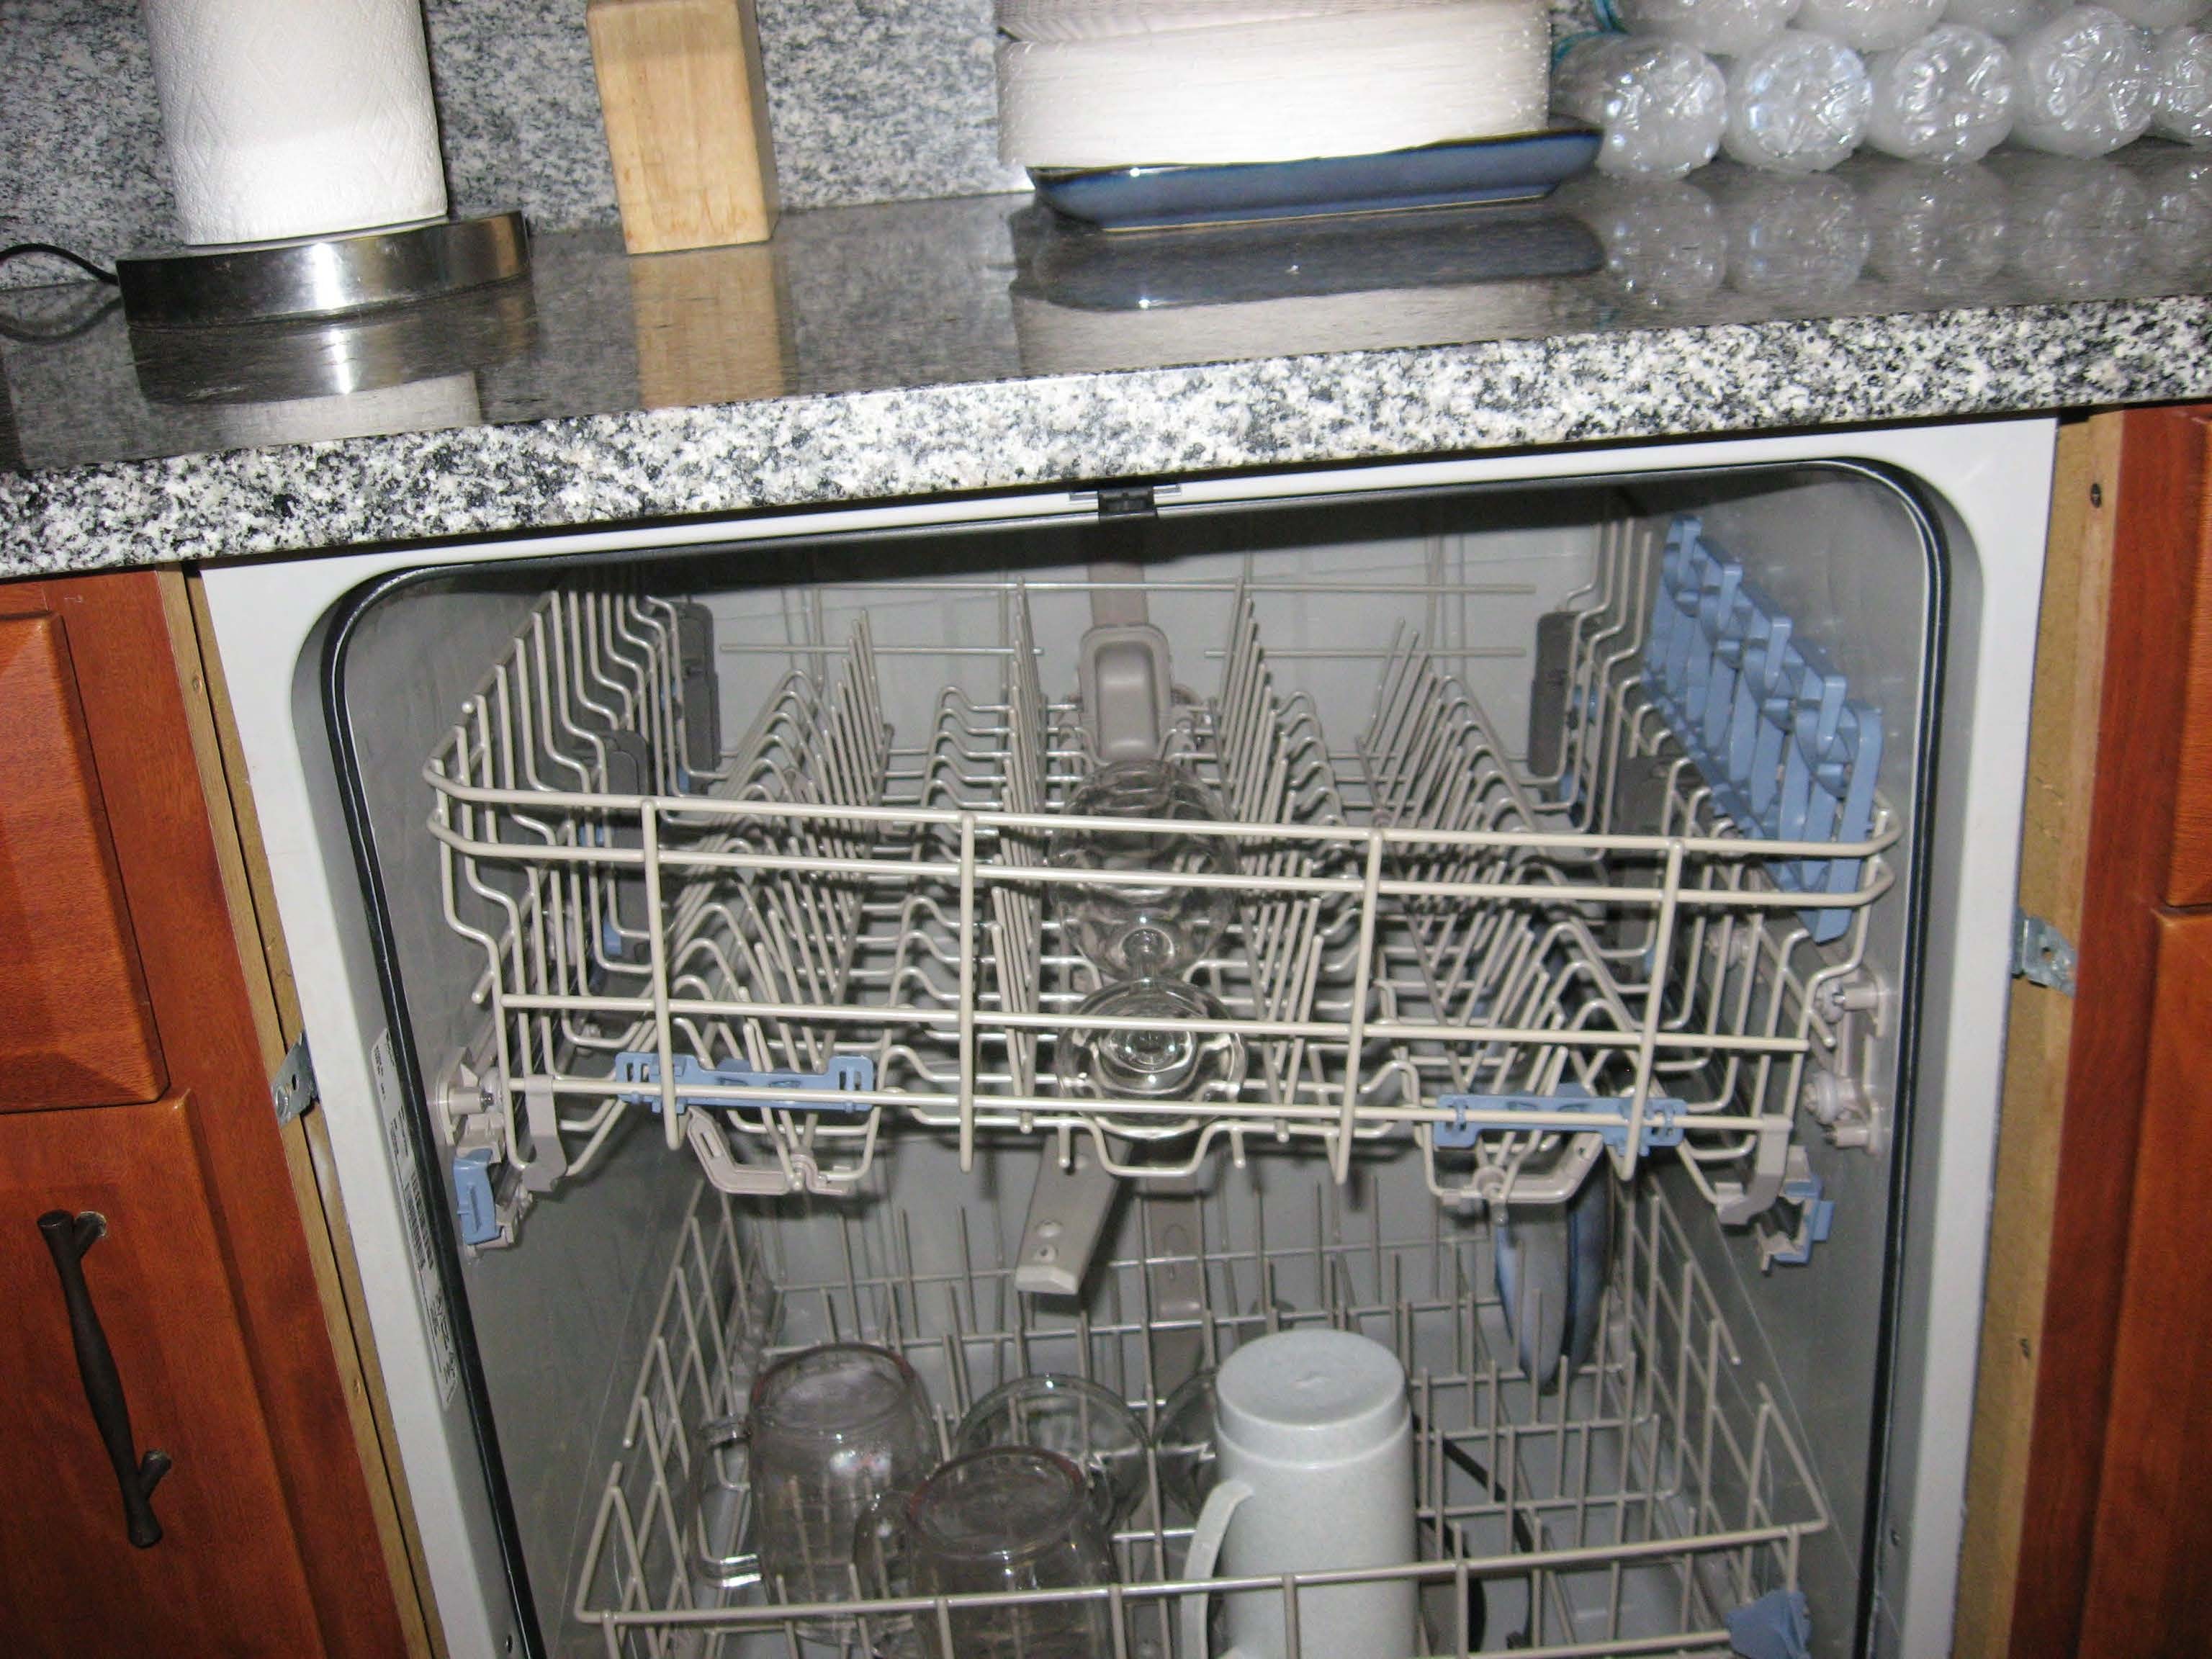

Current Answers
Answer #1: Posted by Odin on November 3rd, 2016 5:48 PM
Odin

Member since:
April 10th, 2010 Points: 41,236,740

Member since:
April 10th, 2010 Points: 41,236,740
Hope this is useful. Please don't forget to click the Accept This Answer button if you do accept it. My aim is to provide reliable helpful answers, not just a lot of them. See https://www.helpowl.com/profile/Odin.
Related Whirlpool WDT710PAYM Manual Pages
Use & Care Guide - Page 1
... www.whirlpool.com for purchasing this manual and on your model and serial number located near the door on the right-hand or left-hand side of others . W10350359B Table of Contents
DISHWASHER SAFETY 1 WHAT'S NEW IN YOUR DISHWASHER 3 PARTS AND FEATURES 4 QUICK STEPS 5 DISHWASHER USE 6 CYCLE AND OPTION DESCRIPTIONS 8 DISHWASHER FEATURES 11 FILTRATION SYSTEM 13 DISHWASHER CARE...
Use & Care Guide - Page 2

...recommendations.
■ Do not abuse, sit on, or stand on the door, lid, or dish racks of the dishwasher.
■ To reduce the risk of injury, do not smoke or use an open door. ...9632; Remove the door or lid to the washing compartment when removing an old dishwasher from service or discarding it will not fit the outlet, have a proper outlet installed by providing a path of least resistance...
Use & Care Guide - Page 4

... Tines
4
TOP RACK BOTTOM RACK
Cup shelves (on some models) Upper spray arm
Silverware basket Detergent dispenser Vents
Parts and Features
POWERSCOUR™ (on some models) powerful jets target water toward pots, pans, or casserole dishes loaded in the back of the dishwasher to clean stubborn messes. Overfill protection float
Resource Efficient Wash System removes...
Use & Care Guide - Page 6

... in the racks.
■ When loading silverware, always place sharp items pointing down and inward to use too little detergent in the covers to keep your silverware separated for the water spray to reach all soiled surfaces.
■ Make sure that when the dishwasher door is important for optimum wash. (See illustration, right.)
STEP...
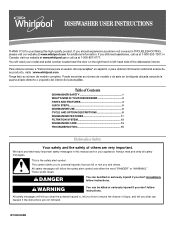
Use & Care Guide - Page 8

... incoming water is ideal to -day and size, while sensing the right level for fast results. temperatures to partial dish loads. Throughout the cycle, the wash
to remove the tough soils. Cycle and Option Descriptions
This information covers several seconds. Your dishwasher may hear noises that you change an option anytime before the...
Use & Care Guide - Page 9
... water temperature in accordance with 2-4-8 Hour Delay). Press START/RESUME. Adds heat, wash time and water to start of the lower level rack. For best drying results, dry dishes with tough food soil. Smaller loads slightly soiled. Certified residential dishwashers are not intended for the delay to the cycle. Press Delay until reaching...
Use & Care Guide - Page 11

...right to make room for a variety of the top rack to fit larger items such as shown.
Reposition the clip on the holding buttons. POWERSCOUR™ Wash Area
The POWERSCOUR™ wash...
center of items may have some or all the way before closing the dishwasher door. Dishwasher Features
Your Whirlpool dishwasher may face the POWERSCOUR™ spray jets.
Make sure items do not ...
Use & Care Guide - Page 12
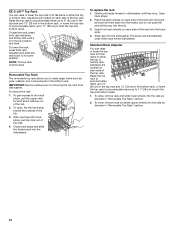
... track stops and slide the tracks back into the dishwasher. Gently pull tracks forward in dishwasher until it is in the bottom rack. Insert front rack wheels on each side of the rails.
4. To lower, remove rack and slide upper wheels into the track slots.
4.
To remove the rack
1. To gain access to fit tall items in both...
Use & Care Guide - Page 14

... To help avoid odor or odor-causing residue in a seasonal dwelling such as part of the dishwasher with the wash water. Turn on the most aggressive cycle - Slowly rotate the filter clockwise until it is left in your dishwasher, use liquid dishwasher detergent on the affresh® product package completely before beginning the cleaning process...
Use & Care Guide - Page 15

...the dishwasher
Is the cycle complete?
Check for hand washing dishes.
2. See the table in the dishwasher console can come from interfering with water. Moisture from opening properly. Keep...? In the U.S.A., www.whirlpool.com In Canada, www.whirlpool.ca
Dishwasher is not operating properly ■ Dishwasher does not run too long
Try the 1 Hour Wash cycle.
Replace the fuse or...
Use & Care Guide - Page 16

... arm can break down in "Filtration System" section for proper dishwasher filling? It might be 120°F (49°C) as it enters the dishwasher. It may shift when dish racks are permanent and cannot be 120°F (49°C) as it in the POWERSCOUR™ wash area are not completely clean
■ Food soil left...
Use & Care Guide - Page 17

...or you would like to schedule service, you on the right-hand or left-hand side of the dishwasher interior.
Consumable parts are excluded from unauthorized modifications made to correct house wiring... assistance, you do not have been removed, altered or cannot be provided by Whirlpool.
5. Service calls to correct the installation of God, improper installation, installation not...
Installation Guide - Page 13
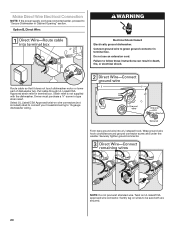
..., or electrical shock. Twist on wires to be sure both are secured.
13
Failure to lower part of the green ground wire. Reattach and tighten the green screw. Connect ground wire to 16-gauge dishwasher wiring.
Remove the green grounding screw and place through strain relief in terminal box. Select UL Listed...
Installation Guide - Page 14

... www.whirlpool.com/electrical under FAQ tab. NOTES:
■ If the minimum cabinet opening height is less than 34" (86.4 cm), the rear wheels can be more difficult to measure the lowest point on the floor).
This will need to move. (Measurements are tucked inside terminal box. Wheels and legs are removed, the dishwasher...
Installation Guide - Page 20
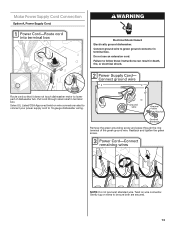
... clockwise around ground connector screw and under the washer.
Strain relief is not supplied with the dishwasher. Select UL Listed/CSA Approved twist-on wire connectors (not included) rated to connect your household... hook. Route cable so that it does not touch dishwasher motor or lower part of dishwasher tub.
Option B, Direct Wire:
WARNING
Electrical Shock Hazard Electrically ground...
Installation Guide - Page 21
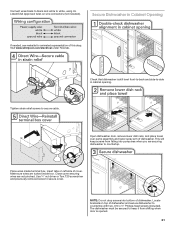
... secure cover. Visit www.whirlpool.com/electrical under FAQ tab. Tighten strain relief screws to countertop. Make sure wires are tucked inside terminal box.
NOTE: Do not drop screws into pump area when you are not pinched. This will keep it from falling into bottom of dishwasher. Secure Dishwasher in cabinet opening. The...
Installation Guide - Page 22
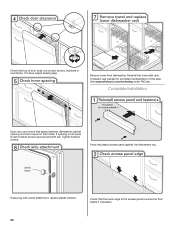
... both sides.
Place the plastic access panel against the dishwasher leg. Check that space between dishwasher cabinet opening and tub is not equal, loosen bracket screws secured and shift tub.
If securing with a side attachment, replace plastic buttons. Reinstall the lower dish rack. Visit www.whirlpool.com/anchoring under FAQ tab. Complete Installation
Open...
Installation Guide - Page 23

...Failure to possibly avoid the cost of the dishwasher tub. Check that power supply cord does not touch dishwasher motor or lower part of these instructions can result in the ... door. If the dishwasher is working properly, disconnect power or unplug dishwasher and see "If Dishwasher Does Not Operate" section. Additional Tips
Expect longer wash times. Your new dishwasher will flash until you...
Dimension Guide - Page 1

... water supply line (Part Number 4396897RP minimum plastic tubing is recommended that the drain hose either be 120°F (49°C) water at dishwasher. It is not ...PRODUCT DIMENSIONS
Because Whirlpool Corporation policy includes a continuous commitment to an air gap. Power supply cord must be looped up and securely fastened to the underside of 12' (3.7 m) (Part Number 3385556) ...
Dimension Guide - Page 2
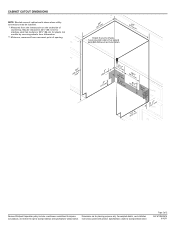
Because Whirlpool Corporation policy includes a continuous commitment to improve
Dimensions are for plastic tub models by removing wheels from dishwasher. ** Minimum, measured from the lowest point on the underside of
countertop. Page 2 of 2
Ref. W10350361A 6/10/11 Specifications subject to change materials and specifications without ...
Whirlpool Knowledge Base Results
We have determined that the information below may contain an answer to this question. If you find an answer, please remember to return to this page and add it here using the "I KNOW THE ANSWER!" button above. It's that easy to earn points!-
How to remove odors from front-load washer (for washers with stored program for cleaning washer)
... not place the tablet in the Estimated Time Remaining display, an error tone will continue. This is added. If the washer displays the letters "rL" (Remove Load) in the detergent dispenser. Make sure you will access this time; If necessary, the cleaning cycle may reduce the effectiveness of buttons will be pressed. If your washing machine... -
Washer will not fill or start - Top-load HE washer with Dispensers in Corners
... are completed. The washer will not start the washer, and let it , ...washer will not properly operate with Dispensers in your Cabrio How the washer senses the load size How does this washing machine...washer with agitator washer with agitator. Once the washer begins the wash action, press the Pause/Cancel button to drain the load. The washer may appear to the load once the washer... -
Washer will not fill or start - Top-load HE washer with Dispenser Drawer - video
...? Does the water level seem too low, or does the washer appear to drain the load. You may appear to be space for draining. As long as a status light is not completely submerged in this washing machine. This is pressed, the washer will not properly operate with the lid open ? The following video demonstrates how...
Similar Questions

Wfw9050xw00 Washer, 3 Beeps, Won't Start
Have a Whirlpool WFW9050XW00 washer, worked fine, unplugged and moved it and now it won't start back...
Have a Whirlpool WFW9050XW00 washer, worked fine, unplugged and moved it and now it won't start back...
(Posted by jdl1985 5 years ago)


Why Is My Dishwasher Making A Grinding Noise And Not Draining Properly?
My dishwasher has been making a grinding noise during wash cycles. It is also not properly draining ...
My dishwasher has been making a grinding noise during wash cycles. It is also not properly draining ...
(Posted by Rockeegsa 12 years ago)