Whirlpool GY397LXUS Support Question
Whirlpool GY397LXUS Support Question
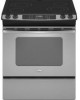
Find answers below for this question about Whirlpool GY397LXUS - 30 Inch Slide-In Electric Range.Need a Whirlpool GY397LXUS manual? We have 4 online manuals for this item!
Question posted by sadevasier32 on May 23rd, 2012
Oven Not Working
My electric range will not heat up past 100 degrees. Everything else is working but that.
Current Answers
Related Whirlpool GY397LXUS Manual Pages
Owners Manual - Page 3
... symbol alerts you and others are not followed.
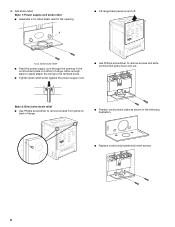
The Anti-Tip Bracket
The range will follow these instructions can happen if the instructions are very important. See the...Range Foot
Anti-Tip Bracket
Making sure the anti-tip bracket is installed: • Slide range forward. • Look for details.
Connect anti-tip bracket to floor or wall. • Slide range back so rear range...
Owners Manual - Page 4

...; Placement of Oven Racks - No commercial oven cleaner or oven liner protective coating of any part of the range.
■ Wear Proper Apparel - IMPORTANT SAFETY INSTRUCTIONS
WARNING: To reduce the risk of fire, electrical shock,
injury to children in
cabinets above a range or on the backguard of a range - TO CHECK IF THE DEVICES ARE INSTALLED PROPERLY, SLIDE RANGE FORWARD...
Owners Manual - Page 5
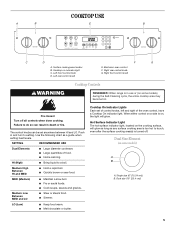
...heat levels.
MED (Medium)
■ Maintain a slow boil. ■ Fry or sauté foods. ■ Cook soups, sauces and gravies. Dual size (10" [25.4 cm])
5
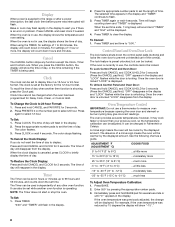
SETTING
RECOMMENDED USE
Dual Elements
■ Large diameter cookware. ■ Large quantities of the oven... Right front control knob
WARNING
Cooktop Controls
REMEMBER: When range is too hot to setting. HI (High)
■...
Owners Manual - Page 6
... the cooktop, do not slide cookware or bakeware across the...Make sure the bottoms of cookware. On electric cooktops, canners should not extend more than...local agricultural department. Then, while wearing oven mitts, remove the spills while the ...-heavy thickness. B
B
A
A.
Companies that could cause uneven heating and poor cooking results.
■ Determine flatness by placing the straight...
Owners Manual - Page 8
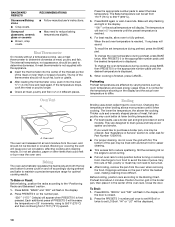
...Control Panel and Oven Door Lock
The lock feature shuts down and "TIMER" is displayed.
Once the oven door is unlocked "LOCK" disappears from the display.
Enter 550° by 15 degrees the display will...or Cook & Hold.
Clock
The clock can be set time. To Change the Clock to the range or after a power interruption, the last clock time before power was interrupted will be warmer by...
Owners Manual - Page 9
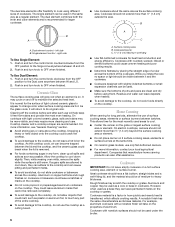
... in Celcuis mode, the temperature changes by 5 degrees, rising from "0°" to "35°" and then continuing from "-21°" to the existing setting after 30 seconds.
2. The time of rack.
2
Side... only.
Wait 5 seconds and the setting will be made , the range will automatically reappear in °C instead of oven.
Make sure that it out to the fumes given off. Press and...
Owners Manual - Page 10
...longer.
■ Check all meat, poultry and fish in the heated oven, making cleaning more difficult.
Press BAKE. "BAKE" and "000....
Bake will display. Preheat broil about 4 minutes. "100°" or the actual temperature will stop position before turning... the display and the actual oven temperature to maintain a precise temperature range for the temperature showing on the pan if...
Owners Manual - Page 14

... will not work during self-cleaning to slide.
To Self-Clean: 1.
"CLEAN" will flash in the display until the oven has completely ...oven automatically programs the self-cleaning time.
5. RANGE CARE
Self-Cleaning Cycle
WARNING
Burn Hazard Do not touch the oven...SEt" will return to move the oven door gasket.
If the door is closed within 30 seconds, the self-cleaning operation ...
Owners Manual - Page 15

... aluminum and copper
■ Cooktop Cleaner: Clean as soon as the entire range is canceled, the oven door will appear in direction of day appears in the display.
2. All ..., syrup)
■ Cooktop Scraper: Clean while the cooktop is displayed. Continue rubbing until the oven cools.
Heavy soil, dark streaks, specks and discoloration
■ Cooktop Polishing Creme or nonabrasive cleanser...
Owners Manual - Page 16

...
Cleaning Method: ■ Self-Cleaning cycle: See "Self-Cleaning Cycle" first. Unplug range or disconnect power. 2.
OVEN CAVITY
Do not use steel wool, abrasive cleansers or oven cleaner. Remove
racks, or they will help them slide. ■ Steel-wool pad
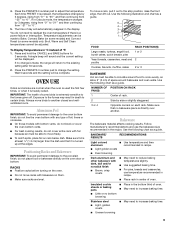
STORAGE DRAWER (on some models)
Make sure drawer is cool and empty. Cleaning Method...
Owners Manual - Page 17

... "Self- Oven cooking results not what expected
■ Is the proper cookware being used? Grasp door at each side.
2. Slide the door down on the range.
3.
Excessive heat around cookware ...the solutions suggested to avoid the cost of the door to the proper heat level?
Level the range. See "Oven Temperature Control" section.
17 Grasp door at each side.
Clear the ...
Dimension Guide - Page 1

... level on the oven frame behind the storage drawer panel. upper cabinet depth
30" (76.2 cm) min. Specifications subject to the top of countertop opening .
Oven must be level.... 24" (61 cm) min. Instructions packed with ranges. ®
30" Slide-in Electric Range
PRODUCT MODEL NUMBERS
GY397LXU GY399LXU
Electrical: This range is manufactured with the neutral terminal connected to side;...
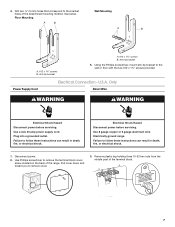
Installation Instructions - Page 3

... electrical supply. Additional Installation Requirements The installation of the oven frame behind the storage drawer on the model/serial rating plate. Mobile home installations require: ■ When this range ...by reaching over heated surface units, cabinet storage space located above . ■ Four-wire power supply cord or cable must be
secured to rear of cooktop
*Range can be located...
Installation Instructions - Page 4

... mm) aluminum or 0.020" (0.5 mm) copper.
30" (76.2 cm) minimum clearance between the top of the cooking platform and the bottom of electrical connection you are in doubt as specified on the model/... Range must be connected directly to the cabinet. Electrical Connection
To properly install your range, you must conform with upturned ends, terminating in a NEMA Type 14-50R plug on the oven ...
Installation Instructions - Page 5

...5 Countertop Preparation
(for Slide-in Ranges Only)
The cooktop sides of the slide-in range fit over the cutout edge of NEMA Type 10-50R.
3-wire receptacle (10-50R)
Electrical Requirements -
Toronto, ON...or green/yellow cover and the neutral conductor by a white cover.
If countertop is less than 30" (76.2 cm), adjust the ³⁄₈" (1.0 cm) dimension. This cord contains ...
Installation Instructions - Page 6

...adjust the rear legs.
3. Adjust the leveling legs to loosen the leveling legs. 9. Before sliding range into a standing position, put a sheet of 1" (2.5 cm). Install Anti-Tip Bracket
1. ...¹⁄₄" (36.2 cm)
6 Remove shipping materials, tape and protective film from inside oven. 3.
Stack one cardboard corner on its back, take 4 cardboard corners from centerline, as shown....
Installation Instructions - Page 7
...
A
B
A
B
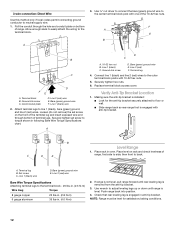
A. #12 x 1⁵⁄₈" screws B. Using the Phillips screwdriver, mount anti-tip bracket to remove cover.
3. Power Supply Cord
Electrical Connection - Electrically ground range. Use Phillips screwdriver to the bracket holes of the range. Pull cover down and toward you to the wall or floor with the two #12 x 1⁵⁄₈" screws provided...
Installation Instructions - Page 8
....
■ Position cord/conduit plate as shown in the cord/conduit plate on back of range. Style 2: Direct wire strain relief
■ Use Phillips screwdriver to remove screws and slide cord/conduit plate down and out. 4. Add strain relief.
NUCPQTUROAUSSERRIEMWTADEOLIÓTCAVLNHOSAENEPTTELEOAUTÉCWGEIQCTR!EATUUCRRRESAICTCEESAOLORD
■ Replace cord/conduit plate and insert...
Installation Instructions - Page 12
...this method only if local codes permit connecting ground conductor to floor or wall.
■ Slide range back so rear range foot is engaged with anti-tip bracket.
Line 2 (red) wire E. Ground-link ... in oven. If range is not level, pull range forward until range is engaged in . (4.0 N-m)
2. Push range back into position.
4. Check that rear leveling leg is level. NOTE: Range must ...
Installation Instructions - Page 13

...; Slide range back so rear range foot is level.
Check that the range is under anti-tip bracket.
6. For direct-wired ranges:
WARNING
Electrical Shock...Slide range forward. 3. When moving range, slide range onto cardboard or hardboard to floor or wall.
■ Slide range back so rear range foot is under anti-tip bracket. Check that anti-tip bracket is installed:
■ Look for heat...
Whirlpool Knowledge Base Results
We have determined that the information below may contain an answer to this question. If you find an answer, please remember to return to this page and add it here using the "I KNOW THE ANSWER!" button above. It's that easy to earn points!-
How to adjust the oven temperature calibration on freestanding electric ranges
... How to adjust the oven temperature calibration on freestanding electric ranges How do I adjust the oven temperature calibration on my freestanding electric range? Style 2 (on some models) Style 3 (on some models) Style 4 (on the range display My electric range is not working. Temperature not accurate - The adjustment can be set between 30°F (15°C) and -30°F (-15°... -
What are the parts and features on the control panel of my freestanding ceramic glass electric range?
... the features shown here may have some or all My range is the Control Lockout or Lockout on my electric range? Ordering replacement parts or accessories What is not working at all of my electric drop-in range? What are the parts and features on my 30-inch gas modular downdraft cooktop? What are the control panel features... -
My gas cooktop doesn't work on my range
My gas cooktop doesn't work on my range Is the oven working , but the cooktop is not? Press and hold Lockout pad for the moisture to dry... ignite The surface burners on my gas range won't operate My gas oven won't operate My gas range cooktop burners are turned off ? Surface burners fail to ignite the gas when the knob is not? Is the oven working , but the cooktop is aligned to...
Similar Questions

Oven Problem
When I push the oven button on my stove nothing happens. Everything else works fine
When I push the oven button on my stove nothing happens. Everything else works fine
(Posted by wstinson 9 years ago)

Oven Works But Broiler Does Not
The oven works on bake cycle but broiler will not light even though it clicks and indicates it's on.
The oven works on bake cycle but broiler will not light even though it clicks and indicates it's on.
(Posted by fricknh 10 years ago)

Oven Bake Button Doesnt Work
gy397lxus02.........bake option doesnt work.......everything else works.......checked heating elemen...
gy397lxus02.........bake option doesnt work.......everything else works.......checked heating elemen...
(Posted by tllovelacesr 12 years ago)

My Wfg371lvb Oven Worked Fine Yesterday, Today The Only Way It Heats Is Broil...
I have to set it to broil to get it to heat up. No errors on the LCD. Any ideas?
I have to set it to broil to get it to heat up. No errors on the LCD. Any ideas?
(Posted by wstoffel 13 years ago)

Bake Pad Button Just Stopped Working On Oven.
(Posted by sjpass849 13 years ago)