Get support for Singer Professional 5 Serger 14T968DC

Singer Professional 5 Serger 14T968DC Support Question

Singer Professional 5 Serger 14T968DC Support Question

Find answers below for this question about Singer Professional 5 Serger 14T968DC.
Need a Singer Professional 5 Serger 14T968DC manual? We have 3 online manuals for this item!
Question posted by solinda4aiya on October 14th, 2022

My Serger Got Jame

I have it on and keep sewing for 2h, and it start getting stuck, the motor not moving forward, but it can move backwards.

Current Answers

Answer #1: Posted by SonuKumar on October 15th, 2022 9:35 AM
This answer was accepted by the poster of the original question.
SonuKumar

Member since:
May 9th, 2021

Points: 16,577,220
1,100
points


Please respond to my effort to provide you with the best possible solution by using the "Acceptable Solution" and/or the "Helpful" buttons when the answer has proven to be helpful.

Regards,
Sonu
Your search handyman for all e-support needs!!

Related Singer Professional 5 Serger 14T968DC Manual Pages

Instruction Manual - Page 2

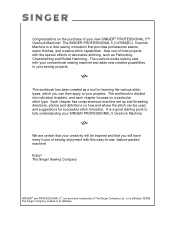
The SINGER PROFESSIONAL 5 (14T968DC) Overlock Machine is a time saving innovation that you can be inspired and that provides professional seams, seam finishes, and creative stitch capabilities. We are exclusive trademarks of The Singer Company Ltd. Sew one-of-kind projects with this easy-to your new SINGER® PROFESSIONAL 5™ Overlock Machine! The overlock works side by side...
Instruction Manual - Page 13

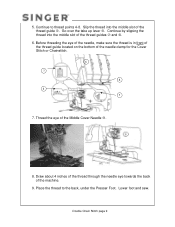
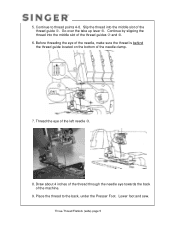
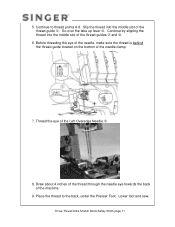
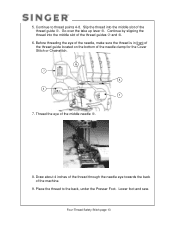
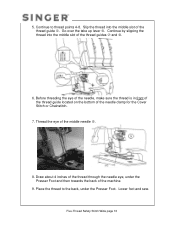
...of the needle clamp for the Cover Stitch or Chainstitch. 6 7 4 8 5 7. Lower foot and sew. Before threading the eye of the needle, make sure the thread is in front of the thread guide ... middle slot of the thread guides and . 6. Continue by slipping the thread into the middle slot of the machine. 9. Draw about 4 inches of the thread through the needle eye towards the back of the thread guide ....
Instruction Manual - Page 41

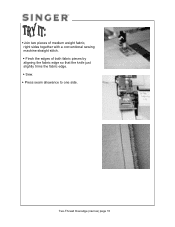
Sew. Finsh the edges of medium weight fabric, right sides together with a conventional sewing machine straight stitch. Two-Thread Overedge (narrow) page 10 Join two pieces of both fabric pieces by aligning the fabric edge so that the knife just slightly trims the fabric edge. Press seam allowance to one side.
Instruction Manual - Page 45

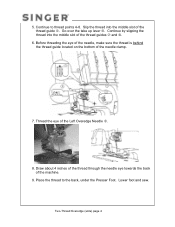
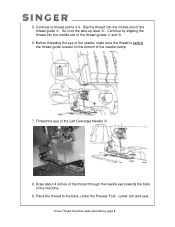
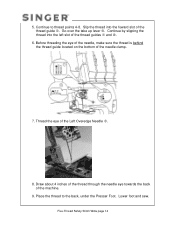
Lower foot and sew. Place the thread to thread points 4-8. 5. Thread the eye of the needle clamp. 7. Continue by slipping the thread into the ...the Left Overedge Needle . 8. Continue to the back, under the Presser Foot. Slip the thread into the middle slot of the machine. 9. Draw about 4 inches of the thread through the needle eye towards the back of the thread guides and . 6.
Instruction Manual - Page 46

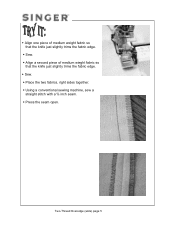
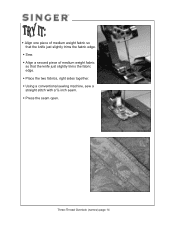
... the knife just slightly trims the fabric edge. Align one piece of medium wieght fabric so that the knife just slightly trims the fabric edge. Sew. Using a conventional sewing machine, sew a straight stitch with a ⅝ inch seam. Sew. Press the seam open. Two-Thread Overedge (wide) page 5 Place the two fabrics, right sides together.
Instruction Manual - Page 48

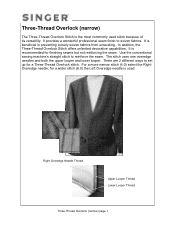
Use the conventional sewing machine's straight stitch to set up for a Three-Thread Overlock stitch. There are 2 different ways to reinforce the seam. Three-Thread Overlock (narrow) The Three-Thread Overlock Stitch is the most commonly used . It provides a wonderful professional seam finish to woven fabrics. It is beneficial in preventing loosely woven fabrics...
Instruction Manual - Page 61

... the knife just slightly trims the fabric edge. Align a second piece of medium weight fabric so that the knife just slightly trims the fabric edge. Sew. Press the seam open. Three-Thread Overlock (narrow) page 14 Place the two fabrics, right sides together. Using a conventional sewing machine, sew a straight stitch with a ⅝ inch seam.
Instruction Manual - Page 74

... thread guide . Before threading the eye of the needle, make sure the thread is behind the thread guide located on the bottom of the machine. 9. Lower foot and sew. Place the thread to thread points 4-8. 5. Three-Thread Overlock (wide-decorative) page 8 Slip the thread into the middle slot of the Left Overedge...
Instruction Manual - Page 95

... 4 inches of the thread through the needle eye towards the back of the thread guides and . 6. Place the thread to thread points 4-8. Lower foot and sew. Continue by slipping the thread into the middle slot of the thread guide . Slip the thread into the middle slot of the...
Instruction Manual - Page 108

... middle slot of the thread guides and . 6. Continue by slipping the thread into the middle slot of the needle clamp. 7. Thread the eye of the machine. 9. Three-Thread Ultra-Stretch Mock Safety Stitch page 11 5. Before threading the eye of the needle, make sure the thread is behind the thread guide...
Instruction Manual 2 - Page 15

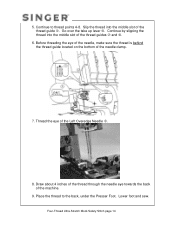
... eye of the thread guide . Lower foot and sew. 5. Slip the thread into the middle slot of the thread guides and . 6. Before threading the eye of the needle, make sure the thread is behind the thread guide located on the bottom of the machine. 9. Draw about 4 inches of the thread through the...
Instruction Manual 2 - Page 18

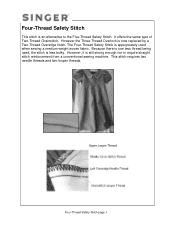
... weight woven fabric. Four-Thread Safety Stitch page 1 However the Three-Thread Overlock is an alternative to require straight stitch reinforcement from a conventional sewing machine. This stitch requires two needle threads and two looper threads. Four-Thread Safety Stitch This stitch is now replaced by a Two-Thread Overedge finish. The ...
Instruction Manual 2 - Page 30

... the take up lever . Slip the thread into the middle slot of the thread guides and . 6. Thread the eye of the machine. 9. Four-Thread Safety Stitch page 13 Lower foot and sew. Draw about 4 inches of the thread through the needle eye towards the back of the middle needle . 8. Continue by slipping...
Instruction Manual 2 - Page 33

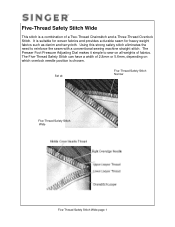
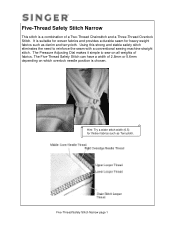
...-Thread Safety Stitch Wide Five-Thread Safety Stitch Wide page 1 The Presser Foot Pressure Adjusting Dial makes it simple to reinforce the seam with a conventional sewing machine straight stitch. It is suitable for woven fabrics and provides a durable seam for heavy weight fabrics such as denim and terrycloth. Using this strong safety...
Instruction Manual 2 - Page 46

... the bottom of the thread guides and . 6. Continue by slipping the thread into the foward slot of the machine. 9. Five-Thread Safety Stitch Wide page 14 Continue to the back, under the Presser Foot. Lower foot and sew. Place the thread to thread points 4-8. Thread the eye of the Left Overedge Needle . 8. 5.
Instruction Manual 2 - Page 48

... by slipping the thread into the middle slot of the thread guide . Thread the eye of the machine. 9. Draw about 4 inches of the thread through the needle eye, under the Presser Foot. Five...front of the thread guide located on the bottom of the thread guides and . 6. Lower foot and sew. Slip the thread into the middle slot of the needle clamp for the Cover Stitch or Chainstitch. ...
Instruction Manual 2 - Page 51

... Adjusting Dial makes it simple to reinforce the seam with a conventional sewing machine straight stitch. The Five-Thread Safety Stitch can have a width of...Thread Chainstitch and a Three-Thread Overlock Stitch. Using this strong and stable safety stitch eliminates the need to sew on which overlock needle position is chosen. Hint: Try a wider stitch width (6.5) for heavy weight fabrics ...
Instruction Manual 2 - Page 66

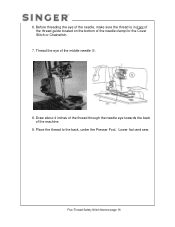
6. Place the thread to the back, under the Presser Foot. Lower foot and sew. Draw about 4 inches of the thread through the needle eye towards the back of the middle needle . 8. Thread the eye of the machine. 9. Five-Thread Safety Stitch Narrow page 16 Before threading the eye of the needle, make sure...
Instruction Manual 2 - Page 69

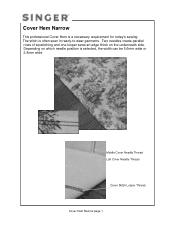
..., the width can be 5.6mm wide or 2.8mm wide. Depending on the underneath side. Two needles create parallel rows of topstitching and one looper sews an edge finish on which needle position is often seen in ready-to-wear garments. Cover Hem Narrow This professional Cover Hem is a necessary requirement for today...
Instruction Manual 2 - Page 77

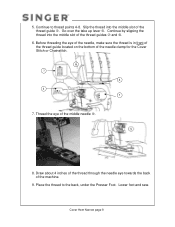
... the thread to thread points 4-8. Slip the thread into the middle slot of the machine. 9. 5. Draw about 4 inches of the thread through the needle eye towards the back of the thread guides and . 6. Lower foot and sew. Cover Hem Narrow page 9 Continue to the back, under the Presser Foot. Go over the...

Similar Questions

Needle Will Not Reposition
When I go to turn the needle location knob to move the needle either left or right the needle no lon...
(Posted by shawen 8 years ago)
Singer Sewing Machine Series 5500/5400
I just got this sewing machine and I have read the manual. I cannot get the machine to engage. I am ...
(Posted by skalvig 10 years ago)
No Power To Machine
Im was sewing a seam and the machine was bouncing quite a bit on the table..not real sturdy. It just...
(Posted by lbouska 10 years ago)
Ask a New Question
Use the box below to post a new question about this Singer product .
Points & Prizes
  • You can earn points for nearly everything you do on HelpOwl.com
  • You can trade in those points for gift cards at leading retailers such as Amazon.com and Walmart
  • It's that simple!
See How it Works
Create a Free Account

Singer Manuals

Find free Singer Professional 5 Serger 14T968DC manuals and user guides available at ManualOwl.com. Try out our unique manual viewer allowing you to interact with manuals from directly within your browser!

Singer Reviews

View thousands of Singer user reviews and customer ratings available at ReviewOwl.com.

Contact Information

Complete Singer customer service contact information including steps to reach representatives, hours of operation, customer support links and more from ContactHelp.com.

Scoreboard Ratings

See detailed Singer customer service rankings, employee comments and much more from our sister site.