Ridgid R350CHE Support Question
Ridgid R350CHE Support Question
Find answers below for this question about Ridgid R350CHE.Need a Ridgid R350CHE manual? We have 2 online manuals for this item!
Question posted by Rivergod177 on June 24th, 2014
How To Adjuest Air Press On Ridgid R350che
I can't fine in the operators manual for my r350che that part that tells me how to adj. the pres. On the nailer?
Current Answers
Answer #1: Posted by waelsaidani1 on June 25th, 2014 12:21 PM
waelsaidani1

Member since:
May 12th, 2013 Points: 19,501,777

Member since:
May 12th, 2013 Points: 19,501,777
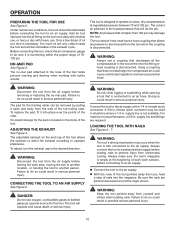
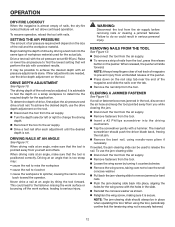
setting the AIR pressure The amount of air pressure required will depend on the size of the nail and the workpiece material. Begin testing the depth of drive by driving a test nail into the same type of workpiece material used for the actual job. Drive a test nail with the air pressure set at 90-95 psi. Raise or lower the air pressure to find the lowest setting that will perform the job with consistent results. It may be possible to achieve the desired depth with air pressure adjustments alone. If finer adjustments are needed, use the drive depth adjustment on the tool. removing nails from the tool See Figure 12. =550; Disconnect the tool from the air supply. =550; =516;To remove a strip of nails from the tool, press the release button on the pusher. When released, the pusher will slide forward. NOTE: Always keep fingers clear of nail track of magazine to prevent injury from unintended release of the pusher. drivE depth ADJUSTMENT See Figure 10. The driving depth of the nail may be adjusted. It is advisable to test the depth on a scrap workpiece to determine the required depth for the application. To determine depth of drive, first adjust the air pressure and drive a test nail. To achieve the desired depth, use the drive depth adjustment on the tool. =550; Disconnect the tool from the air supply. =550; Turn the depth selector left or right to change the driving depth. =550; Reconnect the tool to the air supply. =550; Drive a test nail after each adjustment until the desired depth is set. =550; Press down on the nail stop tab near the end of the magazine and slide the nails over the tab. =550; Remove the nail strip from the tool. CLEARING A JAMMED FASTENER See Figure 13. If a nail or fastener becomes jammed in the tool, disconnect the air hose and keep the tool pointed away from you while clearing the jam. =550; Disconnect the tool from the air supply. =550; =505;Remove fasteners from the tool. =550; Insert a #2 Phillips screwdriver into the driving mechanism. =550; Tap the screwdriver gently with a hammer. The inserted screwdriver should push the driver blade back, freeing the nail jam. =550; Remove the bent nail, using needle-nose pliers if necessary. If needed, the jam-clearing slide can be used to release the nail. To use the jam-clearing slide: =550; Disconnect the tool from the air supply. =550; =505;Remove fasteners from the tool. =550; Loosen the wing screw by turning it counterclockwise. =550; Remove the wing screw, taking care not to lose the small concave washer. =550; Pull back the jam-clearing slide to remove jammed or bent nails. =550; Push the jam-clearing slide back into place, aligning the holes for the wing screw with the holes in the slide. =550; Reinstall the concave washer as shown. =550; Retighten the wing screw, making sure it is secure.
Related Ridgid R350CHE Manual Pages
Operation Manual - Page 3
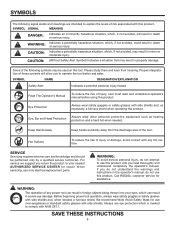
... in the hands of the enclosure plastic. Following this manual. SERVICE
Tool service must be worn by unqualified personnel may affect the tool's operation. GENERAL SAFETY RULES
danger:
READ AND UNDERSTAND TOOL LABELS AND MANUAL.
Contain long hair. A moment of injury.
When servicing a tool, use over eyeglasses or standard safety glasses that provide protection...
Operation Manual - Page 4
...; o not alter or modify this tool. Do not discharge fasteners into open air.
U se the pneumatic tool only for the purpose for its applications and limitations, as well as accidental actuation may occur, possibly causing injury.
Choice of triggering method is properly secured before pressing the nailer against the material. Positioning the...
Operation Manual - Page 5
...tool
Do not load the tool with fasteners when any part of body in use the tool will recoil immediately after driving a fastener. When loading tool: Never place a hand or any one of the operating... being driven from the nailer. Do not attempt to prevent the recoil by holding the nailer against the work.
If you loan someone this tool as tool will be deflected possibly ...
Operation Manual - Page 6
... explain the levels of injury, user must read thoroughly and understand completely the operator's manual. Proper interpretation of the tool. Eye, Ear and Head Protection
Always wear other personal protective equipment such as necessary, a full face shield when operating this product. Call RIDGID® customer service for repair. Always use this product.
WARNING:
To avoid...
Operation Manual - Page 7
...drive areas of the tool component(s) intended to actuate the tool. Maximum air pressure The maximum allowable pressure of the compressed air, as part of an actuation system, can occur when a specific operating control, other fastening device which is designed and manufactured for operating a tool. Trigger A tool operating control activated by a tool operator's fingers.
Additional actuation...
Operation Manual - Page 8
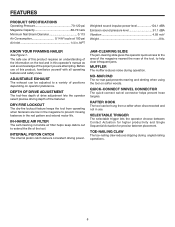
....
The safe use of this operator's manual as well as a knowledge of the project you are low in the magazine to prevent missing fasteners in -handle air filter helps keep debris out to extend the life of the information on the tool and in this product, familiarize yourself with all operating features and safety rules...
Operation Manual - Page 9
...Nailer Carrying Bag Oil Hex Key Eye Protection Fastener Guide Operator's Manual
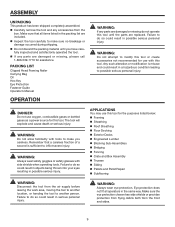
OPERATION
WARNING:
If any parts are damaged or missing do so could result in possible serious personal injury. WARNING:
Do not allow familiarity with tools...
WARNING:
Disconnect the tool from the air supply before leaving the work area, moving the tool to another location, or handing the tool to make sure no...
Operation Manual - Page 10
... injury.
10
ADJUSTing the EXHAUST
See Figure 4. WARNING:
The tool's driving mechanism may cycle when the tool is empty at the beginning of the tool. Add air tool lubricant into the air fitting on the body of each work area, moving the tool to another location, or handing the tool to operator preference. supply line is located on the...
Operation Manual - Page 11

...wedge or hold back the workpiece contact mechanism during operation. Reconnect the tool to the air supply. Grip the tool firmly to maintain control. Squeeze and ...The nailer will recoil immediately after driving a fastener. WARNING:
Do not use of the tool. The selectable trigger can result in tool malfunction, leading to prevent movement during operation of tool or...
Operation Manual - Page 12
... from unintended release of the pusher. Press down on a scrap workpiece to determine the required depth for the application. When released, the pusher will not allow continued operation. NOTE: Always keep the tool pointed away from you while clearing the jam. Disconnect the tool from the air supply. Remove fasteners from...
Operation Manual - Page 13
... damage, weaken or destroy plastic which may freeze and prevent tool operation. cold weather operation
For cold weather operation, near and below freezing, the moisture in the air line may result in the system. The air volume supplied to prevent frost or ice formation on the tools' operating valves and mechanisms that would prevent full volume flow of...
Operation Manual - Page 14

... and pull the trigger several times. Repeat this manual. The driver must not operate.
• With the workpiece contact not engaged on the trigger to ensure that best fits your application. The tool must not operate.
• Press the workpiece contact firmly against a workpiece to Contact Actuation operation, Position B, as shown in place and the wing...
Operation Manual - Page 15
...
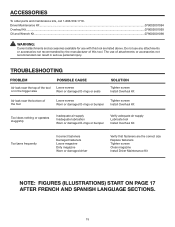
Loose screws Worn or damaged O-rings or bumper
Tighten screws Install Overhaul Kit
Tool does nothing or operates sluggishly
Inadequate air supply Inadequate lubrication Worn or damaged O-rings or bumper
Verify adequate air supply Lubricate tool Install Overhaul Kit
Tool jams frequently
Incorrect fasteners Damaged fasteners Loose magazine Dirty magazine Worn or damaged driver
Verify that...
Operation Manual - Page 16
...particular purpose, that cannot be presented when requesting warranty service. WARRANTY
RIDGID® PNEUMATIC TOOL 3 YEAR LIMITED SERVICE WARRANTY
Proof of purchase must be disclaimed under state ...service center for this warranty.
HOW TO OBTAIN SERVICE
To obtain service for RIDGID® branded pneumatic tools. RIDGID, INC. You may obtain the location of purchase, if you by ...
Repair Sheet - Page 3
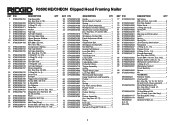
...64-71 1 Filter 1 End Cap 1 Spring Pin 2 Swivel Air Plug (NPT 3/8 in 1
KEY P/N
77 079005004108 78 079005004067...x 18 mm, Soc. Oil and 5 mm Hex Key 1 Tool Bag (CHE Only 1 Glasses 1 Operator's Manual 1
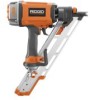
3 Soc. Hd 4 Compression Spring 1 Top Cap Gasket...Lubricant)........ 1 Driver Maintenance Kit (Inc. R350CHE/CHECN Clipped Head Framing Nailer
KEY P/N
1 079022002704
2 079005004009 3...
Similar Questions

No Power R250af18
The battery is charged and I'm inserted but there's no power
The battery is charged and I'm inserted but there's no power
(Posted by schezerstephanie 2 years ago)

I Have Air Coming Out Of The Top Of My R350rhe.doesnt Work
my R350RHE has air flow coming out of the top all the time (exhaust area).nail gun doesnt work.How d...
my R350RHE has air flow coming out of the top all the time (exhaust area).nail gun doesnt work.How d...
(Posted by heimlichelectric 2 years ago)

Auto Actuation Not Functional
When I Depress the contact tipand pull the trigger it functions but when I try to switch over to aut...
When I Depress the contact tipand pull the trigger it functions but when I try to switch over to aut...
(Posted by jeffyoungrmt 5 years ago)

Rp-210 Crimper Tool
how can we order a replacement motor for the tool. the end has come off part way and the tool in una...
how can we order a replacement motor for the tool. the end has come off part way and the tool in una...
(Posted by webb97907 8 years ago)

When I Start It It Just Turns Off
I have a green light when i switch it on but when i start it it just turns off?
I have a green light when i switch it on but when i start it it just turns off?
(Posted by thomas20792 8 years ago)