Ricoh Aficio MP C4502 Support Question
Ricoh Aficio MP C4502 Support Question
Find answers below for this question about Ricoh Aficio MP C4502.Need a Ricoh Aficio MP C4502 manual? We have 2 online manuals for this item!
Question posted by tcouvion on November 5th, 2012
Two Sided Printing
How do I turn off two sided printing?
Current Answers
Answer #1: Posted by freginold on November 5th, 2012 7:24 PM
freginold

Member since:
December 20th, 2011 Points: 23,253,885

Member since:
December 20th, 2011 Points: 23,253,885
Hi, to turn off two-sided printing go into your print driver and under either the General or Paper tab, find the option for Duplex and set it to Off.
Related Ricoh Aficio MP C4502 Manual Pages
General Settings Guide - Page 2
...: Some illustrations in hazardous radiation exposure. Notes: The model names of this manual. • Type 1:8035e/8035eg/DSm735e/DSm735eg/LD335/Aficio MP 3500/Aficio MP 3500G • Type 2:8045e/8045eg/DSm745e/DSm745eg/LD345/Aficio MP 4500/Aficio MP 4500G Certain types might result in this manual might not be liable for quick reference. For details, please contact your...
General Settings Guide - Page 6
... the Forwarding Function 129 Forwarding Mark ...130 Parameter Settings 131 Changing the User Parameters 136 Printing the User Parameter List 137 Special Senders to Treat Differently 138 Authorized Reception 140 Forwarding ...141 Reception File Print Quantity 141 Print 2 Sided...142 Memory Lock...142 Paper Tray ...142 Programming/Changing Special Senders 143 Programming Initial Set...
General Settings Guide - Page 55
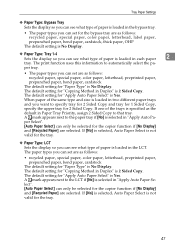
... so you can see what type of paper is loaded in each paper
2
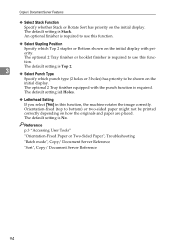
tray. The print function uses this information to that tray. The default setting for the bypass tray are selected....Auto Paper Select] can only be selected for "Copying Method in Paper Tray Priority, assign 2 Sided Copy to automatically select the pa- The default setting for the copier function if [No Display] ...
General Settings Guide - Page 56

.... When [Full Time] is selected, the cover sheet tray is always displayed. The default setting for two-sided copying.
After selecting the paper tray, you can set Copying Method in the bypass tray when printing data from the computer.
• The paper types you can also specify the display timing and
copy...
General Settings Guide - Page 76

... the se-
C Press [TNext]. D Press [Print Address Book: Destination List]. F To print the list on two-sided pages, select [Print on 2 Sides]. You can also select a name using the number keys.
❖ Print Address Book: Destination List You can print the destination list registered in the Address Book. • Print in Title 1 Order Prints the Address Book in Title...
General Settings Guide - Page 87
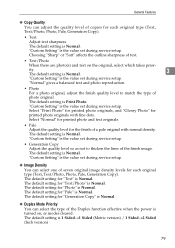
... is Normal. The default setting for "Pale" is turned on the original, select which takes prior- ity. "Custom Setting" is 1 Sided→1 Sided (Metric version) / 1 Sided→2 Sided (Inch version)
79 The default setting for printed photo originals with normal density. "Custom Setting" is Normal. Select "Print Photo" for printed photo originals, and "Glossy Photo" for "Text" is...
General Settings Guide - Page 102
...ority. The optional 2 Tray finisher or booklet finisher is required to bottom) or two-sided paper might not be shown on how the originals and paper are placed. The default ...Select Stapling Position
Specify which punch type (2 holes or 3 holes) has priority to be printed correctly depending on the
initial display. The optional 2 Tray finisher equipped with pri- Reference p.3 "Accessing ...
General Settings Guide - Page 107
...on . RX (Print Confidential Reception)
• Print Memory Lock
• Stored File
• Send Later
• Auto Document
• 2 Sided Original • ...Print
• Label Insertion
• RX File Status (Reception File Status)
• Forwarding
• Transfer Request
• Switch RX Mode (Reception Mode Switch)
• Manual E-mail RX (when the Internet Fax is turned...
General Settings Guide - Page 109

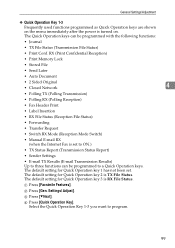
The default setting is 1 set(s).
• 1 to 10 set(s)
❖ 2 Sided Print
Specify whether or not received fax documents are to be forwarded to be printed on the options installed.
❖ Specify Tray for Lines Specify a paper tray for each line (telephone, Internet Fax, IP-Fax).
The default setting is Auto ...
General Settings Guide - Page 110

...Specify whether or not a checkered mark is Off. ❖ Print Reception Time Specify whether or not the received date, time, and file number are printed at the top center of received fax documents. Reference p.3 "... default tray. If you select [Off], the received fax is delivered to be printed halfway down the left side and at the bottom of each page received. The default setting is On. &#...
General Settings Guide - Page 146
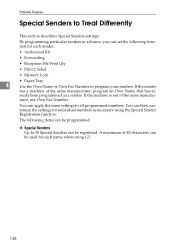
... programming particular senders in advance, you can set the following items can be used for each sender:
• Authorized RX
• Forwarding
• Reception File Print Qty
• Print 2 Sided
• Memory Lock
• Paper Tray
4
Use the Own Name or Own Fax Number to all programmed numbers.
General Settings Guide - Page 147

..., you can program a common sequence of characters to identify destinations using the specified sender list.
❒ To use Forwarding, Print 2 Sided, or Paper Tray with Internet Fax receptions.
• Authorized RX
• Reception File Print Qty
• Memory Lock
❒ You can program up to 24 characters for the sender.
❒ You can...
General Settings Guide - Page 150
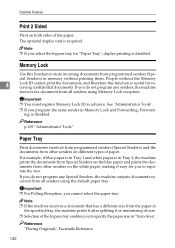
... documents, and therefore this function to store incoming documents from all senders using the default paper tray. Facsimile Features
Print 2 Sided
Print on both sides of the bypass tray enables you to separate the two.
cial Senders) in "Scan Area". Important ❒ You must register Memory Lock ID in Tray 1 ...
General Settings Guide - Page 152

...
B Press [On] or [Off], and then press [OK]. Reference p.139 "Using Full agreement :" p.144 "Authorized RX (Authorized Reception)" p.145 "Forwarding" p.146 "Reception File Print Qty" p.147 "Print 2 Sided" p.147 "Memory Lock" p.147 "Paper Tray"
4
Authorized RX (Authorized Reception)
This section describes how to [On]. See "Reception Settings".
Facsimile Features
L Press the {User Tools...
General Settings Guide - Page 155

...Note ❒ Selecting [Same as Basic Settings] will result in the same setting made for "2 Sided Print" of "Reception Settings". B Press [On] or [Off], and then press [OK]. Reference..."Program Memory Lock ID" under "Administrator Tools".
Special Senders to Treat Differently
Print 2 Sided
This section describes how to specify Memory Lock.
Specify when programming a Special Sender...
General Settings Guide - Page 182
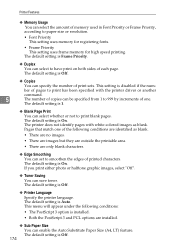
... select the amount of memory used in Font Priority or Frame Priority, according to have print on both sides of each page. The default setting is Frame Priority.
❖ Duplex You can save toner. ber of pages to print has been specified with white-colored images as blank.
• There are no images...
General Settings Guide - Page 211

... the User Code Authentication is specified.
G Press [Print].
203 Authentication Information
Printing the Counter for Each User
This section describes how to select all user codes on the Page] to print the counter for each user.
F Select the function usage you want to print from the left side of the display.
B Press [Administrator Tools]. C Press...
General Settings Guide - Page 289
INDEX
1 Sided to 2 Sided Auto Margin: TtoB, 84 1 Sided to 2 Sided Auto Margin: TtoT, 84 2 Sided Print (Available only with the
optional duplex unit and HDD), 101
A
..., 89 Back Margin: Left / Right, 84 Back Margin: Top / Bottom, 84 Bidirectional Communication, 54 Blank Page Print, 173 Box Settings, 152 Bypass Tray Setting Priority, 173
C
Capture Server IP Address, 57 Center Mark, 101 Change...
Manuals - Page 11

... You Can Do with This Machine
You can search for a procedure either by keyword or by what you want to Save Paper
BRL059S
Printing multi-page documents on a single sheet (Combine (Copier/Fax)) See "Combined Copying", Copy/ Document Server . Printing received faxes on both sides of sheets (2 Sided Print) See "Two-Sided Printing", Fax . 1.
I Want to do.
Manuals - Page 237
INDEX
2 Sided Print 9
A
Address Book 11 ADF 8, 63 ARDF 8, 27, 30 Authentication screen 61 Auto document feeder 8 Auto Reduce/Enlarge 14, 69 Auto reverse document ... 27, 30 Front and right view 27, 30 Front cover 27, 30 Function key 45
H
Handset 35, 39, 43 Hold Print 15, 106 Hold print file 106 Home key 45 Home screen 13, 48, 49, 50 Home screen image 48 How to Read the Manuals 6
I
...
Similar Questions

How To Turn Off Both Side Printing Ricoh C4502
(Posted by dejespran 9 years ago)


Does Ricoh Aficio Mp C2800 Support Two Sided Printing
(Posted by uswbec 10 years ago)

How Do I Turn Off Two Sided Printing On Ricoh Aficio Mpc4502
(Posted by evLGWas 10 years ago)