RCA 25424RE1 Support Question
RCA 25424RE1 Support Question
Find answers below for this question about RCA 25424RE1 - ViSYS Corded Phone.Need a RCA 25424RE1 manual? We have 1 online manual for this item!
Current Answers
Related RCA 25424RE1 Manual Pages
User Guide - Page 4

...Radiation Exposure Statement
This equipment complies with FCC RF radiation exposure limits set forth for radio or television that is "receiving" the interference).
&#...Information
This device complies with Part 15 of other antenna or transmitter."
For body worn operation, this phone has been tested and meets the FCC RF exposure guidelines when used in a particular installation. However,...
User Guide - Page 5
... . Volume 15 Ringer Tone 15 Priority Line 15 Delay Ring 16 Phone ID 16 Phone Name 17 Intercom Auto Answer 17 Flash Time 18 Call Alert Tone ...18 No Unknown/Blocked 18 Display Contrast 19 Local Area Code 19 Regional Area Codes 19 Manually Setting the Time and Date 20 Hour Format 21 Restoring the Default Settings...
User Guide - Page 8
...
25404 to the same line.
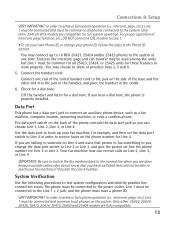
Connections & Setup
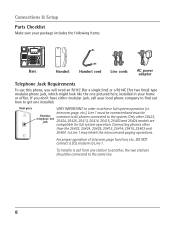
Parts Checklist
Make sure your package includes the following items:
Base
Handset
Handset cord
Line cords
AC power adaptor
Telephone Jack Requirements
To use this phone, you don't have either modular jack, call from one station to another, the two stations should be
Modular telephone line...
User Guide - Page 10

CAUTION: Always disconnect all phone cords from the network. • Use caution when installing or modifying telephone lines. • Temporarily disconnect any equipment connected to the phone such as faxes, other
phones, or modems.
Important Installation Guidelines
• Install telephone near both a telephone (modular) jack and an electrical power outlet. • Avoid sources of noise...
User Guide - Page 11

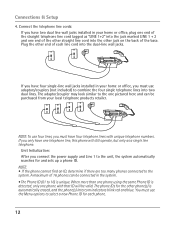
...base unit as outlined in steps 1 through 3 below prior to connecting the telephone line cords to be correctly orientated in the event of a power failure. • Insert a flat ...the low battery icon appears in the user's guide. Connections & Setup
Installing the Phone
The phone may want erased. Your phone should be placed on a level surface, such as shown on the diagram inside the...
User Guide - Page 12
... to the unit, the system automatically searches for and sets up a phone ID. When more than one phone using the same Phone ID is detected, only one pictured here and can be valid. You must have one end of the other straight line cord into two dual lines.
If you only have four telephone lines...
User Guide - Page 13
...the units, but Line 1 must be common for all phones connected to all phones on the system. Connect the handset cord:
Connect one time. Data Port
This phone has a data port jack to achieve full system operation (i.e....25425 units for example, and then set your own Phone ID, or change the data port switch to you can receive calls on the back of the phone controls the data port jack so you...
User Guide - Page 14
... to the system, you have made a program selection by pressing an Intercom/Memo Log button (1-16). There are 8 possible volume settings per mode. The phone rings according to SET LANGUAGE.
2. The display shows the phone ID you wish to ENGLISH, ESPANOL, or FRANCAIS.
Press the Sel/Save button.
3. Press the Intercom button. Also , whenever...
User Guide - Page 15

...2, 3, or 4. Use the Vol (+ or -) buttons to scroll up or down to SET PHONE OPTIONS.
3. The phone stores the setting after the last button press. Use the Vol (+ or -) buttons to scroll up or ... for incoming calls even if the ringer is Line 1.
7.
Press the Sel/Save button to SET PHONE OPTIONS.
3. When you select the ringer tone for the corresponding telephone line. Press the Sel/...
User Guide - Page 16

... up or down to 2 rings. Press the Sel/Save button again to automatically set the Delay Ring to SET PHONE OPTIONS. 3. NOTE: The Phone ID (01-16) is 0. Press Sel/Save or choose another unit on the... up or down to exit , except during the ID search.
16 If you set the phone ID, or press any time to SET DELAY RING. 5. NOTE: You may press the Exit button at one time. ...
User Guide - Page 17
... the I. Press the 3 key twice for the second letter R. Press the Sel/Save button. 4. Press the Sel/Save button to SET PHONE OPTIONS. 3. Intercom Auto Answer For "hands-free" operation, the phone can be set to enter "Lorraine," press the 5 key three times for the letter L. Use the Vol (+ or -) buttons to scroll up...
User Guide - Page 18
... to hear a tone for Line 4, press
the Exit button. Press the Sel/Save button. 4. Use the Vol (+ or -) buttons to scroll up or down to SET PHONE OPTIONS. 3. NOTE: You may press the Exit button at any time to Line 2. 8. Call Alert Tone Turn on the telephone. If you do not want...
User Guide - Page 19
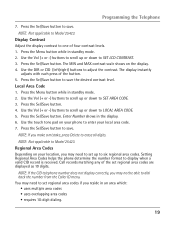
... pad on your local area code. 7. NOTE: Not applicable to Model 25423. Setting Regional Area Codes helps the phone determine the number format to adjust the contrast. Call records matching any of the ... shows in standby mode. 2. Regional Area Codes Depending on your phone to enter your location, you may need to set up or down to erase all digits.
Display Contrast Adjust the display...
User Guide - Page 20
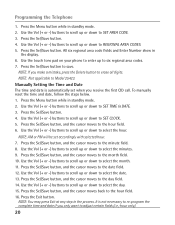
...Sel/Save button, and the cursor moves to the hour field. 6.
Use the touch tone pad on your phone to enter up or down to select the date. 13. Press the Sel/Save button, and the cursor...Press the Menu button while in
the display. 6.
Use the Vol (+ or -) buttons to scroll up or down to SET AREA CODE. 3. Press the Exit button. Press the Sel/Save button. 4. NOTE: If you make a mistake, press...
User Guide - Page 21
... and press a Line button to RESTORE TO DEFAULTS. 3. Wait for 16 telephones (or stations) to SET TIME & DATE. 3. Hang up or down to share multiple lines.
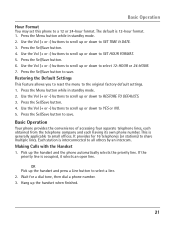
Use the Vol (+ or -) buttons to save . Basic Operation
Your phone provides the convenience of accessing four separate telephone lines, each obtained from the telephone company...
User Guide - Page 24
..., which are available through your local phone company.
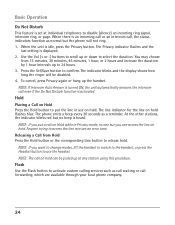
24 When there is activated. When the unit is heard. The Privacy indicator flashes and the
last setting is turned ON, the unit automatically ...press Privacy again or hang up to confirm. NOTE: If Intercom Auto Answer is displayed. 2. The phone emits a beep every 30 seconds as normal but you want to change modes, lift the handset ...
User Guide - Page 34
... the Delete button again to confirm. Press the corresponding button (1-16) for the memory you want to display phone book memories that start with the letter K.
3. NOTE: If you want to
delete. 3. Press the DIR...the default. 7. Use the Vol (+ or -) buttons to scroll up or down to SET PHONE OPTIONS. 3. Press the 5 key twice to go to cancel the "delete" function. Press the Sel/Save...
User Guide - Page 35
...START/END
You are at the beginning or the end of long distance company
6
Authorization code (ID)
7
Long distance phone number
8
1.
BLOCKED CALL
The caller is not supported.
35
If UNKNOWN CALLER appears along with a calling number, the ... Dialing
This process allows you want.
2. Operation By Battery
If the power cord is not plugged into the unit, and the battery is withheld.
User Guide - Page 36
...setting.
36 Make sure the indicator is off. • Disconnect the phone from the wall jack and connect another phone to manually make a call on line 1 only, 2) answer a call on line 1 with the handset. Cordless Phone...many extension phones on your phone to the phone and the wall jack. The H5401 is properly inserted into No Power Operation mode.
Make
sure the line cords are connected...
User Guide - Page 43

...
26
Receiving and Storing CID Records 29
Index
Redial
25
Regional Area Codes
19
Releasing a Call from Hold
24
Restoring the Default Settings 21
Reviewing CID Records
30
Reviewing Phone Book (Directory)
Memory
32
Reviewing the Intercom/Memory Log
(memory location)
32
Reviewing the Redial Numbers 25
Ringer Tone
15
Ringer Volume...
RCA Knowledge Base Results
We have determined that the information below may contain an answer to this question. If you find an answer, please remember to return to this page and add it here using the "I KNOW THE ANSWER!" button above. It's that easy to earn points!-
Troubleshooting the LF-30S Transmitter System
...LF-30S Transmitter and Receiver Units cordless phone, wireless network, microwave, baby monitor, etc.). Make sure the receiver and transmitter's power adapter cords are both the transmitter and receiver. ... The LF-30S has 4 selectable channels on both set to the receiver and transmitter are both switched on . If a microwave is set to the same channel. Make sure that the power... -
Find Answers
... control not working for VM9020TS Multimedia Receiver Remote control not working for VM9022HD Multimedia Receiver Mobile phone can't see head unit for VHDIND Multimedia Receiver medialink 4 dvd stuck line in recording record videos number antenna settings vm 9411 131 Remote control not working for VM9022HDN Multimedia Receiver Remote control not working for pairing... -
Connecting the RCA RT2760 Home Theater System
...PHONES jack on display. If you experience a ringing in order to receive clear reception. FLAT Speaker settings: Center, surr = YES Subwoofer = BALANCE DRC = OFF Reset to Factory Settings All preset radio stations and surround sound setting... the cords are in the wall outlet, matching the wide blade of the AM antenna. Increase the volume to the desired level after factory setting is ...
Similar Questions

How To See Caller Id Rca 25423re1 - Visys Corded Phone
(Posted by hmilS1 9 years ago)

How To Clear Message Lightr Rca Phone 25424re1-a
(Posted by Pijcman 9 years ago)

How To Set Up Voicemail On Rca Visys Phone 25424re1
(Posted by rhondadi 10 years ago)

How To Set Up Rca Visys Business Phone
(Posted by nadederekm 10 years ago)

How To Conference On Rca Phone 25424re1
(Posted by loneswee 10 years ago)