Get support for Pfaff C1100 Pro

Pfaff C1100 Pro Support Question

Pfaff C1100 Pro Support Question

Find answers below for this question about Pfaff C1100 Pro.
Need a Pfaff C1100 Pro manual? We have 1 online manual for this item!
Question posted by kasperflindt on March 28th, 2013

Sewing Machine Is Blinking Away And Not Able To Operate

Sewing machine was sewing constantly even after I removed my foot from the pedal. I had to switch it off to stop it from sewing. When I switched the machine back on, it was blinking and not operational.

Current Answers

There are currently no answers that have been posted for this question.
Be the first to post an answer!

Remember that you can earn up to 1,100 points for every answer you submit. The better the quality of your answer, the better chance it has to be accepted.

Related Pfaff C1100 Pro Manual Pages

Owner's Manual - Page 2

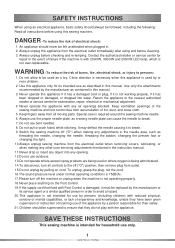
...presser foot or changing the light. 10.Always unplug sewing machine from the electrical outlet when removing covers... oxygen is not operating properly. 18. Switch the sewing machine off the machine or unplug when the machine is being used as...operate this appliance from accumulation of electrical shock: 1. Special care is 75dB(A). 17.Please turn all moving parts. Keep fingers away...
Owner's Manual - Page 3

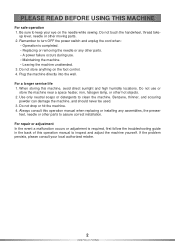
... problem persists, please consult your eye on the foot control. 4. Remember to turn OFF the power switch and unplug the cord when: Operation is required, first follow the troubleshooting guide in the back of this operation manual to keep your local authorized retailer. 2 INSTRUCTIONS Plug the machine directly into the wall. up lever, needle or...
Owner's Manual - Page 6

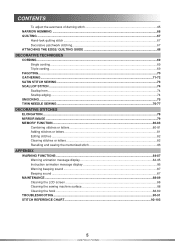
...cording...69 FAGOTING...70 GATHERING ...71-72 SATIN STITCH SEWING ...73 SCALLOP STITCH ...74 Scallop hem...74 Scallop edging...74 SMOCKING ...75 TWIN NEEDLE SEWING ...76-77 DECORATIVE STITCHES ELONGATION...78 MIRROR IMAGE ...79...-89 Cleaning the LCD screen ...88 Cleaning the sewing machine surface 88 Cleaning the hook ...88-89 TROUBLESHOOTING ...90-91 STITCH REFERENCE CHART...92-103 5 INSTRUCTIONS
Owner's Manual - Page 8

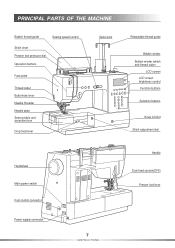
PRINCIPAL PARTS OF THE MACHINE Bobbin thread guide Sewing speed control Stitch chart Presser foot pressure dial Operation buttons Face plate Thread cutter Buttonhole lever Needle threader Needle plate Sewing table and accessory box Drop feed lever Spool pins Retractable thread guide Bobbin winder Bobbin winder switch and thread cutter LCD screen LCD screen brightness control Function...
Owner's Manual - Page 9

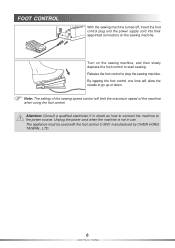
... setting of the sewing speed control will allow the needle to stop the sewing machine. Release the foot control to go up or down. FOOT CONTROL With the sewing machine turned off, insert the foot control plug and the power supply cord into their appointed connectors on the sewing machine, and then slowly depress the foot control to start sewing. Unplug the power...
Owner's Manual - Page 10

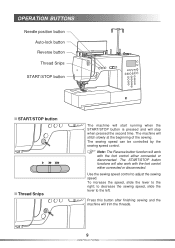
... be controlled by the sewing speed control. The machine will trim the threads. 9 INSTRUCTIONS Note: The Reverse button function will stop when pressed the second time. OPERATION BUTTONS Needle position button Auto-lock button Reverse button Thread Snips START/STOP button START/STOP button Thread Snips The machine will start running when the START/STOP button is pressed...
Owner's Manual - Page 11

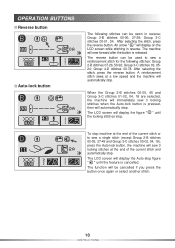
... display the figure " " until the feature is cancelled. Group 3-C stitches 00-01, 04. OPERATION BUTTONS Reverse button Auto-lock button The following stitches: Group 2-B stitches 07-26, 50-92; An arrow " " will automatically stop . The machine will sew forward after the button is pressed, then will display on the LCD screen while stitching in...
Owner's Manual - Page 12

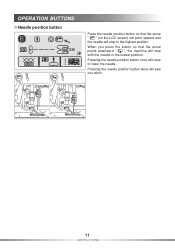
... the needle. When you press the button so that the arrow " " (on the LCD screen) will point upward and the needle will stop with the needle in the highest position. OPERATION BUTTONS Needle position button Press the needle position button so that the arrow points downward " ", the machine will stop in the lowest position.
Owner's Manual - Page 16

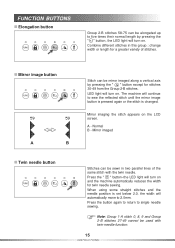
... the mirror image button is pressed again or the stitch is set below 2.0, the width will automatically move to single needle sewing. Normal B - Mirror imaging the stitch appears on and the machine automatically reduces the width for a greater variety of the same stitch with twin needle function. 15 INSTRUCTIONS Mirror imaged Twin...
Owner's Manual - Page 20

...: If a power outage occurs while the machine is not sewing. 2. In addition, before transporting the machine to another location, be sure to correctly operate the machine. 19 GETTING READY The lamp goes off . 1. Turn off the machine When you are finished using the machine, turn it off . 3. When restarting the machine, follow the necessary procedure to turn it...
Owner's Manual - Page 48

... return the feed dogs to raise the presser foot. Attention: Do not touch the Knee lift while sewing, otherwise the fabric will lower the feed dogs, for example during button sewing. USEFUL FUNCTIONS To raise or lower the feed dogs With the sewing table off the machine, the feed dog adjustment lever is extremely helpful...
Owner's Manual - Page 49

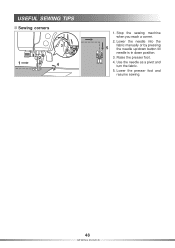
Raise the presser foot. 4. Use the needle as a pivot and turn the fabric. 5. Stop the sewing machine when you reach a corner. 2. Lower the needle into the 5 fabric manually or by pressing the needle up/down button till needle is in down position. 3. USEFUL SEWING TIPS Sewing corners 3 1. Lower the presser foot and resume sewing. 48 SEWING BASICS
Owner's Manual - Page 50

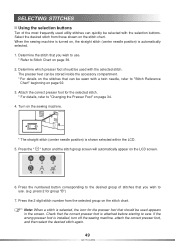
... in the screen. Press the " " button and the stitch group screen will automatically appear on the stitch chart. If the wrong presser foot is automatically selected. 1. When the sewing machine is turned on the stitch chart. The presser feet can be stored inside the accessory compartment. * For details on the stitches that the...
Owner's Manual - Page 81

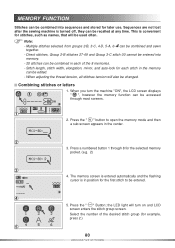
... of the 8 memories. - When adjusting the thread tension, all stitches tension will turn the machine "ON", the LCD screen displays " ", however the memory function can be accessed through 8 ...stitches selected from groups 2-B, 3-C, 4-D, 5-A, 6- Note: - Sequences are not lost after the sewing machine is turned off, they can be combined and sewn together. - MEMORY FUNCTION Stitches can be ...
Owner's Manual - Page 84

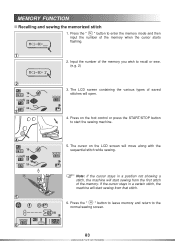
... the " " button to recall or sew. (e.g. 2) 2 3. The cursor on the foot control or press the START/STOP button to the normal sewing screen. 6 83 DECORATIVE STITCHES MEMORY FUNCTION Recalling and sewing the memorized stitch 1. Press on the LCD screen will start sewing from that stitch. 5 6. Press the " " button to leave memory and return to start the sewing machine. 4 5.
Owner's Manual - Page 85

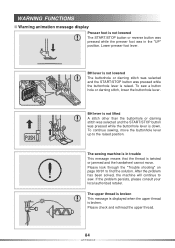
... and rethread the upper thread. 84 APPENDIX WARNING FUNCTIONS Warning animation message display Presser foot is not lowered The START/STOP button or reverse button was pressed while the presser foot was pressed while the buttonhole lever is down. The sewing machine is in the "UP" position. BH lever is not lowered The buttonhole or...
Owner's Manual - Page 88

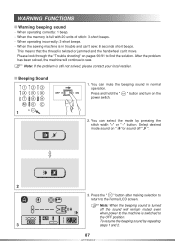
... find the solution. After the problem has been solved, the machine will remain muted even when power to the machine is in normal operation. When operating correctly: 1 beep. - To resume the beeping sound by pressing the stitch width "+" or " ­" button. When the sewing machine is switched to sew. You can select the mode by repeating 3 steps 1 and...
Owner's Manual - Page 89

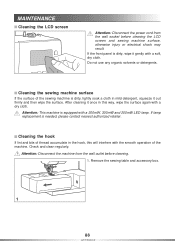
... and bits of the machine. Remove the sewing table and accessory box. 1 88 APPENDIX If the front panel is dirty, lightly soak a cloth in the hook, this way, wipe the surface again with a 200mW, 300mW and 200mW LED lamp. Check and clean regularly. After cleaning it gently with the smooth operation of thread accumulate...
Owner's Manual - Page 90

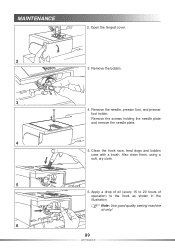
..., presser foot, and presser foot holder. Clean the hook race, feed dogs and bobbin case with a brush. Remove the bobbin. 3 4. Apply a drop of oil (every 15 to 20 hours of operation) to the hook as shown in the illustration. Remove the screws holding the needle plate and remove the needle plate. 4 5. Note: Use good quality sewing machine oil...
Owner's Manual - Page 92

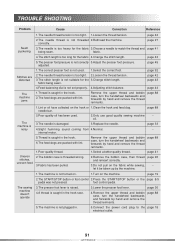
.... page 33 4.Slight humming sound coming from 4.Normal. -- let it be taken up by hand and remove the thread remnants. page 19 The sewing machine doesn't operate 2.The START/STOP button or foot control 2.Press the START/STOP button or the page 8/9 pedal was not pressed. page 36 4.A thread is noisy 2.Poor quality oil has been used . 1.Select...

Similar Questions

My Foot Pedal Won't Engage The Machine
My Pfaff Hobbylock 794 turns the machine on but will not sew. It has been years since I tried to use...
(Posted by pamelapalagyi 1 year ago)
Pfaff C1100 Pro Sewing Machine Instruction
Can you please direct me to "easy" to understand instruction on how to "thread" my Pfaff C1100 Pro s...
(Posted by magicfeathers55 10 years ago)
My Pfaff C1100 Is Clicking Continuously And Is Not Operational
Hello My sowing machine Pfaff C1100 was sowing away even after I removed my foot from the pedal. I ...
(Posted by kasperflindt 11 years ago)
Ask a New Question
Use the box below to post a new question about this Pfaff product .
Points & Prizes
  • You can earn points for nearly everything you do on HelpOwl.com
  • You can trade in those points for gift cards at leading retailers such as Amazon.com and Walmart
  • It's that simple!
See How it Works
Create a Free Account

Pfaff Manuals

Find free Pfaff C1100 Pro manuals and user guides available at ManualOwl.com. Try out our unique manual viewer allowing you to interact with manuals from directly within your browser!

Pfaff Reviews

View thousands of Pfaff user reviews and customer ratings available at ReviewOwl.com.

Contact Information

Complete Pfaff customer service contact information including steps to reach representatives, hours of operation, customer support links and more from ContactHelp.com.

Scoreboard Ratings

See detailed Pfaff customer service rankings, employee comments and much more from our sister site.