Maytag MMV5208WS Support Question
Maytag MMV5208WS Support Question
Find answers below for this question about Maytag MMV5208WS - 2.0 cu. Ft. Combination Range Hood-Microwave.Need a Maytag MMV5208WS manual? We have 2 online manuals for this item!
Question posted by ggjohnston on June 13th, 2011
Microwave Shows 'clean Filter' Too Often. Within Weeks Of Installing A New Filt
I do not cook often and only once or twice a week with the cooktop below my microwave. Do not understand why "Clean Filter" message appears on microwave w/in a couple weeks of installing new filter.
Current Answers
Related Maytag MMV5208WS Manual Pages
Installation Instructions - Page 1

... the instructions are very important. All safety messages will follow instructions. See "Installation Requirements" section for use above electric or gas cooking products up to reduce the chance of injury, and tell you what the potential hazard is the safety alert symbol. Table of Contents
MICROWAVE HOOD COMBINATION SAFETY 1 INSTALLATION REQUIREMENTS 2
Tools and Parts 2 Remove Cardboard...
Installation Instructions - Page 2

... between the wall and the microwave oven, so that the door can...installation dimensions. For Roof Venting Installation Only:
■ If you are for wall or roof
venting)
Not Shown:
Upper cabinet template
Mounting plate (attached to back of microwave oven)
Cardboard template (part of wall structures, be combined.
See User Instructions.)
NOTE: Depending on model, charcoal filters...
Installation Instructions - Page 3

... type of electric shock by providing an escape wire for 66" (167.6 cm) installation height. WARNING: Improper use an adapter. SAVE THESE INSTRUCTIONS
3 See "Electrical Requirements"...range/cooktop below.
Recommended:
■ A time-delay fuse or time-delay circuit breaker. ■ A separate circuit serving only this microwave oven. Observe all cord connected appliances: The microwave oven...
Installation Instructions - Page 4

.... 3. NOTE: Skip this section if you are inserted into the microwave oven.
Slide damper plate toward the front of microwave
oven exterior. Screws B. Damper plate
2. Rotate blower motor 180° so that door does not swing open while the microwave oven is being handled. Wall Venting Installation Only 1. Remove screws attaching damper plate to top of the...
Installation Instructions - Page 5

... (as shown), performance will be reattached to back of microwave oven with flat sides facing the back of "Wall Venting Installation Only." A
6. Make sure damper plate tabs are inserted into microwave oven. D
A. Repeat Step 4 from "Wall Venting Installation Only." 2. Reattach blower motor to the microwave oven.
7. NOTE: If blower motor is not positioned with 2 screws removed...
Installation Instructions - Page 6

...C
C
C
F
F
A. Cabinet opening , do not install the microwave oven.
1. Locate Wall Stud(s)
NOTE: If no wall studs ...installation configurations with the mounting plate. Support tabs F. See illustrations in "Possible Wall Stud Configurations."
2.
Holes for lag screws E. See illustrations in "Possible Wall Stud Configurations." Possible Wall Stud Configurations
These depictions show...
Installation Instructions - Page 7

... B
A. Front edge of the upper cabinet.
9. Holding the mounting plate in the shaded areas are 3 installation configurations. The blackened holes in place, find and clearly mark the vertical centerline of the opening. Using measuring tape...upper cabinet
3. Mark Rear Wall
The microwave oven must be installed on the wall, making sure it is level, and that the end holes are properly marked....
Installation Instructions - Page 8

...contents from the rear wall to the wall at the end holes marked in the top of "Installation for Wall Stud at One End Hole (Figure 3)
1.
Wall Stud at both end holes. 3.... bolt through the drywall, and finger
tighten the bolt to use as guides. ■ If the wall behind the microwave oven (as at One End Hole (Figure 3)
1. Start a toggle nut on the template is level. 8. Push the...
Installation Instructions - Page 9

... damper assembly with 2 sheet metal screws. Mounting plate B. Metal cabinet B. For Roof Venting Installation Only
7. Damper assembly C.
With front of the microwave oven is being handled. A
B C
D
Install the Microwave Oven
WARNING
Excessive Weight Hazard Use two or more people, lift microwave oven and hang it on each 1/4-20 x 3" flat-head bolt and place inside upper cabinet...
Installation Instructions - Page 10

... for troubleshooting information. Install filters. Sheet metal screw D. Failure to provide) may require bolts longer or shorter than 3" (7.6 cm). Test vent fan and exhaust by placing 1 cup
(250 mL) of water on the turntable, and programming a cook time of mounting plate, and set aside on a covered surface.
8. Vent B. Raised tabs B.
Plug microwave oven into a grounded...
Installation Instructions - Page 11

... 6" = 5 ft (8.3 x 25.4 cm to round transition piece F. NOTES: ■ Vent materials needed for wall venting only) D. See "Rectangular to vent air outside, unless using recirculation installation. VENTING DESIGN SPECIFICATIONS
This section is at least 3" (7.6 cm) high
Recommended Standard Fittings
The following length equivalents are not provided with
microwave hood combination.
■...
Installation Instructions - Page 12

... not exceed the equivalent of 140 ft (42.7 m) for either type of vent.
Accessories
Filler Panel Kits are available from sticking. Replacement Parts
If any of the installation hardware needs to be installed to keep the damper from your model number located on the front facing of the microwave oven opening . You will need additional...
Owners Manual - Page 1

...alerts you how to excessive microwave energy:
■ Install or locate the microwave oven only in accordance with the provided Installation Instructions.
■ Read all safety messages. All safety messages will follow instructions. for purchasing this section and in TROUBLESHOOTING, please visit our website at 1-800-688-9900.
MICROWAVE HOOD COMBINATION USER INSTRUCTIONS
THANK YOU...
Owners Manual - Page 2

... no damage to accumulate on hood or filter.
■ Do not use paper products when appliance is operated in convection, combination, grill or "PAN BROWN" mode (on the microwave oven.
■ Do not store this manual. Stir the liquid both gas and electric cooking equipment.
■ Intended to heat, cook, or dry food. Use extreme care when...
Owners Manual - Page 3

...tones sound and padlock icon appears in hours and minutes with a fuse or circuit breaker.
Set the cooktop light to run for manual cooking only. Touch Options or Setup...installed and grounded. GROUNDING INSTRUCTIONS
■ For all governing codes and ordinances.
Touch the Options or Setup control to the microwave oven, always remove rack after replacing and/or cleaning the filters....
Owners Manual - Page 4

..., the cook power will be 100%, but may be kept warm in the microwave oven. To avoid damage to follow label instructions on some models) appears in the display when it out, and remove filter.
Clean monthly, or as prompted by arcing due to replace the charcoal filter, and clean or replace the grease filter. The charcoal filter cannot be cleaned...
Owners Manual - Page 5

...: The cooktop light bulb is located on the underside of the microwave oven, and is attached to inside of the door, remove it out.
If a message about the door appears in "Microwave Oven Care" section. Make sure Demo Mode (on some models), which may be purchased separately. See "General Cleaning" in the display, the door has been closed...
Owners Manual - Page 6
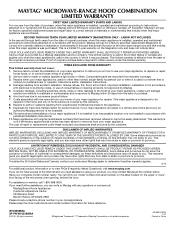
...replace appliance light bulbs or filters. Major appliances with the ...MICROWAVE-RANGE HOOD COMBINATION LIMITED WARRANTY
FIRST YEAR LIMITED WARRANTY (PARTS AND LABOR) For one year from the date of purchase, when this major appliance is
contrary to published user or operator instructions and/or installation... reported to use of consumables or cleaning products not approved by a Maytag designated...
Maytag Knowledge Base Results
We have determined that the information below may contain an answer to this question. If you find an answer, please remember to return to this page and add it here using the "I KNOW THE ANSWER!" button above. It's that easy to earn points!-
How do I use my temperature controls? - Bottom freezer/French door refrigerator
... front of water. A new filter should immediately be more humid or if moisture appears on the cabinet. Use...range for three seconds. User Preferences Access the User Preferences menu to: Change the temperature display from the line and prepare the water filter...will show the current compartment temperatures and the highest compartment temperatures reached when the power was installed. The... -
Locking the controls and oven door - Wall oven
... the Cancel and Cook & Hold pads for cleaning or to control unwanted use. Both the touchpad and oven door can be locked. To lock: Press and hold the Cancel and Cook & Baking - The current time of day will not function when locked. Hold pads for three seconds. "Off" appears in use... -
Control lock - Gemini® double-oven freestanding range
...; Lock remains in the display. • Gemini® double-oven freestanding range My oven door is 400°F or higher. Both oven doors lock. Gemini® My oven controls do not work. Press and hold the upper oven Cancel and Cook & Error messages - Oven Gemini® The touchpad controls will remain in use . IMPORTANT: The touchpads...
Similar Questions

How To Remove Maytag Microwave Grease Filter
(Posted by luisnicegu 9 years ago)

How Do I Install A Light Bulb For This Microwave?
(Posted by lewalters2 10 years ago)

How To Get Fan Turn Off On Maytage Microwave-range Hood Combination Mmv4203dq
(Posted by Anonymous-79210 11 years ago)

Installation Question..i;m Installing The Microwave And It Says To Remove Mounti
Does this model come with a mounting plate. It's not connected on the back and I didn't see it in th...
Does this model come with a mounting plate. It's not connected on the back and I didn't see it in th...
(Posted by jet120566 11 years ago)

Microwave Show Se And No Function Is Working. What Is The Issue?
recently on the display its showing SE and even if we unplugg and restart still showing SE and not f...
recently on the display its showing SE and even if we unplugg and restart still showing SE and not f...
(Posted by tenopaul 12 years ago)