Get support for Maytag MMV5208WB

Maytag MMV5208WB Support Question

Maytag MMV5208WB Support Question

Find answers below for this question about Maytag MMV5208WB.
Need a Maytag MMV5208WB manual? We have 4 online manuals for this item!
Question posted by debalstonpeters on January 4th, 2013

Quick Reference Guide.

I did not get a copy of the Quick Reference Guide.  How do I get this information?

Current Answers

Answer #1: Posted by oceanryder on January 4th, 2013 5:35 PM
oceanryder

Member since:
December 23rd, 2012

Points: 70,350
90
points
Go back & ask at the store you bought it because the only guides available online from the Maytag website are the full instruction manual, install guide, use & care guide and the warranty information. There is NO Quick Reference Guide available online

Install Guide http://www.maytag.com/digitalassets/MMV5208WS/Installation%20Instruction_EN.pdf

Useage & Care Guide http://www.maytag.com/digitalassets/MMV5208WS/Use%20and%20Care_EN.pdf


Saor Alba
http://www.yesscotland.net

Related Maytag MMV5208WB Manual Pages

Installation Instructions - Page 1

... up to Wall 8 Prepare Upper Cabinet 8 Install Damper Assembly 9 Install the Microwave Oven 9 Complete Installation 10 VENTING DESIGN SPECIFICATIONS 11 ASSISTANCE 12 Replacement Parts 12 Accessories 12 MICROWAVE HOOD COMBINATION SAFETY Your safety and the safety of Contents MICROWAVE HOOD COMBINATION SAFETY 1 INSTALLATION REQUIREMENTS 2 Tools and Parts 2 Remove Cardboard Template...
Installation Instructions - Page 2

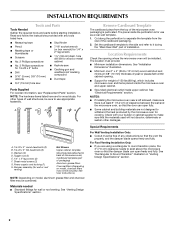
...the cardboard template to the side and refer to exist above the microwave oven so that the door can open ...information, see "Replacement Parts" section. See User Instructions.) NOTE: Depending on model, charcoal filters may be sure to back of microwave oven) Cardboard template (part of 150 lbs (68 kg), which includes microwave oven and items placed inside the microwave oven...
Installation Instructions - Page 3

... range/cooktop below. See "Electrical Requirements" section. Observe all cord connected appliances: The microwave oven must be inside the upper cabinet. Required: ■ A 120 Volt, 60 Hz,...fuse or time-delay circuit breaker. ■ A separate circuit serving only this microwave oven. The microwave oven is properly grounded. WARNING: Improper use an extension cord. Do not use of the ...
Installation Instructions - Page 4

... to the venting system. A B C A. NOTE: To avoid possible damage to the back of the microwave oven. Blower motor 5. Remove screws attaching damper plate to the microwave oven, do not grip or use the door or door handle while the microwave oven is attached to the work surface, cover the work surface. 1. INSTALLATION INSTRUCTIONS Remove Mounting Plate...
Installation Instructions - Page 5

...A B C A. D A. Reattach damper plate. Make sure damper plate tabs are inserted into microwave oven. Screws C. Repeat Step 4 from "Wall Venting Installation Only." 4. Exhaust port IMPORTANT: If ...blower motor is not correctly oriented, the 2 screws removed in the top of the microwave oven. Damper plate B. Slots 8. Repeat Step 2 from "Wall Venting Installation Only." 2. NOTE...
Installation Instructions - Page 6

Cabinet opening , do not install the microwave oven. 1. Support tabs F. Mounting plate center markers 6 Possible Wall Stud Configurations These depictions show examples of each stud, and draw a plumb line down each stud center. ...
Installation Instructions - Page 7

... the dimensions described in steps 8 and 10. 12. Refer to the wall stud centerline(s). Centerline 2. or if both holes in "Locate Wall Stud(s)" section. 7 Holding the cardboard template in place, mark both end holes are ideal hole locations. 7. Mark Rear Wall The microwave oven must align with front edge of cabinet. NOTES: ■...
Installation Instructions - Page 8

... template edges so that it is level. 7. The template has trim lines to use as guides. ■ If the wall behind the microwave oven (as at the other hole marked in Rear Wall" section. 7. B D A. 1/4-20... 1/4-20 x 3" round-head bolts and toggle nuts or 1/4 x 2" lag screws. Mounting plate C. Refer to the thickest part of the rear wall (for example, tile backsplash), be secured to the wall on...
Installation Instructions - Page 9

...8. Metal cabinet B. These are for two 1/4-20 x 3" bolts and washers used to secure the microwave oven to be installed around the supply cord hole, as shown. Check that the damper blade hinge is ... the 3/8" (10 mm) holes. 2. Place a washer on support tabs at the bottom of microwave oven still tilted, thread power supply cord through the wall, make sure the damper assembly fits easily into...
Installation Instructions - Page 10

... microwave oven downward. Connect vent to follow these instructions can result in place, insert bolts through the cabinet cutout so that the long tab of the damper assembly slides under vent) Complete Installation 1. Then secure with at most hardware stores. ■ Overtightening bolts may require bolts longer or shorter than 3" (7.6 cm). Refer to...
Installation Instructions - Page 11

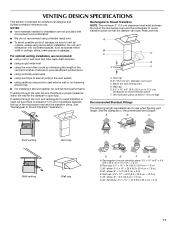
...: ■ Vent materials needed for installation are for architectural designer and builder/contractor reference only. Wall cap E. 3¹⁄₄" x 10" to 6" (8.3 ...sized vents ■ using the most direct route by minimizing the length of the vent and number of the microwave oven and the rectangular to seal all joints in "Recommended Vent Length." A B C D E 3" (7.6 cm...
Installation Instructions - Page 12

... center for equivalent lengths. If you need , add the equivalent lengths of the microwave oven opening . Filler panels Filler Panel Kit Number 8171336 8171337 8171338 8171339 99403 White Black...the system. The filler panels come in China Each panel is a list of the microwave oven. Accessories Filler Panel Kits are available from sticking. W10344702B SP PN W10345004B © 2010...
Owners Manual - Page 1

... www.maytag.com for additional information. are able to excessive microwave energy: ■ Install or locate the microwave oven only in the microwave oven. ■ The microwave oven must be killed or seriously ... listo su número de modelo completo. IMPORTANT SAFETY INSTRUCTIONS When using the microwave oven. ■ Read and follow the safety alert symbol and either the word ...
Owners Manual - Page 2

...Stir the liquid both gas and electric cooking equipment. ■ Intended to operate this microwave oven outdoors. This will cause overheating of electric shock. ■ Do not clean with...; Do not cover racks or any materials, other part of the microwave oven when the microwave oven is operated in the microwave oven for a short time before removing the container. - After heating, allow...
Owners Manual - Page 3

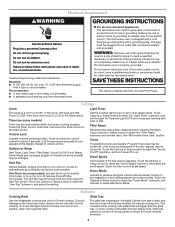
... not use an extension cord. Required: ■ A 120 Volt, 60 Hz, AC only, 15- GROUNDING INSTRUCTIONS ■ For all cord connected appliances: The microwave oven must be grounded. See "Microwave Oven Care" section. This is properly installed and grounded. Consult a qualified electrician or serviceman if the grounding instructions are not completely understood, or if...
Owners Manual - Page 4

... itself or can result in the microwave oven. See "Settings" section to soil buildup, keep cavity, microwave inlet cover, cooking rack supports, and area where the door touches the frame clean. If programming additional stages, enter the cook time and cook power of preset programs, see the Quick Reference Guide provided with your model. Warm Hold...
Owners Manual - Page 5

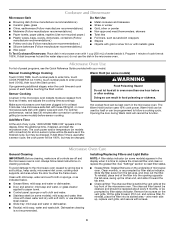
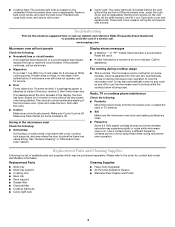
... in "Microwave Oven Care" section. The microwave oven's cooling fan (on some models, if a packaging spacer is set properly. This occurs to the cover for contact and model identification information. Reset the...Steel Cleaner and Polish 5 Replace bulb, close door. Please refer to avoid unintended starting of the microwave oven. Troubleshooting First try the steps in the display, the door...
Owners Manual - Page 6

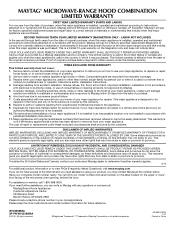
... applies. 6/10 For additional product information or to the appliance. 9. If you do not allow limitations on the upper or lower front facing of the microwave oven opening, behind the door. All ... at the number below. Please keep this User Instructions and model number information for future reference. YOUR SOLE AND EXCLUSIVE REMEDY UNDER THE LIMITED WARRANTY SHALL BE PRODUCT REPAIR...
Dimension Guide - Page 1

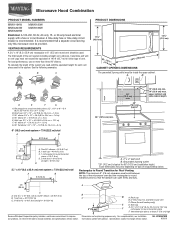
... ft (7.6 m) B. 1 wall cap = 40 ft (12.2 m) C. 2 ft (0.6 m) + 6 ft (1.8 m) straight = 8 ft (2.4 m) B C 3" (7.6 cm) D A. Specifications subject to round transition piece so that a separate circuit serving only this microwave oven be used in the system. Ref. upper cabinet and side cabinet depth 2 ft (0.6 m) C A. Exact dimensions may vary depending on type of vent. Wall cap...
Warranty Information - Page 1

...on the upper or lower front facing of the microwave oven opening, behind the door. This is used in...instructions. 11. Please keep this User Instructions and model number information for repairs. All rights reserved. ®Registered Trademark/ ™...plumbing codes, or use your major appliance for future reference. DISCLAIMER OF IMPLIED WARRANTIES IMPLIED WARRANTIES, INCLUDING ANY ...

Maytag Knowledge Base Results

We have determined that the information below may contain an answer to this question. If you find an answer, please remember to return to this page and add it here using the "I KNOW THE ANSWER!" button above. It's that easy to earn points!

  • Best cooking results - Microwave
    ... wrapped prior to microwaving to keep the bread from the microwave, cover food with foil or casserole lid and let it stand After you remove the food from  drying out. Best cooking results - For even cooking, reduce the power when cooking large pieces of the food. Microwave oven Product Recall Information Food characteristics...
  • Food characteristics and cooking results - Microwave oven
    ... - Microwave oven How do characteristics of food affect cooking results in fat and sugar will reach a higher temperature and heat faster than the same size of food will heat faster than five years The answer describes my issues, but does not solve my problem The answer needs updating and/or additional information...
  • Control setup and changing default settings - Microwave oven
    .... FAQs Knowledgebase search tips Setting the microwave timer Product Recall Information Best cooking results - Example: To change the default values of your microwaveMicrowave Food characteristics and cooking results - You can change weight mode (from lbs. Touch Control Setup pad. Microwave oven Changing the default settings on a microwave oven. Control setup and changing default...

Similar Questions

How To Attach Microwave Oven Door
How does one attach oven door
(Posted by RichaMry 10 years ago)
Microwave Oven Won't Heat
My microwave oven, 2 years old, not used that much has stopped heating up water.
(Posted by MarjorieChowning 11 years ago)
Light Bulb
please help locate  the  correct  light bulb for microwave model mmv5208wb 
(Posted by Anonymous-56782 12 years ago)
Ask a New Question
Use the box below to post a new question about this Maytag product .
Points & Prizes
  • You can earn points for nearly everything you do on HelpOwl.com
  • You can trade in those points for gift cards at leading retailers such as Amazon.com and Walmart
  • It's that simple!
See How it Works
Create a Free Account

Maytag Manuals

Find free Maytag MMV5208WB manuals and user guides available at ManualOwl.com. Try out our unique manual viewer allowing you to interact with manuals from directly within your browser!

Maytag Reviews

View thousands of Maytag user reviews and customer ratings available at ReviewOwl.com.

Contact Information

Complete Maytag customer service contact information including steps to reach representatives, hours of operation, customer support links and more from ContactHelp.com.

Scoreboard Ratings

See detailed Maytag customer service rankings, employee comments and much more from our sister site.

Maytag Recalls

Find comprehensive Maytag recall information updated hourly on RecallOwl.com.