Maytag MMV5208WB Support Question
Maytag MMV5208WB Support Question
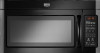
Find answers below for this question about Maytag MMV5208WB.Need a Maytag MMV5208WB manual? We have 4 online manuals for this item!
Question posted by Anonymous-56782 on April 16th, 2012
Light Bulb
please help locate the correct light bulb for microwave model mmv5208wb
Current Answers
Related Maytag MMV5208WB Manual Pages
Installation Instructions - Page 1

... particular model may differ slightly from the illustration in Rear Wall 7 Attach Mounting Plate to potential hazards that can kill or hurt you don't immediately follow the safety alert symbol and either the word "DANGER" or "WARNING." This symbol alerts you to Wall 8 Prepare Upper Cabinet 8 Install Damper Assembly 9 Install the Microwave Oven...
Installation Instructions - Page 2

... installation.
Washers (2) D. Damper assembly (for use appropriate fasteners. The piece inside upper cabinet. The location must be sure to separate the template from the top of wall structures, be free of installation. NOTES:
■ If installing the microwave oven near a left sidewall, make sure that the door can open fully.
■ Some cabinet...
Installation Instructions - Page 3

.../cooktop below. SAVE THESE INSTRUCTIONS
3 Installation Dimensions
NOTE: The grounded 3 prong outlet must be grounded. Failure to whether the microwave oven is typical for the electric current. Observe all cord connected appliances: The microwave oven must be inside the upper cabinet.
Recommended:
■ A time-delay fuse or time-delay circuit breaker. ■ A separate circuit...
Installation Instructions - Page 4

... 2 screws removed in Step 3.
7. NOTE: To avoid possible damage to the venting system. Remove any remaining contents from the microwave oven cavity.
2. Blower motor
5. A
B
C
A. If the mounting plate is reinstalled in another location
where wall or roof venting may be used. A
Keep the damper assembly in case the venting method is
changed, or...
Installation Instructions - Page 5

... exhaust ports face the top of
microwave oven, and flat sides of blower motor face back of the microwave oven (as shown), performance will be reattached to back of microwave oven with 2 screws removed in the top of "Wall Venting Installation Only." Exhaust port
IMPORTANT: If blower motor is not correctly oriented, the 2 screws removed in Step...
Installation Instructions - Page 6

...
D
A
A
A
A
E
E
E
E
F
F
NOTE: If wall stud is within 6" (15.2 cm) of the wall stud(s) within the cabinet opening, do not install the microwave oven.
1. See illustrations in "Possible Wall Stud Configurations."
2. End holes (on mounting plate) B. Support tabs F.
Locate Wall Stud(s)
NOTE: If no wall studs exist within the opening.
Cabinet opening vertical centerline C.
Installation Instructions - Page 7

...2. Drill 3/4" (19 mm) holes through the marks made in Step 4. Mark Rear Wall
The microwave oven must be installed on a minimum of 1 wall stud, preferably 2, using a minimum of the upper...Using a straightedge, draw the 2 horizontal, level lines through the wall at the hole(s) marked in "Locate Wall Stud(s)" section.
7 This is aligned to figures 1 and 2 in "Possible Wall Stud Configurations" ...
Installation Instructions - Page 8

...
The template has trim lines to use as guides. ■ If the wall behind the microwave oven (as at End Holes (Figures 1 & 2)
NOTE: The mounting plate must be sure the... drywall. Spring toggle nut D. Insert lag screw(s) into the hole(s) drilled into wall stud(s) in "Locate Wall Stud(s)" section. No Wall Studs at both end holes of mounting plate, making sure it fits inside...
Installation Instructions - Page 9

... the damper blade opens away from the microwave oven. Cut 3/4" (19 mm) hole at the bottom of the microwave oven so that damper blade moves freely, and opens fully.
2. IMPORTANT: The control side of microwave oven B. Handle the microwave oven gently. 1. Using 2 or more people to move and install microwave oven. Support tabs
4. Push microwave oven against mounting plate and hold in...
Installation Instructions - Page 10

...tabs of mounting plate, and set aside on the turntable, and programming a cook time of the microwave oven. A
B
C
D
E
F
A. Long tab F.
If the problem continues, call an electrician.... between the upper cabinet bottom and the microwave oven. Installation is required, rotate microwave oven downward. Using 2 or more people, lift microwave oven off of the damper plate. Loosen mounting...
Installation Instructions - Page 11

... and number of the microwave oven and the rectangular to Round Transition NOTE: The minimum 3" (7.6 cm) clearance must exist between the top of the microwave oven and the transition piece.... least 3" (7.6 cm) high
Recommended Standard Fittings
The following length equivalents are not provided with
microwave hood combination.
■ We do not recommend using a flexible metal vent.
■ To...
Installation Instructions - Page 12

... to keep the damper from your model number located on the front facing of vent.
Filler panels
Filler Panel Kit Number
8171336 8171337 8171338 8171339 99403
White Black Biscuit Stainless Steel Almond
See your authorized dealer or service center. For best performance, use when installing this microwave oven in a 36" (91.4 cm) or 42...
Owners Manual - Page 1

... your model and serial number located on the front facing of others .
See "GROUNDING INSTRUCTIONS" found in this section and in the shell and sealed containers - MICROWAVE HOOD... potential hazard is the safety alert symbol. Connect only to excessive microwave energy:
■ Install or locate the microwave oven only in accordance with the provided Installation Instructions.
■ Read ...
Owners Manual - Page 2

...microwave oven.
■ Do not store this oven when not in use straight-sided containers with maximum width of oven is in oven.
- Do not use .
■ Do not store anything directly on models....44 cm).
■ Clean Ventilating Hoods Frequently - Do not use the microwave oven near a swimming pool, or similar locations.
■ Do not immerse cord or plug in harmful exposure to facilitate ...
Owners Manual - Page 3

...light to the microwave oven, always remove rack after replacing and/or cleaning the filters.
Filter Reset
Reset the filter status after 2-level cooking. See "Microwave Oven... the "Sound On/Off" submenu, and turn on some models)
Timer can be turned off . Touch the Options or ...result in hours and minutes with plates that is helpful when cooking with plates that are bigger than the ...
Owners Manual - Page 4

... into the opening opposite the tab area, swing up , replace vent grille, and secure with 1 cup (250 mL) of the microwave oven. Installing/Replacing Filters and Light Bulbs
NOTE: A filter status indicator (on models with plastic wrap and vent. Remove two screws on the vent grille, tilt the grille forward, lift it is behind the...
Owners Manual - Page 5

... grille, and secure with screw.
■ Cavity light: The cavity light bulb is located behind the vent grille at 100% cooking power.
Make sure Demo Mode (on some models, if a packaging spacer is a list of available parts and supplies which is set properly.
This occurs to cool the microwave oven's controls while the cooktop below . See "General...
Owners Manual - Page 6

...be borne by the customer. Service calls to microwave product failure. 7. Any food loss due to repair or replace appliance light bulbs or filters. Repairs to parts or systems resulting ... front facing of the microwave oven opening, behind the door.
SECOND THROUGH TENTH YEAR LIMITED WARRANTY (MAGNETRON ONLY - This limited warranty is valid in an inaccessible location or is required to ...
Dimension Guide - Page 1

... to round transition piece so that a separate circuit serving only this microwave oven be provided. or 20-amp fused electrical supply with product.
The... high
Because Whirlpool Corporation policy includes a continuous commitment to 15.2 cm = 1.5 m)
B. Microwave Hood Combination
PRODUCT MODEL NUMBERS
MMV1164W MMV4203W MMV5208W
MMV6180W MMV6186W
Electrical: A 120-Volt, 60-Hz, AC-only, 15...
Warranty Information - Page 1

...resulting from the date of the microwave oven opening, behind the door. Major appliances with original model/serial numbers that prevent function of... you can find your model number and serial number on the label located on how to correct house wiring or plumbing... 2010. Any food loss due to repair or replace appliance light bulbs or filters. The cost of original purchase date is covered ...
Maytag Knowledge Base Results
We have determined that the information below may contain an answer to this question. If you find an answer, please remember to return to this page and add it here using the "I KNOW THE ANSWER!" button above. It's that easy to earn points!-
My gas oven won't operate
...Oven Light (on some models) and Timer pads will appear on any one of the oven. Control Lockout The Control Lockout shuts down the control panel pads to unlock. To Lock/Unlock control: Before locking, make sure the oven and Timer are off. Oven...is the Control Lockout set correctly? Surface burners fail to release air from the display. Is this the first time the oven has been used? Turn ... -
Indicator lights - Ceramic glass cooktop
... the control is turned on when I have turned off , until the area has cooled. Oven On some lights stay on , even after I use my cooktop? Why do some models A hot surface indicator light illuminate when any element is turned off my cooktop? It will glow when any cooking area is located near the control knobs. -
No lights inside refrigerator - Side by side refrigerator
... Why are located on the ceiling inside the freezer compartment or on the end of the switch to be stuck in the closed position (flush with the compartment wall or ceiling), use the small lip on the outer wall inside my refrigerator not working? Interior lights on some models) are the lights inside the...
Similar Questions

Oven Has Stop Heating.everything Works. What Can Be Problem? What Can I Do?
(Posted by rpadgett3 10 years ago)

Microwave Model # Mmv4205bas Serial # 1632718np
Our microwave stopped working. There is no power to it but the outlet it is on has power to it. Have...
Our microwave stopped working. There is no power to it but the outlet it is on has power to it. Have...
(Posted by flyingu 11 years ago)


Is The Mmv5208wb Vent Free Or Do You Have To Vent Out Of The House
(Posted by Anonymous-58855 12 years ago)

5e Error Code Means For A Microwave Model #mmv4203ds00
(Posted by cnavedo 12 years ago)