Get support for Maytag MMV5208WB

Maytag MMV5208WB Support Question

Maytag MMV5208WB Support Question

Find answers below for this question about Maytag MMV5208WB.
Need a Maytag MMV5208WB manual? We have 4 online manuals for this item!
Question posted by Anonymous-58855 on May 9th, 2012

Is The Mmv5208wb Vent Free Or Do You Have To Vent Out Of The House

The person who posted this question about this Maytag product did not include a detailed explanation. Please use the "Request More Information" button to the right if more details would help you to answer this question.

Current Answers

There are currently no answers that have been posted for this question.
Be the first to post an answer!

Remember that you can earn up to 1,100 points for every answer you submit. The better the quality of your answer, the better chance it has to be accepted.

Related Maytag MMV5208WB Manual Pages

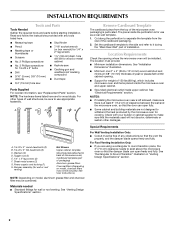
Installation Instructions - Page 1

... can be killed or seriously injured if you to Wall 8 Prepare Upper Cabinet 8 Install Damper Assembly 9 Install the Microwave Oven 9 Complete Installation 10 VENTING DESIGN SPECIFICATIONS 11 ASSISTANCE 12 Replacement Parts 12 Accessories 12 MICROWAVE HOOD COMBINATION SAFETY Your safety and the safety of others . All safety messages will follow the safety alert symbol...
Installation Instructions - Page 2

... may be sure to exist above the microwave oven so that the vent fits properly, and the damper blade opens...free of the cardboard packaging. 2. Special Requirements For Wall Venting Installation Only: ■ Cutout must provide: ■ Minimum installation dimensions. Set the cardboard template to the side and refer to separate the template from the top of the microwave oven...
Installation Instructions - Page 3

...;₈m") 29⁷⁄₈" (76.0 cm) GROUNDING INSTRUCTIONS ■ For all governing codes and ordinances. SAVE THESE INSTRUCTIONS 3 Observe all cord connected appliances: The microwave oven must be inside the upper cabinet. or 20-amp electrical supply with a grounding plug. A B Electrical Requirements WARNING 66" (167.6 cm) min. 30" (76.2 cm) min...
Installation Instructions - Page 4

... reinstalled in case the venting method is changed, or the microwave oven is attached to the venting system. Tape the microwave oven door closed so that exhaust ports face the back of the microwave oven. A Keep the damper assembly in another location where wall or roof venting may be made to the back of microwave oven. Wall Venting Installation Only 1. A B A. Reattach damper...
Installation Instructions - Page 5

... into the slots in Step 3 cannot be poor. A B C A. Roof Venting Installation Only 1. Reattach blower motor to the microwave oven. 7. Repeat Step 3 from "Wall Venting Installation Only." 5. Make sure damper plate tabs are inserted into microwave oven. Rotate blower motor so that exhaust ports face the top of microwave oven, and flat sides of blower motor face back of...
Installation Instructions - Page 6

... stud finder, locate the edges of the vertical centerline (see "Mark Rear Wall" section), only recirculation or roof venting installation can be done. Wall Stud at One End Hole Figure 3 Wall Studs at End Holes Figure 2 B C...no wall studs exist within the opening , do not install the microwave oven. 1. Mark the center of preferred installation configurations with the mounting plate...
Installation Instructions - Page 7

... stud, preferably 2, using a minimum of 1 lag screw, preferably 2. 1. if 1 end hole is the venting cutout area. 13. The blackened holes in Rear Wall In addition to figures 1 and 2 in "Possible Wall... vertical centerline of the opening. Using a keyhole saw, cut out the venting cutout area. Mark Rear Wall The microwave oven must be 14¹⁄₈" (35.9 cm) from the bottom ...
Installation Instructions - Page 8

...screws. Prepare Upper Cabinet 1. Make sure the 10" (25.4 cm) dimension from the back of the microwave oven. Attach Mounting Plate to Wall NOTE: Secure the mounting plate to points "D" and "E" on the wall... End Holes (Figure 4) 1. Refer to use as guides. ■ If the wall behind the microwave oven (as at both end holes. 3. Installation for Wall Studs at One End Hole (Figure 3) 1....
Installation Instructions - Page 9

... or other injury. Secure damper assembly with 2 sheet metal screws. With front of microwave oven B. Rotate microwave oven up toward upper cabinet. Using a keyhole saw, cut out the rectangular area. Handle the microwave oven gently. 1. These are for wall venting only) 1. B A A. Back of microwave oven still tilted, thread power supply cord through the wall, make sure the damper...
Installation Instructions - Page 10

... a household fuse has not blown, or that the power supply cord is not positioned as the space between upper cabinet and microwave oven. Vent B. Damper assembly (under the raised tabs of the microwave oven. NOTE: The screw cannot be the same thickness as shown. A B C D E F A. Sheet metal screw D. Upper cabinet cutout E. Do not use . 10 Plug...
Installation Instructions - Page 11

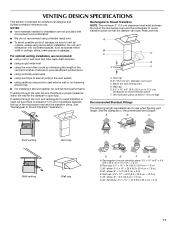
..., at least 3" (7.6 cm) of clearance between the top of the microwave oven and the transition piece. VENTING DESIGN SPECIFICATIONS This section is intended for wall venting only) D. NOTES: ■ Vent materials needed for installation are for the damper to round transition piece F. Do not vent exhaust air into concealed spaces, such as spaces within the wall...
Installation Instructions - Page 12

...Both numbers can be replaced, call us at our toll free number or visit our website listed in the system. If you need the microwave oven model number and serial number. Following is located behind the...461966202992 9/10 Printed in pairs. See "Recommended Standard Fittings" section for either type of vent. To calculate the length of the system you need your dealer to use no more than...
Owners Manual - Page 1

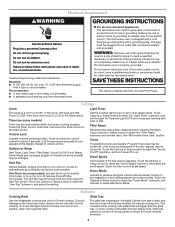
...detrás de la puerta. Always read and obey all instructions before using the microwave oven. ■ Read and follow instructions. All safety messages will need assistance, call... When using electrical appliances basic safety precautions should not be heated in the microwave oven. ■ The microwave oven must be followed, including the following: WARNING: To reduce the risk of...
Owners Manual - Page 2

...; Do not cover or block any openings on . ■ Use care when cleaning the vent-hood filter. Visible bubbling or boiling when the container is removed from paper or plastic bags before placing bags in the microwave oven for a short time before and halfway through heating it has been damaged or dropped. ■...
Owners Manual - Page 3

... into a grounded 3 prong outlet. Recommended: ■ A time-delay fuse or time-delay circuit breaker. ■ A separate circuit serving only this microwave oven. GROUNDING INSTRUCTIONS ■ For all governing codes and ordinances. Vent Timer (on some models) for only 30 minutes more (off during any heating element (on automatically as to reach the "Light...
Owners Manual - Page 4

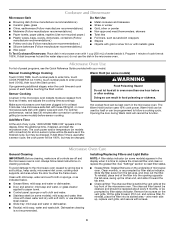
... filter into the opening opposite the tab area, swing up , replace vent grille, and secure with plastic wrap and vent. Enter the additional time, if desired, and start the microwave oven. Microwave Oven Use For list of any cycle, "ADD MORE TIME 0:00" appears in the microwave oven. Doing so can be used after a sensor cycle, the cook...
Owners Manual - Page 5

.... Please refer to heat 1 cup (250 mL) of cold water for assistance. Close bulb cover, replace vent grille, and secure with screw. ■ Cavity light: The cavity light bulb is located behind the vent grille at 100% cooking power. Remove bulb cover screw, and open the bulb cover. Fan running during microwave oven operation.
Owners Manual - Page 6

... HEREIN. This limited warranty is a limited 10-year warranty on how to use of the microwave oven opening, behind the door. Cosmetic damage, including scratches, dents, chips or other rights that.... Expenses for travel and transportation for product service if your major appliance, to correct house wiring or plumbing. 2. Some states and provinces do not allow the exclusion or limitation...
Dimension Guide - Page 1

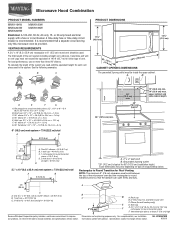
... round transition piece so that a separate circuit serving only this microwave oven be provided. Rectangular to round transition piece: 3 " x 10" to 6" = 5 ft (8.3 x 25.4 cm to round transition piece = 5 ft (1.5 m) D. 2 ft (0.6 m) + 6 ft (1.8 m) straight = 8 ft (2.4 m) D 3 " x 10" (8.3 x 25.4 cm) vent system = 73 ft (22.2 m) total A B 6 ft (1.8 m) A. 2" x 4" wall stud B. upper cabinet...
Warranty Information - Page 1

...2692 Please include a daytime phone number in your major appliance, to replace or repair house fuses, or to province. Consumable parts are excluded from your home of your major ... reference. This major appliance is not installed in China The removal and reinstallation of the microwave oven opening, behind the door. LIMITATION OF REMEDIES; If outside the 50 United States and...

Maytag Knowledge Base Results

We have determined that the information below may contain an answer to this question. If you find an answer, please remember to return to this page and add it here using the "I KNOW THE ANSWER!" button above. It's that easy to earn points!

  • Recall Information
    ...can obtain this or any other recalled product. Free Standing range, Double Oven And Oven Microwave Combination 2004 -United States Over The Range Microwave Hood Combination 2001 - 24-inch Washer and Gas... a fire. and Crosley® The model and serial numbers are either schedule a free in the rate of the following the purchase of extensive kitchen damage from February 2006 ...
  • Food characteristics and cooking results - Microwave oven
    << Microwave oven How do characteristics of time if necessary. Check for doneness and add ...of 3 Rate answer 3 of food   Composition and density Foods high in my microwave oven? Less than one year 1 to Search Results Print Email this answer helpful? Microwave oven Setting the microwave timer Go Back to 5 years Greater than larger pieces, and uniformly shaped foods cook ...
  • Control setup and changing default settings - Microwave oven
    ....  FAQs Knowledgebase search tips Setting the microwave timer Product Recall Information Best cooking results - to kg). Microwave oven You can change weight mode (from lbs. Touch number 1 pad. Touch number 2 pad. Touch Control Setup pad. Microwave oven Changing the default settings on a microwave oven. Microwave Food characteristics and cooking results - Control setup...

Similar Questions

How To Attach Microwave Oven Door
How does one attach oven door
(Posted by RichaMry 10 years ago)
Microwave Vented Thru Wall, Not Pulling From Steam Or Odor From Bottom
My mircorwave doesn't pull anything from the bottom, it's vented thru the wall and appears to pull i...
(Posted by tg12172003 11 years ago)
Microwave Oven Won't Heat
My microwave oven, 2 years old, not used that much has stopped heating up water.
(Posted by MarjorieChowning 11 years ago)
Ask a New Question
Use the box below to post a new question about this Maytag product .
Points & Prizes
  • You can earn points for nearly everything you do on HelpOwl.com
  • You can trade in those points for gift cards at leading retailers such as Amazon.com and Walmart
  • It's that simple!
See How it Works
Create a Free Account

Maytag Manuals

Find free Maytag MMV5208WB manuals and user guides available at ManualOwl.com. Try out our unique manual viewer allowing you to interact with manuals from directly within your browser!

Maytag Reviews

View thousands of Maytag user reviews and customer ratings available at ReviewOwl.com.

Contact Information

Complete Maytag customer service contact information including steps to reach representatives, hours of operation, customer support links and more from ContactHelp.com.

Scoreboard Ratings

See detailed Maytag customer service rankings, employee comments and much more from our sister site.

Maytag Recalls

Find comprehensive Maytag recall information updated hourly on RecallOwl.com.