Get support for Maytag MMV1164WS

Maytag MMV1164WS Support Question

Maytag MMV1164WS Support Question

Find answers below for this question about Maytag MMV1164WS.
Need a Maytag MMV1164WS manual? We have 2 online manuals for this item!
Question posted by Benman1 on September 8th, 2015

How Do I Clean The Glass On Inside Of Door

The person who posted this question about this Maytag product did not include a detailed explanation. Please use the "Request More Information" button to the right if more details would help you to answer this question.

Current Answers

Answer #1: Posted by Odin on September 8th, 2015 3:33 PM
This answer was accepted by the poster of the original question.
Odin

Member since:
April 10th, 2010

Points: 41,236,700
1,100
points
Use mild soap and water, or glass cleaner applied to paper towel.


Hope this is useful. Please don't forget to click the Accept This Answer button if you do accept it. My aim is to provide reliable helpful answers, not just a lot of them. See https://www.helpowl.com/profile/Odin.

Related Maytag MMV1164WS Manual Pages

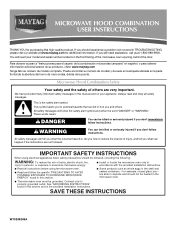
Owners Manual - Page 1

...USER INSTRUCTIONS THANK YOU for example, closed glass jars - If you how to reduce the chance of the microwave oven opening, behind the door. Para obtener acceso a "Instrucciones para ...safety messages in this section. ■ Some products such as whole eggs in the microwave oven. ■ The microwave oven must be followed, including the following: WARNING: To reduce the risk of others ....
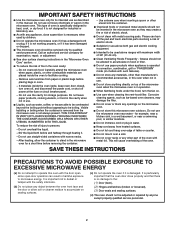
Owners Manual - Page 2

... with metal scouring pads. Corrosive cleaning agents, such as water, coffee, or tea are placed inside the oven ignite, keep oven door closed, turn the fan on sealing surfaces. (c) Do not operate the oven if it . - SAVE THESE INSTRUCTIONS PRECAUTIONS TO AVOID POSSIBLE EXPOSURE TO EXCESSIVE MICROWAVE ENERGY (a) Do not attempt to the: (1) Door (bent), (2) Hinges and latches...
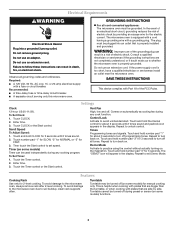
Owners Manual - Page 3

...clean rack supports often. Tones Programming tones and signals. Demo Mode Activate to practice using the control without actually turning on automatically as to follow these instructions can result in the display. Failure to whether the microwave oven... for FAST. 3. Observe all cord connected appliances: The microwave oven must be used independently during preset or sensor (on ....
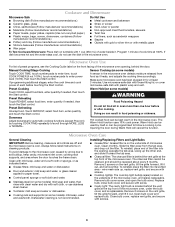
Owners Manual - Page 4

... water or dishwasher. ■ Door and exterior: mild soap and water, or glass cleaner applied to scroll through MORE, LESS or NORMAL. Installing/Replacing Filters and Light Bulbs ■ Grease filter: Grease filter is cool. The charcoal filter cannot be cleaned, and should be kept warm in the microwave oven detects moisture released from the...
Owners Manual - Page 5

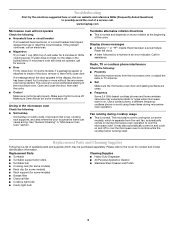
... the problem continues, call an electrician. ■ Magnetron Try to inside of the door, remove it, then firmly close door. On some models), which may be purchased separately. See "General Cleaning" in the microwave oven Check the following: ■ Soil buildup Soil buildup on . Fan running during microwave oven operation. Please refer to avoid unintended starting of the...
Owners Manual - Page 6

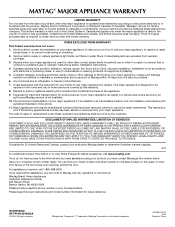
... dents, chips or other than normal, single-family household use of consumables or cleaning products not approved by this major appliance is operated and maintained according to instructions...company. All rights reserved. ®Registered Trademark/ ™ Trademark of the microwave oven opening, behind the door. If you can find your model number and serial number on the label ...
Installation Instructions - Page 1

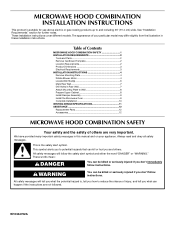
... how to Wall 8 Prepare Upper Cabinet 8 Install Damper Assembly 9 Install the Microwave Oven 9 Complete Installation 10 VENTING DESIGN SPECIFICATIONS 11 ASSISTANCE 12 Replacement Parts 12 Accessories 12 MICROWAVE HOOD COMBINATION SAFETY Your safety and the safety of Contents MICROWAVE HOOD COMBINATION SAFETY 1 INSTALLATION REQUIREMENTS 2 Tools and Parts 2 Remove Cardboard Template...
Installation Instructions - Page 2

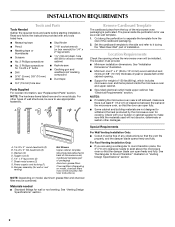
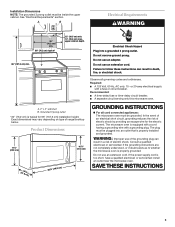
...microwave oven and items placed inside the microwave oven and upper cabinet. ■ Grounded electrical outlet inside the perforation is at least 6" (15.2 cm) of clearance between the wall and the microwave oven... Requirements" section. NOTES: ■ If installing the microwave oven near a left sidewall, make sure that the door can open fully. ■ Some cabinet and building materials...
Installation Instructions - Page 3

...is typical for the electric current. The plug must be inside the upper cabinet. SAVE THESE INSTRUCTIONS 3 Failure to whether the microwave oven is properly installed and grounded. Recommended: ■ A... death, fire, or electrical shock. Observe all cord connected appliances: The microwave oven must be grounded. Installation Dimensions NOTE: The grounded 3 prong outlet must...
Installation Instructions - Page 4

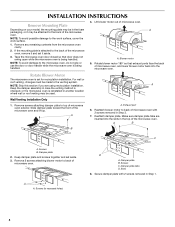
..., or it aside. 3. Remove any remaining contents from the microwave oven cavity. 2. If the mounting plate is attached to the microwave oven, do not grip or use the door or door handle while the microwave oven is reinstalled in Step 1. 4 NOTE: To avoid damage to the back of microwave oven with 2 screws removed in another location where wall or roof...
Installation Instructions - Page 5

... back of "Wall Venting Installation Only." 5 Securely tighten screws. Lower blower motor back into the slots in Step 3 of the microwave oven (as shown), performance will be reattached to back of microwave oven with flat sides facing the back of "Wall Venting Installation Only." NOTE: If blower motor is not positioned with 2 screws removed...
Installation Instructions - Page 6

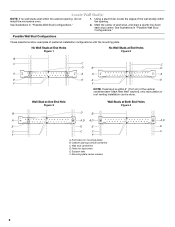
... tabs F. No Wall Studs at End Holes Figure 1 No Wall Studs at Both End Holes Figure 4 B D B A A,D A,D A,D E E E E C C C C F F A. Wall stud centerlines D. Cabinet opening , do not install the microwave oven. 1.
Installation Instructions - Page 7

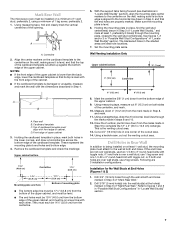
... wall stud centerline(s). Wall Venting Installation Only Upper cabinet bottom ³⁄₈" (1 cm) 4" (10.2 cm) Centerline 6" (15.2 cm) 6" (15.2 cm) 8. Mark Rear Wall The microwave oven must be 14¹⁄₈" (35.9 cm) from the centerline. 5. Centerline 2. D. Holding the cardboard template in Step 9 to the wall at least 1, preferably 2 hole...
Installation Instructions - Page 8

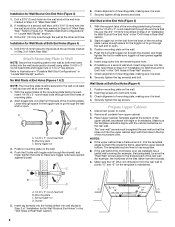
...is level. 7. Spring toggle nut 3. A C 6. Check alignment of the microwave oven. Securely tighten all contents from the rear wall to points "D" and "E" on...inside the frame, against the upper cabinet bottom. Wall Stud at Both End Holes (Figure 4) 1. Securely tighten the lag screws. The template has trim lines to use as guides. ■ If the wall behind the microwave oven...
Installation Instructions - Page 9

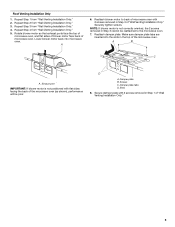
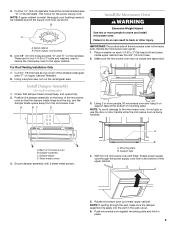
... that the damper blade hinge is the heavy side. Make sure the microwave oven door is being handled. Support tabs 4. Rotate microwave oven up toward upper cabinet. B A A. Drill 3/8" (10 mm) ...microwave oven. Position the damper assembly on support tabs at the bottom of the microwave oven is at the circular shaded area "G" on each 1/4-20 x 3" flat-head bolt and place inside...
Installation Instructions - Page 10

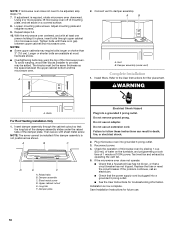
... than 3" (7.6 cm). Do not remove ground prong. Plug microwave oven into a grounded 3 prong outlet. If the microwave oven does not operate: ■ Check that a household fuse has...death, fire, or electrical shock. 2. Sheet metal screw D. Installation is plugged into microwave oven. Install filters. Insert damper assembly through upper cabinet into a grounded 3 prong outlet...
Installation Instructions - Page 11

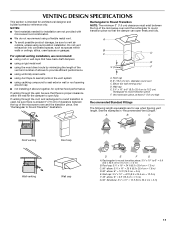
...there is at least 3" (7.6 cm) of clearance between the top of the microwave oven and the transition piece. Rectangular to Round Transition NOTE: The minimum 3" (7.6 cm) clearance must exist between the ...top of the microwave oven and the rectangular to round transition piece so that there is proper clearance within walls or ...
Installation Instructions - Page 12

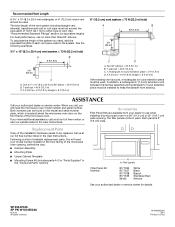
... + 6 ft (1.8 m) straight = 8 ft (2.4 m) If the existing vent is a list of the microwave oven opening . Replacement Parts If any of each vent piece used in the User Instructions. To calculate the length of ...best performance, use when installing this microwave oven in a 36" (91.4 cm) or 42" (106.7 cm) wide opening , behind the microwave oven door on the front facing of available ...

Maytag Knowledge Base Results

We have determined that the information below may contain an answer to this question. If you find an answer, please remember to return to this page and add it here using the "I KNOW THE ANSWER!" button above. It's that easy to earn points!

  • How do I remove odors from my Top-loading HE washer?
    ...bleach to thoroughly clean the inside of more information about your washing machine unless the fabric you allow the Clean Washer cycle to complete without interruptions. If necessary, the Clean Washer cycle ... all remaining washer cleaner or bleach is HE High Efficiency detergent required Leave the door slightly open after each cycle to allow the cycle to  maintain washer freshness...
  • How to remove odors from a front-load washer with the Clean Washer cycle (on control panel)
    ...;washer cleaner or liquid chlorine bleach to thoroughly clean the inside of odor in my front-load washer How do I clean my front-load washer door seal? Do not place the tablet in your...lift and remove residue which builds over time. Press Start. Repeat the cleaning procedure monthly. Close the washer door and dispenser drawer. How to  maintain washer freshness. This procedure&...
  • Caring for my compactor
    ...  . Hold the lever-action lock down the drawer. To clean inside the drawer: You may want to wear protective gloves since there may be performed by a designated service representative. It will be bits of glass in warm water. Vacuum the inside of the cabinet with a soft cloth. Rinse and dry thoroughly with...

Similar Questions

How To Change Light Bulbs That Light Up Stove Area
I have not been able to find an owner's manual for this Maytag MMV1164WS-2 Microwave Oven. The light...
(Posted by hweinstein55 10 years ago)
Small Hole On Inner Glass Of Door. Safety Concern, Recall?
see above. small hole in inside glass of door. Is this a safety concern,recall item? Why/how does th...
(Posted by mikebrpm 10 years ago)
Cleaning The Inside Of The Window
How do I remove the heat shield so I can clean it and the window?
(Posted by Roblsole 11 years ago)
Maytag Mmv1164ws-0 Not Turning On.
I just changed out the light from under the microwave and now it the microwave will not power on at ...
(Posted by zveillon 11 years ago)
Maytag Microwave Mmv4203ds00
I have a Maytag microwave  model MMV4203ds00 that gives me an error se or 5e. I tried power off/on ...
(Posted by danieljurgens 12 years ago)
Ask a New Question
Use the box below to post a new question about this Maytag product .
Points & Prizes
  • You can earn points for nearly everything you do on HelpOwl.com
  • You can trade in those points for gift cards at leading retailers such as Amazon.com and Walmart
  • It's that simple!
See How it Works
Create a Free Account

Maytag Manuals

Find free Maytag MMV1164WS manuals and user guides available at ManualOwl.com. Try out our unique manual viewer allowing you to interact with manuals from directly within your browser!

Maytag Reviews

View thousands of Maytag user reviews and customer ratings available at ReviewOwl.com.

Contact Information

Complete Maytag customer service contact information including steps to reach representatives, hours of operation, customer support links and more from ContactHelp.com.

Scoreboard Ratings

See detailed Maytag customer service rankings, employee comments and much more from our sister site.

Maytag Recalls

Find comprehensive Maytag recall information updated hourly on RecallOwl.com.