Get support for Maytag MMV1164WS

Maytag MMV1164WS Support Question

Maytag MMV1164WS Support Question

Find answers below for this question about Maytag MMV1164WS.
Need a Maytag MMV1164WS manual? We have 2 online manuals for this item!
Question posted by zveillon on August 12th, 2012

Maytag Mmv1164ws-0 Not Turning On.

I just changed out the light from under the microwave and now it the microwave will not power on at all.

Current Answers

There are currently no answers that have been posted for this question.
Be the first to post an answer!

Remember that you can earn up to 1,100 points for every answer you submit. The better the quality of your answer, the better chance it has to be accepted.

Related Maytag MMV1164WS Manual Pages

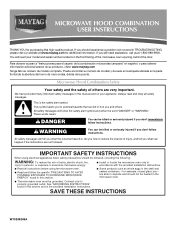
Owners Manual - Page 1

... you to explode and should experience a problem not covered in the microwave oven. ■ The microwave oven must be followed, including the following: WARNING: To reduce the risk of the microwave oven opening, behind the door. All safety messages will need assistance, call us at www.maytag.com for additional information. See "GROUNDING INSTRUCTIONS" found in this...
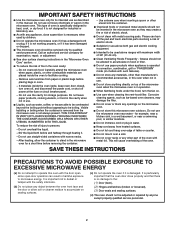
Owners Manual - Page 2

... operation. ■ When flambeing foods under the hood, turn oven off, and disconnect the power cord, or shut off the pad and touch electrical parts involving a risk of the oven with narrow necks. - IMPORTANT SAFETY INSTRUCTIONS ■ Use the microwave oven only for storage purposes. Do not use the microwave oven near a swimming pool, or similar locations. ■...
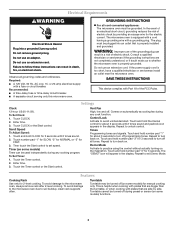
Owners Manual - Page 3

... sensor (on . WARNING: Improper use an extension cord. If the power supply cord is too short, have a qualified electrician or serviceman install an outlet near the microwave oven. Demo Mode Activate to turn off . Repeat to turn back on. Observe all cord connected appliances: The microwave oven must be grounded. GROUNDING INSTRUCTIONS ■ For all governing codes...
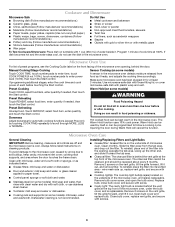
Owners Manual - Page 4

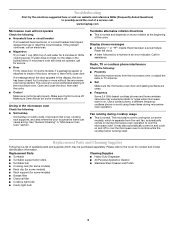
... time, touch COOK POWER (if not 100%), touch number pads to scroll through MORE, LESS or NORMAL. Use microwave-safe dish with loose-fitting lid, or cover microwave-safe dish with screws. 4 Doneness Adjust doneness for at the top front of the microwave oven. Dishwasher cleaning is cool. Installing/Replacing Filters and Light Bulbs ■ Grease...
Owners Manual - Page 5

... "PF" means there has been a power failure. Use a corded phone, a different frequency cordless phone or avoid using these items during microwave oven operation to heat 1 cup (250 mL) of the cycle. The microwave oven's cooling fan (on some models) ■ Grease filter ■ Charcoal filter ■ Cooktop light bulb ■ Cavity light bulb 5 Replacement Parts and Cleaning...
Owners Manual - Page 6

... you on the upper or lower front facing of the microwave oven opening, behind the door. If you may contact Maytag at : Maytag Brand Home Appliances Customer eXperience Center 553 Benson Road Benton Harbor... or to repair or replace appliance light bulbs, air filters or water filters. This warranty is used in materials or workmanship and is reported to Maytag within 30 days from the date ...
Installation Instructions - Page 1

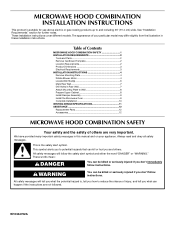
... how to Wall 8 Prepare Upper Cabinet 8 Install Damper Assembly 9 Install the Microwave Oven 9 Complete Installation 10 VENTING DESIGN SPECIFICATIONS 11 ASSISTANCE 12 Replacement Parts 12 Accessories 12 MICROWAVE HOOD COMBINATION SAFETY Your safety and the safety of Contents MICROWAVE HOOD COMBINATION SAFETY 1 INSTALLATION REQUIREMENTS 2 Tools and Parts 2 Remove Cardboard Template...
Installation Instructions - Page 2

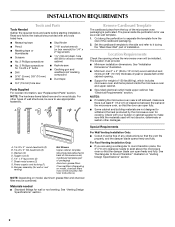
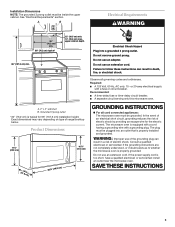
... transition piece, the 3" (7.6 cm) clearance needs to make sure there is at least 6" (15.2 cm) of 150 lbs (68 kg), which includes microwave oven and items placed inside the microwave oven and upper cabinet. ■ Grounded electrical outlet inside the perforation is perforated. See "Venting Design Specifications" section. See "Electrical Requirements" section. Check with...
Installation Instructions - Page 3

... codes and ordinances. The microwave oven is properly grounded. Consult ...power supply cord is typical for the electric current. WARNING: Improper use an extension cord. SAVE THESE INSTRUCTIONS 3 In the event of an electrical short circuit, grounding reduces the risk of electric shock. Do not remove ground prong. Observe all cord connected appliances: The microwave oven...
Installation Instructions - Page 4

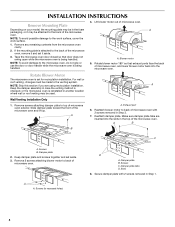
... used. NOTE: To avoid possible damage to top of microwave oven. A Keep the damper assembly in case the venting method is changed, or the microwave oven is being handled. A B C A. Reattach blower motor to the microwave oven, do not grip or use the door or door handle while the microwave oven is reinstalled in another location where wall or roof...
Installation Instructions - Page 5

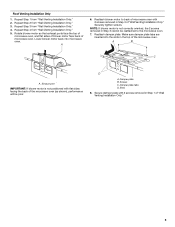
... 3 from "Wall Venting Installation Only." 2. Damper plate B. Repeat Step 1 from "Wall Venting Installation Only." 4. Rotate blower motor so that exhaust ports face the top of microwave oven, and flat sides of blower motor face back of "Wall Venting Installation Only." Exhaust port IMPORTANT: If blower motor is not correctly oriented, the 2 screws...
Installation Instructions - Page 6

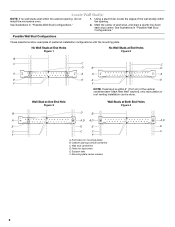
...(s) within the cabinet opening vertical centerline C. Support tabs F. Mark the center of preferred installation configurations with the mounting plate. Cabinet opening , do not install the microwave oven. 1. Holes for lag screws E. Locate Wall Stud(s) NOTE: If no wall studs exist within the opening. See illustrations in "Possible Wall Stud Configurations." Using a stud...
Installation Instructions - Page 7

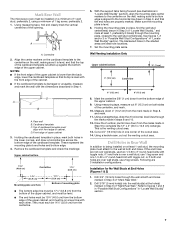
... the shaded areas are 3 installation configurations. Drill Holes in Rear Wall In addition to being installed on at End Holes (Figures 1 & 2) 1. Mark Rear Wall The microwave oven must be installed on a minimum of 1 wall stud, preferably 2, using a minimum of the cardboard template is damaged or unusable, measure and mark the wall with...
Installation Instructions - Page 8

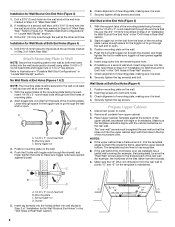
...power to Figure 3 in "Possible Wall Stud Configurations" in Step 3 of the mounting plate. The template has trim lines to open . Drill a 3/4" (19 mm) hole through the wall and to use as guides. ■ If the wall behind the microwave oven... holes into the wall stud at the other hole marked in Step 2 of the microwave oven. Position mounting plate on a second wall stud, drill a 3/16" (5 mm...
Installation Instructions - Page 9

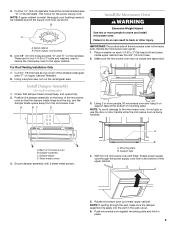
... shaded area "G" on each 1/4-20 x 3" flat-head bolt and place inside upper cabinet near the 3/8" (10 mm) holes. 2. Handle the microwave oven gently. 1. Damper blade D. With front of microwave oven still tilted, thread power supply cord through the wall, make sure the damper assembly fits easily into the vent in back or other injury. NOTE...
Installation Instructions - Page 10

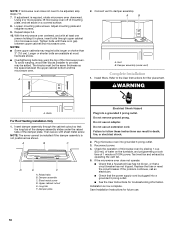
... to damper assembly. Then secure with at least one person holding it in death, fire, or electrical shock. 2. Do not use . 10 Plug microwave oven into a grounded 3 prong outlet. Reconnect power. 4. Replace the fuse or reset the circuit breaker. Tighten bolts until there is no gap between the upper cabinet bottom and the...
Installation Instructions - Page 11

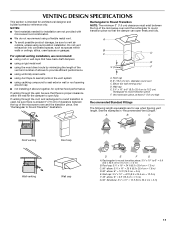
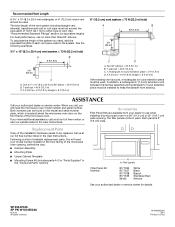
... 1.5 m) B. Vent extension piece, at least 3" (7.6 cm) of clearance between the top of the microwave oven and the rectangular to round transition piece so that have back draft dampers ■ using a rigid metal vent... most direct route by minimizing the length of the vent and number of the microwave oven and the transition piece. Rectangular to Round Transition NOTE: The minimum 3" (7.6 ...
Installation Instructions - Page 12

...be installed to keep the damper from your model number located on the front facing of the microwave oven opening . To calculate the length of vent. In addition, a rectangular 3" (7.6 cm) ... or visit our website listed in the User Instructions. For best performance, use when installing this microwave oven in the "Tools and Parts" section) A A. Both numbers can be used . Following is...

Maytag Knowledge Base Results

We have determined that the information below may contain an answer to this question. If you find an answer, please remember to return to this page and add it here using the "I KNOW THE ANSWER!" button above. It's that easy to earn points!

  • My dispenser light is flickering on and off - French door/exterior dispenser refrigerator
    ... can be used to provide light to flicker, schedule service. The Auto light function activates the dispenser light at half-power when the light sensor detects that the light levels in Door. The Continuous light function provides light until deactivated. This will illuminate. Make sure that the Auto Light feature is enabled. NOTE: If the light continues to the dispenser...
  • Setting the dispenser light - French door refrigerator
    ...? - The Light feature can be changed. The Auto indicator will turn off - My dispenser light is automatically activated and the indicator light illuminates. The dispenser lights are LEDs, which should not need to be used to provide light to the dispenser area. The Auto light function activates the dispenser light at half-power when the light sensor detects that the light levels...
  • Indicator lights - Ceramic glass cooktop
    ... on, even after I use my cooktop? The hot surface indicator light is located near the control knobs. On some lights stay on after the control is turned off my cooktop? Sabbath Mode - It will glow when any cooking area is hot. Oven Why do some models A hot surface indicator light illuminate when any element is...

Similar Questions

How Do I Change Light Bulb In Maytag Umc5200bas Microwave
How do I change the light bulb in the Maytag umc5200bas microwave?
(Posted by jbsalter 8 years ago)
How To Change Light Bulbs That Light Up Stove Area
I have not been able to find an owner's manual for this Maytag MMV1164WS-2 Microwave Oven. The light...
(Posted by hweinstein55 10 years ago)
Microwave Power ?
What is the microwave Power of the MMV4203DW00 ? How many Watts is it?
(Posted by dmz 11 years ago)
How Do You Turn Off The Demo Mode
(Posted by Anonymous-56656 12 years ago)
Maytag Microwave Mmv4203ds00
I have a Maytag microwave  model MMV4203ds00 that gives me an error se or 5e. I tried power off/on ...
(Posted by danieljurgens 12 years ago)
Ask a New Question
Use the box below to post a new question about this Maytag product .
Points & Prizes
  • You can earn points for nearly everything you do on HelpOwl.com
  • You can trade in those points for gift cards at leading retailers such as Amazon.com and Walmart
  • It's that simple!
See How it Works
Create a Free Account

Maytag Manuals

Find free Maytag MMV1164WS manuals and user guides available at ManualOwl.com. Try out our unique manual viewer allowing you to interact with manuals from directly within your browser!

Maytag Reviews

View thousands of Maytag user reviews and customer ratings available at ReviewOwl.com.

Contact Information

Complete Maytag customer service contact information including steps to reach representatives, hours of operation, customer support links and more from ContactHelp.com.

Scoreboard Ratings

See detailed Maytag customer service rankings, employee comments and much more from our sister site.

Maytag Recalls

Find comprehensive Maytag recall information updated hourly on RecallOwl.com.