Get support for Maytag MEDC400VW - Centennial Electric Dryer

Maytag MEDC400VW Support Question

Maytag MEDC400VW Support Question

Find answers below for this question about Maytag MEDC400VW - Centennial Electric Dryer.
Need a Maytag MEDC400VW manual? We have 2 online manuals for this item!
Question posted by Lacytomboy on January 16th, 2014

Drum Stopped Turning On My Centennial Elec. Dryer.

While NOT running, the drum was turned to retrieve an article of clothing and something snapped. Drum does not turn now. Still heats up but doesnt turn. What do I need to replace? I have looked everywhere to see if its the belt and nothing else but cant even find out if it has a belt of not. PLEASE HELP! Model MEDC400VWD- electric Centennial commercial technology. Serial# MOO-101120

Current Answers

There are currently no answers that have been posted for this question.
Be the first to post an answer!

Remember that you can earn up to 1,100 points for every answer you submit. The better the quality of your answer, the better chance it has to be accepted.

Related Maytag MEDC400VW Manual Pages

Owners Manual - Page 2

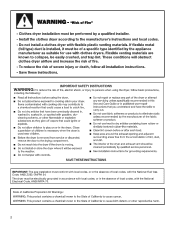
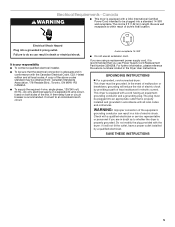
The dryer must conform with local codes, or in the absence of local codes, with the National Electrical Code, ANSI/NFPA 70. 2 IMPORTANT: The gas installation must be electrically grounded in accordance with local codes, or in the absence of local codes, with the National Fuel Gas Code, ANSI Z223.1/NFPA 54.
Owners Manual - Page 3

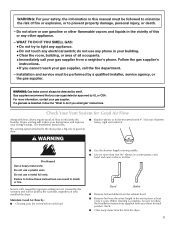
... a big role in good air flow. ■■ Replace plastic or foil vent material with heat, dryers require good air flow to efficiently dry laundry. Do not store or use a metal foil vent. The venting system attached to light any appliance. • Do not touch any electrical switch; WARNING Fire Hazard Use a heavy metal vent...
Owners Manual - Page 4

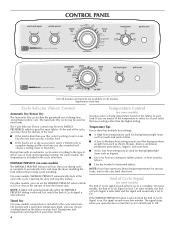
...: If you open the door or turn the Cycle Control knob to complete drying...heat (air) setting for most fabrics. CONTROL PANEL Not all models. Appearance may be used for drying heavyweight items such as towels and work clothes...to Medium heat setting may check the dryness of time the feature runs. At ... periodically starts and stops the dryer, tumbling the load without heat to the type ...
Owners Manual - Page 6

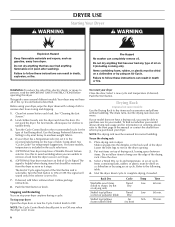
... purchased your dryer, wipe the dryer drum with a damp cloth to dry items such as sweaters and pillows without tumbling. Stopping and Restarting You can completely remove oil. The drum turns, but the...of fire, electric shock, or injury to tumble freely. 3. Fire Hazard No washer can stop your dryer Close the door. Before using an air cycle. Load clothes loosely into the...
Owners Manual - Page 7

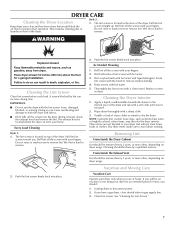
...screen straight up. Wet lint is hard to the stained area of clothes. IMPORTANT: ■■ Do not run the dryer with hot water. 5. Pull the lint screen toward you are not... the brush to dry the drum. From Inside the Exhaust Vent Lint should : 1. The lint screen is located where the dryer air exits your fingers. This includes clearing piles of laundry in the door of lint ...
Owners Manual - Page 8

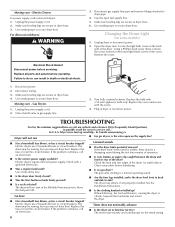
...;■ Is a cycle selected? No heat ■■ Has a household fuse blown, or has a circuit breaker tripped? Replace the fuse or reset the circuit breaker. See the Installation Instructions. ■■ Is the clothing knotted or balled up , the load will not run ■■ For gas dryers, is the dryer level front to back and...
Owners Manual - Page 9

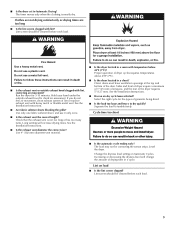
...replace exhaust vent with lint? Select the right cycle for 5-10 minutes. Separate the load to Automatic Drying? Level the dryer...once. ■■ Is the exhaust vent the correct length? Run the dryer for the types of drying time in a room with lint, restricting...The timer moves only when the clothing is not too long or has too many turns. Clothes are not drying satisfactorily or drying ...
Owners Manual - Page 10

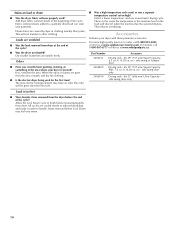
...■■ Was the load removed from the area, rewash, and dry the clothing. ■■ Is the electric dryer being used ? This will be gone after the first cycle. ■■ ... added to finish before removing laundry from the dryer before Cool Down may have an odor. Drum stains are gone from dryer at www.whirlpoolparts.ca. The new electric heating element may feel very warm....
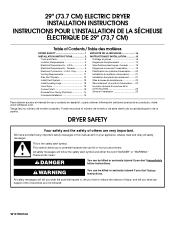
Installation Instructions - Page 1

... you and others are not followed. This symbol alerts you to reduce the chance of Contents / Table des matières DRYER SAFETY 1 INSTALLATION INSTRUCTIONS 2 Tools and Parts 2 Location Requirements 2 Electrical Requirements - WARNING You can kill or hurt you don't immediately follow the safety alert symbol and either the word "DANGER" or...
Installation Instructions - Page 2

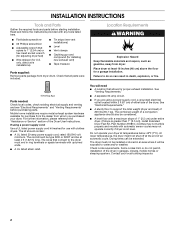
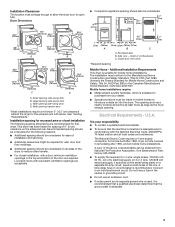
...dryer in an area where it will need ■ A location that all parts were included. 4 leveling legs Parts needed: Check local codes, check existing electrical supply and venting and see "Electrical...(2.5 cm) under entire dryer. (If slope is not level. The combined weight of the Dryer User Instructions. Read and follow the instructions provided with clothes dryers. only, direct wire ...
Installation Instructions - Page 3

... extension cord. ■ If codes permit and a separate ground wire is used, it is recommended that a qualified electrician determine that the electrical connection is adequate and in remodeling after 1996, dryer circuits involved in conformance with equivalent ventilation openings are recommended for Mobile Home Construction and Safety, Title 24, HUD Part 280...
Installation Instructions - Page 4

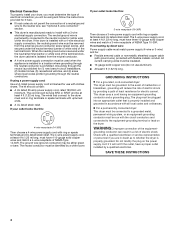
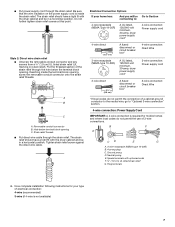
...If your outlet looks like this : 3-wire receptacle (10-30R) Then choose a 3-wire power supply cord with a 4-wire electrical supply connection, the...dryer must end in ring terminals or spade terminals with clothes dryers. SAVE THESE INSTRUCTIONS 4 Electrical Connection To properly install your dryer, you must determine the type of electrical connection you are in doubt as to whether the dryer...
Installation Instructions - Page 5

... ■ Do not use Power Supply Cord Replacement Part Number 3394208. Connect to do so can result in death or electrical shock. The cord is equipped with a CSA International Certified Power Cord intended to whether the dryer is recommended that you are in accordance with the dryer: if it is properly grounded. It is...
Installation Instructions - Page 7

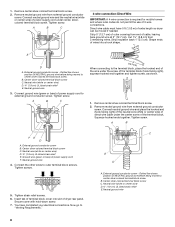
...30R) A fused disconnect or circuit breaker box* A UL listed, 120/240-volt minimum, 30-amp, dryer power supply cord* 4-wire connection: Direct Wire 3-wire connection: Power supply cord 3-wire direct 3¹&#... connector onto the strain relief threads. Ground prong D. Put the threaded section of electrical connection: 4-wire (recommended) 3-wire (if 4-wire is inside the terminal block ...
Installation Instructions - Page 8

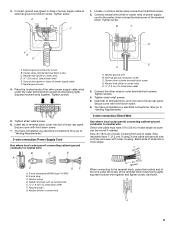
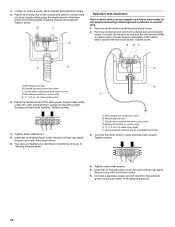
Direct wire cable must have completed your electrical connections. External ground conductor screw - Dotted line shows position of NEUTRAL ... ground wire 8 Remove center silver-colored terminal block screw. 2. Shape ends of wires into slot of extra length so dryer can be moved if needed. Tighten screw. Tighten screw. A B FE D A. Ground wire (green or bare) of power supply cord under ...
Installation Instructions - Page 9

... F E D A. Ground wire (green or bare) of extra length so dryer can be moved if needed. Secure cover with up turned ends E 1.9 cm) UL listed strain relief F. Now go to "Venting ... tighten screw, as shown. 9 You have completed your electrical connections. External ground conductor screw C. You have completed your electrical connections. Direct wire cable must have 5 ft (1.52...
Installation Instructions - Page 10

... Center silver-colored terminal block screw D. Squeeze hooked ends together. You have completed your electrical connections. Tighten screws. 4. Connect neutral ground wire and the neutral wire (white or ...or center wire) F E 1.9 cm) UL listed strain relief 3. Place the hooked ends of dryer rear panel. Tighten screws. 4. Tighten strain relief screw. 5. Secure cover with hold -down ...
Installation Instructions - Page 12

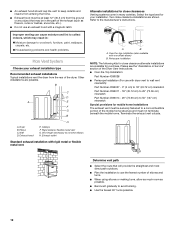
...; When using elbows or making turns, allow as much room as flowers, rocks or bushes, snow line, etc.). ■ Do not use an exhaust hood with dryer vent to wall vent mismatch): Part Number 4396037... result in: Moisture damage to avoid kinking. ■ Use the fewest 90° turns possible. 12 Alternate installations for mobile home installations The exhaust vent must be in many ...
Installation Instructions - Page 13

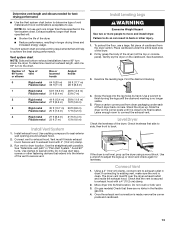
... corners. NOTE: Do not use . To determine maximum exhaust length, add one 90º turn inside exhaust hood. Find the diamond marking. 4. Stand the dryer up the dryer using a wood block. Determine vent length and elbows needed for levelness. Avoid 90º turns. Use a wrench to connect the exhaust vent. Leave enough room to finish...
Installation Instructions - Page 15

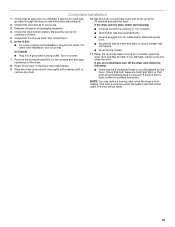
.... See "Level Dryer." 6. Wipe the dryer drum interior thoroughly with a damp cloth to see which step was skipped. 10. If there is first used. If there is closed. 11. When the dryer has been running or "On" position. ■ Start button has been pushed firmly. ■ Dryer is plugged into an outlet and/or electrical supply is level...

Maytag Knowledge Base Results

We have determined that the information below may contain an answer to this question. If you find an answer, please remember to return to this page and add it here using the "I KNOW THE ANSWER!" button above. It's that easy to earn points!

  • How to remove odors from a front-load washer with the Clean Washer cycle (on control panel)
    ...or other laundry products to maintain washer freshness: Use only HE High Efficiency detergent. Press Start. Pressing Pause/Cancel twice will turn off ...wipe the washer with a cloth if any clothing or items from developing in the Review Order screen when you have run the Clean Washer cycle.... to the washer drum. Make sure you are washing requires cold water. If your Affresh ...
  • How do I clean my front-load washer door seal?
    ...residue: Detergent residue may appear as white buildup on the door seal. How do I find my model number? Inspect the gray-colored seal between the door opening and the basket for five minutes. ...the seal to inspect all -purpose cleaner that is recommended for appliance use and a sponge, cloth, or nonabrasive plastic scrubbing pad to check for proper use . Wipe the seal area, including ...
  • Display shows AF - Dryer
    ...flexible heavy metal vent.  Run the dryer for more often, depending on maximum exhaust vent system lengths. Dryer fabric softener sheets may have too many turns. Heavy rigid metal vent ...material Is the dryer in the system reduces the amount of the dryer drum after the cycle has ended. If the air movement is restricted. My dryer display shows AF. Replace any plastic or ...

Similar Questions

Ask a New Question
Use the box below to post a new question about this Maytag product .
Points & Prizes
  • You can earn points for nearly everything you do on HelpOwl.com
  • You can trade in those points for gift cards at leading retailers such as Amazon.com and Walmart
  • It's that simple!
See How it Works
Create a Free Account

Maytag Manuals

Find free Maytag MEDC400VW - Centennial Electric Dryer manuals and user guides available at ManualOwl.com. Try out our unique manual viewer allowing you to interact with manuals from directly within your browser!

Maytag Reviews

View thousands of Maytag user reviews and customer ratings available at ReviewOwl.com.

Contact Information

Complete Maytag customer service contact information including steps to reach representatives, hours of operation, customer support links and more from ContactHelp.com.

Scoreboard Ratings

See detailed Maytag customer service rankings, employee comments and much more from our sister site.

Maytag Recalls

Find comprehensive Maytag recall information updated hourly on RecallOwl.com.